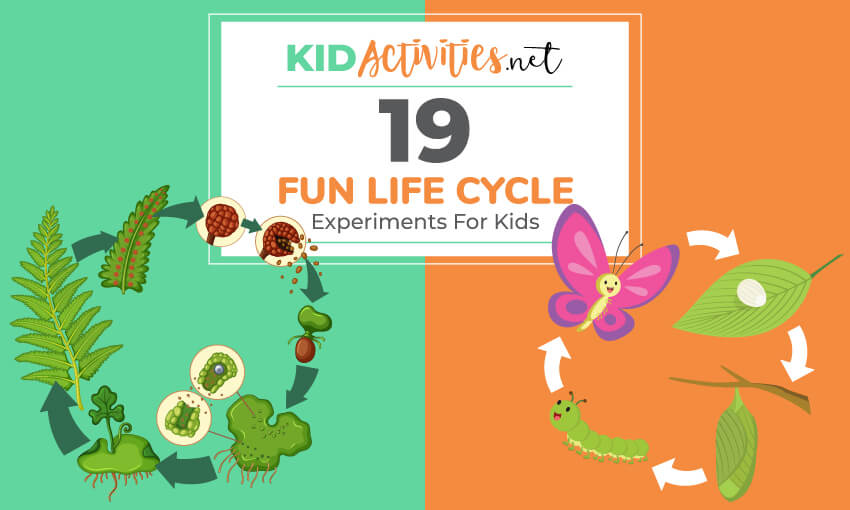
Are you teaching the life cycle of a plant for kids or an animal life cycle for kids? This is the article for you. We will be sharing many kid’s life cycle experiments including:
- Life cycle of a bean plant for kids
- Life cycle of a seed plant for kids
- Life cycle of a caterpillar for kids
- Life cycle of a spider for kids
- Life cycle of a worm for kids
- Stages of plant growth for kids
Animal Life Cycles For Children
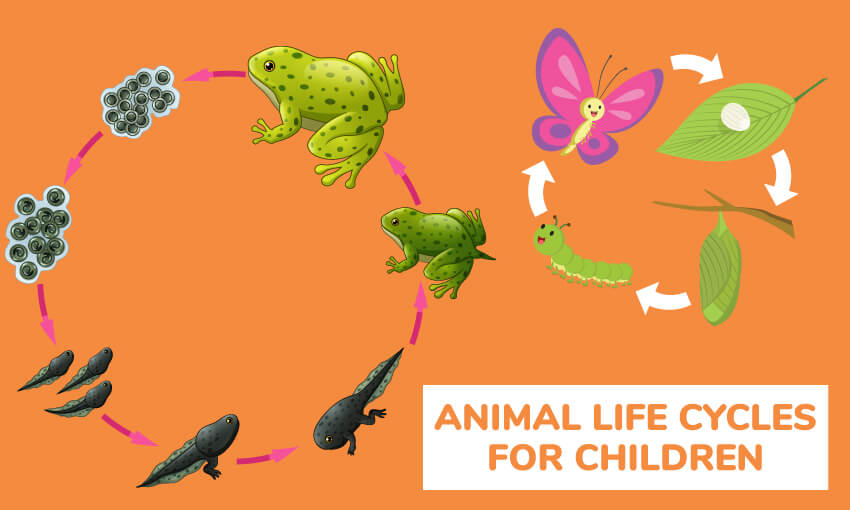
- Life cycle of a butterfly
The animal world is full of amazing transformations. Have students experience them first hand through life cycle studies. Hang a Butterfly Rearing Kit in the room so they can observe the day-by-day changes from caterpillar to chrysalis to butterfly. - Life cycle of a ladybug
For something less familiar, get a ladybug habitat and show them the incredible change from strange alligator-like larvae to the ladybugs we all recognize.) - Life cycle of a frog
In the spring, students can search for their own tadpoles and caterpillars.
They will love caring for the live creatures and watching their progress every day. Encourage them to carefully observe and journal about the changes they see.
1) Life cycle of caterpillars for kids
All a caterpillar does is eat, so it is very important to collect the leaves that you found it eating for food. Caterpillars collected in the spring will finish their cycle in a month or so.
Fall caterpillars will not hatch out of their pupa stage until the following spring.
Make sure that you add a stick to your jar and that you keep a fresh supply of leaves until they have gone into their pupa stage. Leave a wet cotton ball in the jar. They need moisture in order to hatch. After your butterfly or moth has hatched, let it go.
2) Life cycle of a butterfly – Hatch a butterfly garden
We have started one of the Butterfly Gardens that you can buy in science stores or catalogs. We got ours from amazon.com It is a huge hit. This is a wonderful experience from 3 to 30.
1. The caterpillars arrive in a sealed container with everything they need all you have to do is observe them.
2. After a week, we placed the cocoons in the habitat, and out hatched five gorgeous butterflies. We have only had them for two weeks, and the butterflies have tripled in size; they are spinning “silk’ that the children like to call cob webs. We’ll soon let the Monarchs go.
Tips: If you live where it’s cold be sure to order more towards springtime. I received my order in a couple days. They change very quickly, so watch each day and take photographs. From Sara in Oakbrook
3) Life cycle of a crab for kids
Idea: As director of a day care I find that the children really like taking care of live pets. We have pet hermit crabs in our science area. We care for them and also observe shell changes, molting, and speed of movement. The older children chart the changes and seasons.
There is also an area that has live plants and the children are assigned to water and care for these. Also remember, cooking and baking is science. I think on this site there a reminder that turning “liquid into solids with cooking” is science. We do a lot of cooking with the kids. From pre-k to school age, cooking is scheduled in weekly activities!
From: Jenny in Michigan
4) Spider web game for kids
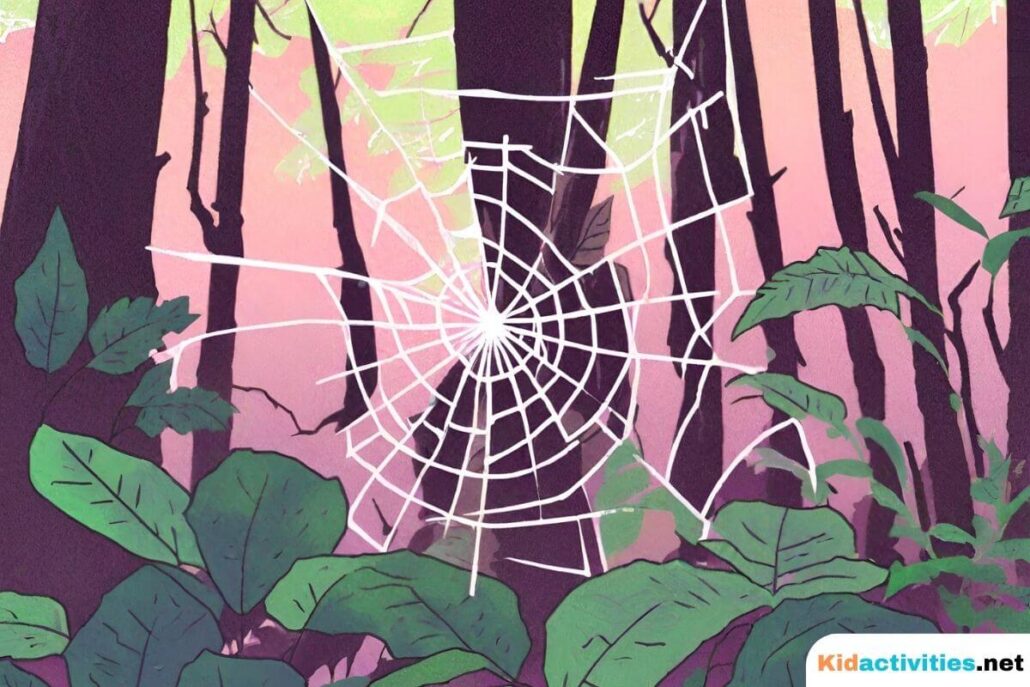
For Pre-K to Grade 4.9
- Have children describe a spider’s web. Probe for how and why a spider makes a web. On chart paper, list responses. Invite children to make sketches of a web. Post these on the chart.
- Help the children research spider webs. Working in small groups, children compile their findings. Each group decides on changes they would make to the chart The group makes and displays a revised chart. Give each group a copy of “A Spider.” Read it to the class and discuss their chart.
A spider poem to read with above.
It crawled into a corner wall. Around and round it spun. It made a web of silk this big. And it was having fun.
It stopped to watch a tiny fly. Around and round Fly flew,
Then it landed on that sticky web.
With flying, Fly was through!
From your Green Pages: Teaching Pre K-8, Feb 1994
You can also ask the kids to make their own paper spider webs by folding and cutting paper.
Suggestion: At this point, please visit the Garden/Gardening Theme. There are two pages of wonderful ideas. Most of the below is also in that category with much, much more. (It was written after this page was written) Gardening is also science. The science of Horticulture.
5) Worm farm experiment for kids
Learn how work work in the garden.
- Cut the top off a plastic soda bottle, tape the edge.
- Pour in 2 inches gravel or stones for drainage (good way to get small rocks out of the yard!)
- Alternate 2 inches of sand, 2 inches of dirt. (VERY lightly spray the dirt with water)
- Put a few small pieces of banana peel in the middle for worm food.
- Continue with layers till top.
- Add worms. Tape the top back on or cover top with plastic wrap and tape. Either way, put in several air holes.
Tape black construction paper around bottle, and leave for a day or 2 try to do this on a Friday. When you take the paper off, you will see the tunnels the worms have made, and the layers will have shifted and mixed. Great way to show how worms work in the garden! Make sure you check your bottle ecosystems every day; moisten the soil; add more moistened food to the top layer if necessary. Here are further instructions on making a wormery.
You can also: 1.) Observe your ecosystems and record your observations. 2.) Draw a picture or take a digital photograph of your ecosystems.
6) Kids worm life cycle experiment #2

Go to bait and tackle store and buy bait worms. Dump them into two large tubs of dirt and let the children observe them as they dig. The children can use their hands to dig up the worms. If your children a young, have a variety of plastic birds at the table for pretend feeding.
With the children, take the worms outside and put them in the garden at the end of the day. Have a box of baby wipes available for hand washing.
For the complete worm theme click here
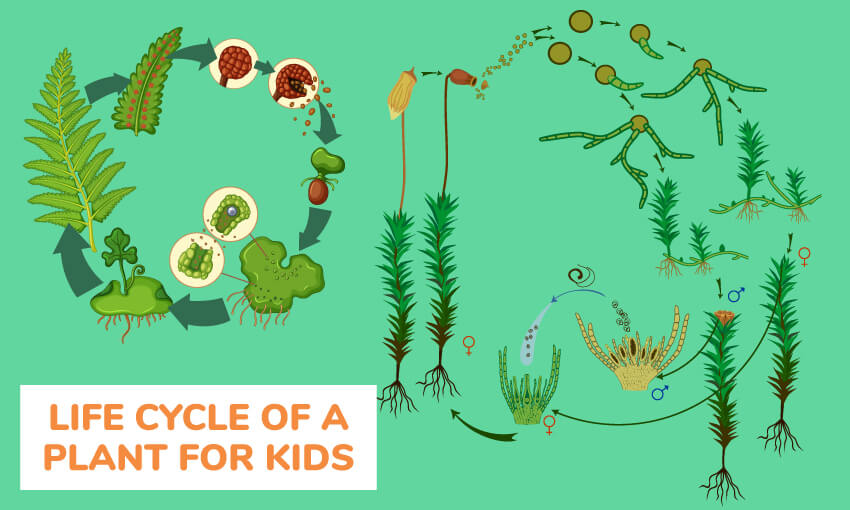
Life cycle of a plant for kids
7) Plant growth in light versus complete darkness
Plant two seeds each in their own clean cup with potting soil. Cover one with a black bag or a box over it. Only open it to water it and then re-cover it immediately. Plant the other one and place it near a window or under a grow light.
Ask what the children predict? After 2 weeks see what happened!
8) Life cycle of a bean plant for kids
1. Take a small zip-lock bag and using a needle, punch a few holes in the bottom seam of the bags.
2. Get some alfalfa or mung bean seeds and place a teaspoon of seeds in each bag.
3. Zip the bag closed and have children place the bag in a bowl of warm water.
4. Soak the seeds overnight.
5. The next day, take the bag out of the water and let it drain; have it sit in indirect sunlight the rest of the day. For the next few days, have children dunk the bags in water for a few seconds and then drain and put back in indirect light.
6. On the fourth day, have your child set the seeds IN THE SUN.
Have fun watching the sprouts turn green.
7. Be sure to use the beans! When ready eat the sprouts by sprinkling them on top of a green salad, on a sandwich or on top of cream cheese spread on crackers.
9) Green beans life cycle
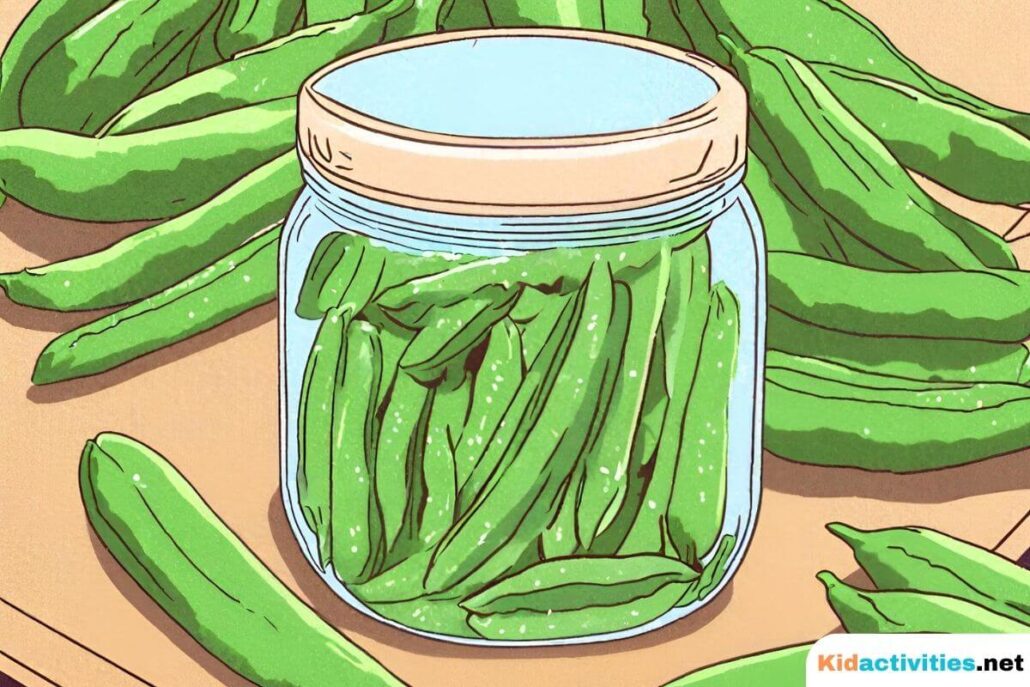
Have each child plant their own green beans. It’s a great way to introduce children to gardening and the connection between food and the earth.
You need is bean seed, small garden pot (3 inch across) some soil and water. You will also need a place to put the pot where it will get 4-6 hours of sunlight. Fill the pot with soil; make a small hole using the little finger about 1/4 inch deep put in the bean cover over water.
Place the pot in a sunny spot and watch it grow. Be sure the planter has drainage and be sure to place a saucer to catch the excess water.
If children are younger end the activity with reading Jack and the beanstalk
10) Life cycle of a seed plant for kids
Learn about: exothermic reactions– Observe the power of seeds when you try to limit their growth!
Materials:
Clear plastic cup
5 tablespoons of Plaster of Paris
2 or more tablespoons of water, Plastic spoon for mixing, Dropper
3 soybeans
1. Put the plaster of Paris in the plastic cup
2. Add 2 tablespoons of water and mix.
3. Continue to add drops of water until the mixture has the consistency of a very thick milkshake.
4. Push the soybeans into the plaster until they are covered and then smooth the surface.
Now, explore! What do you think will happen to the soybeans? Make regular observations. What happens? Why?
5. The next day add a tablespoon of water to the cup and continue to make observations. What happens? Why? What’s Going On?
- Seeds require moisture and warmth to germinate. In this case the seed absorbs moisture from the plaster mixture.
- As the seed absorbs water it increases in size and applies pressure to the surrounding plaster. This force, combined with the strength of the germinating sprout, causes the plaster to crack and allows the shoot to grow up through the plaster.
- This strength and ability to grow in adverse conditions allows plants to survive in a wide range of environments.
- You may also notice that when water is mixed with plaster the cup becomes warm. A chemical reaction which gives off heat like this is known as an “exothermic reaction.” Source: cosi.org
11) Soda bottle greenhouse seedling
Materials:
- 2 clear 2-liter bottles (soda)
- Sand
- Dirt
- Seeds
1. Cut one bottle so that the bottom is approximately 4″ high this creates the bottom and base of the green house.
2. Next, cut the second bottle so it’s about 9″ high this will be the “lid” or top for your house.
3. Place small amount of potting soil in the bottom of the 4″ base.
4. Add soil and seeds. Water the seeds then slip the top over it to create a “greenhouse”.
5. Put in sunny place and plants will appear in 2-5 days depending on the seeds you use.
12) Soda bottle greenhouse #2
1.) Thoroughly wash and dry the clear plastic bottle. A clear juice bottle or 2-liter soda bottle works. With the scissors, cut all the way around the bottle to carefully remove the top one-third of the bottle.
2.) Place about 1 inch of loose grave in the bottom of the bottle, then add about 3 inches of potting soil.
3.) Make small holes in the dirt and plant the small plants or seedlings in the soil, just deep enough to cover the roots.
4.) Add a few drops of water in the bottle, but do not soak the soil. As the bottle will be almost an enclosed garden only a little bit of water is necessary.
5.) Gently place the top part of the bottle back in place on top of the planted section. Use the wide clear tape to secure the 2 parts of the bottle together. (You may need an extra pair of hands for this part.) Once the sections are back together and in place, if you desire, you can decorate the bottle with sticky-backed ribbon to cover the joint where the bottle sections are taped together.
6.) Place the green house in a sunny warm location and water only when necessary. You do not need to keep the lid on the bottle as the air and condensation will give the plants all the nutrition they need to grow into healthy, thriving plants. Source: Source:eHow.com
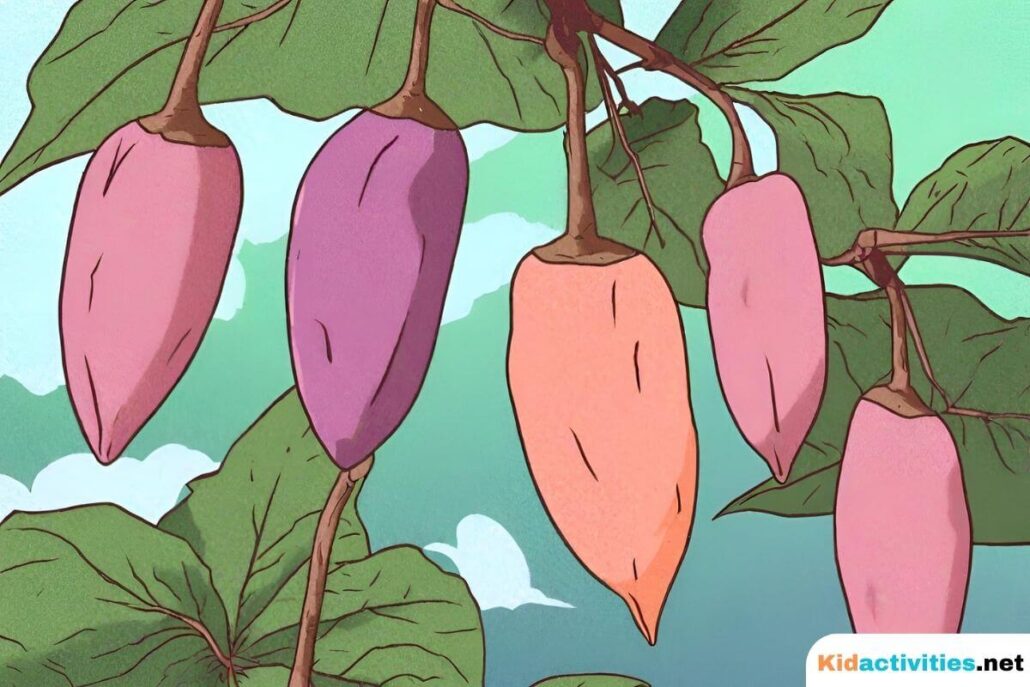
13) Sweet potato vine #1
Need: One healthy sweet potato; 2-litre, clear soda bottle; three tooth picks or wooden skewers, water, clean stones or gravel.
Easy Instructions:
1. Cut the top off your bottle (start cut with a sharp knife, then use scissors).
2. Place stones or gravel in bottom of bottle.
3. Suspend your potato, narrow end down, into the bottle. Use toothpicks, punched into potato and resting on sides of bottle, to hold in place.
4. Fill bottle with water so that at least half of your potato is submerged.
5. Your sweet potato vine should show new roots within a week or two. Leafy purple sprouts will appear shortly after. Use a magnifying glass to see tiny root hairs and to examine little sprouts.
Ask students to predict what will happen next.
Tip: A sweet potato purchased from a natural foods store or farmers’ market may sprout sooner than one from a supermarket because it’s less likely to have been sprayed with a sprout inhibitor.
Extension idea:
Before you prepare your experiment, ask students what plants eat. The general answer to this question is “nutrients collected from soil by roots.” But what about plants grown in water? Students may guess that there are nutrients in what appears to be pure, clear water. Are there enough to support a whole, big plant?
What is your vine eating?
- A sweet potato is a root tuber, a fleshy root that stores food for a plant and produces adventitious shoots or shoots growing from unusual positions in this case, out of the sides of the root.
- What’s happening to the potato, itself? Your vine will continue to grow for months if you are careful to replenish water and/or change it when your bottle becomes cloudy.
- You may wish to plant your sweet potato outdoors in the spring, after danger of frost. It may not survive but, on the other hand, you may find a small crop of sweet potatoes in the fall.
- Dig up the plant and use one of the new potatoes to grow another vine.
14) Sweet potato vine #2
1. Using four toothpicks have child suspend the vegetable on the rim of a jar or mug filled with water.
2. Make sure the bottom half – the pointed end – is under water.
3. Place in a sunny spot and change or add water as needed.
4. In a few days, roots will form below the water. And, two to three weeks later, leaves and stems will sprout from the top.
5. Continue to grow the plant in water or, after a month or two, pot the sweet potato in a houseplant potting mix.
6. Keep the soil moist.
7. The stems are weak, so help children tie them to strings, wire or a stake.
8. Feed once a month with a balanced water-soluble fertilizer such as 20-20-20. As the vine grows, cut it back a few inches to force the plant to grow bushy. Some are treated with heat to keep them from sprouting on grocery-store shelves, but most grow roots in a matter of days after being placed in water.
15) Carrot top experiment
As the project is written, it is geared to grades 6 to 8; however, it can be adapted to any grade level.
Question: Can a plant grow from just the top of a carrot?
Research: What kind of root does a carrot have? Why is the root so big? What is needed for a plant to grow?
Hypothesis: Can the carrot top provide what is needed for the plant to grow?
Materials: Shallow container, 4 carrots
1. Cut about half an inch off the end of the carrot that has the leaves. Cut the leaves off close to the base of the carrot.
2. Put the carrots into the container with the cut side down.
3. Add enough water to cover about half the carrot top.
4. Place the container in a well-lighted window.
5. Observe the carrot tops each day for any changes. Remember the changes may start out small and change slowly. Look for new leaves and roots.
6. Use a metric ruler to measure any growth you may observe.
7. Continue your observations for six days and write your report on the sixth day. For younger children just have fun observing the carrot, while making observations along the way.
Teacher/caregiver section for carrots:
Possible hypothesis: No growth will occur since the carrot is not living-OR Leaves will grow since even this small part of the plant is still living.
Possible conclusion: The carrot top should show some new growth each day. The student should discuss the possible reasons for the growth.
Adapted from Judy Schneider
16) Carnation flower color experiment
Here is a great little “science” project that will amaze younger children.
1. Get a white carnation.
2. Leave it out of water to 1 – 2 hours until it starts to wilt a bit.
3. Cut 1″ from the stem.
4. Place carnation in red-colored (or other color) water made by adding red food coloring to water. Cover 6″ of stem with water. Observe what happens to the carnation.
17) Red white and blue carnations
Make tie-dyed looking red, white and blue carnations. These flowers look great for any red-white & blue theme.
You’ll Need:
| 2 glasses | Water |
| Red and blue food coloring | White carnations |
| Green thread |
1. Pour water into a glass of water. Add 7 to 8 drops of red food coloring to the glass.
2. Pour water into another glass and add 7 to 8 drops of blue food coloring to the glass.
3. Cut the stem of a white carnation lengthwise. This will make the carnation stem into two thin stems.
4. Set the two glasses of colored water together. Put half of the stem of the carnation into the red water and the other half into the blue water.
5. Let the carnation sit for a few hours. The carnation will begin to change gradually into red and blue.
6. Take the flower out of the mixture in just a few hours before the colors can change the white carnation entirely. You want it so that some of the white is still on the carnation.
7. Wrap the stems together with green thread and place the carnation into a clear vase of water. Make several flowers and show off your beautiful red, white and blue flowers in a vase.
18) Celery osmosis experiment
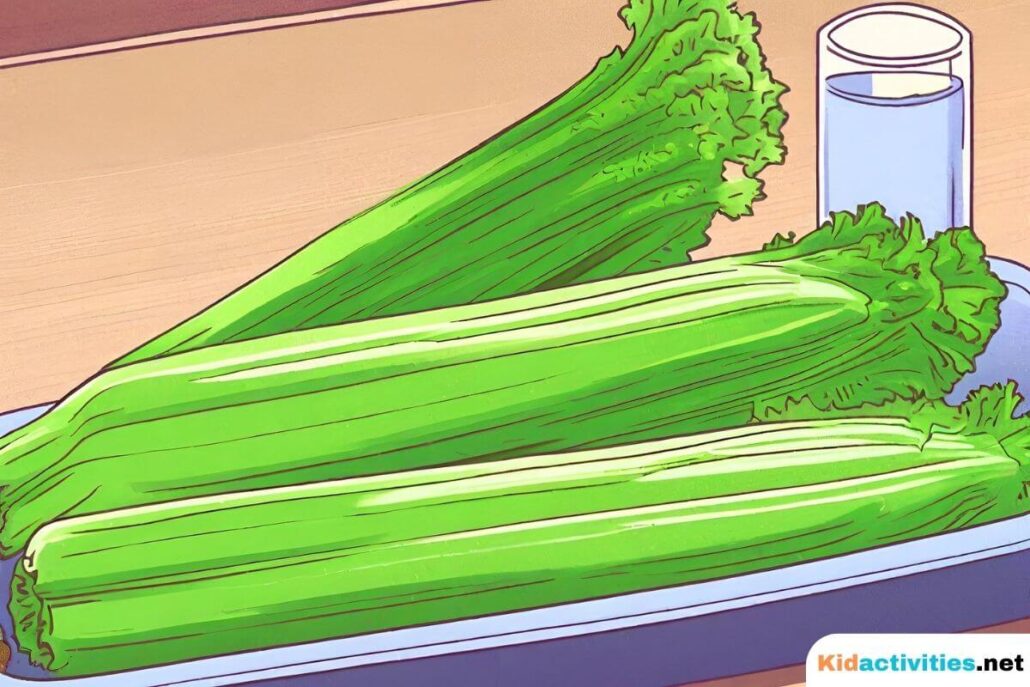
Cut the bottom of celery stalks and set them in glasses of tinted water (using food coloring); the longer the stalks are in water, the deeper the color will be. The stalks will absorb the color and then the kids can eat them!
Another celery idea: holiday colors and food.
- Discuss the colors of Halloween, Thanksgiving, Christmas or a coming-up holiday with the children.
- Take a stalk of celery and slice it up the center leaving it connected at the top. Place the celery stalk in two containers of colored water. Example: Put one side in red, and the other in orange. Leave it for a day or two and watch how the veins in the celery turn color as it takes up the water. You can also include a discussion of plant life with this activity.
19) Grow popcorn in a bag
Instructions: Take a plastic zip-loc baggie, put cotton balls in it and saturate cotton balls with water. Put popcorn kernels into the bag, seal it and tape to a window. Add water as needed and watch the plants grow. Transfer to potting soil later.
20) Make a terrarium
A terrarium is a sort of living landscape inside an enclosed plastic container or jug.
To start, put a layer of pebbles or charcoal at the bottom of the container for drainage.
Cover that with two inches of topsoil.
Add a few rocks, some twigs or branches, moss,and small plants.
Moisten the terrarium with water, but don’t overdo it. Cover the opening with a sheet of plastic wrap.
21) Plant a circle of trees
In the January issue of Exchange, Rusty Keeler contributed the article, “A Spring Playscape Project: Building a Tree Circle”, which he introduces with. “If you are dreaming of adding nature to your yard, this project may be perfect for you. The Tree Circle is a green gathering area for children made by planting trees in a circle.”
- For children, the Tree Circle becomes a magical place for dramatic play, quiet retreat, or lively nature exploration.
- For teachers and parents it becomes a shady grove for snacks and stories.
The trees create a sweet spot that changes during the seasons and grows over time. A beautiful addition to a child’s life – and yours too!” You can read the instructions of the tree circle in its entirety. Click here
22) Outdoor garden games for kids
Here’s a good idea if you can’t dig up a plot for a garden.
1. Get a a small swimming pool and be sure to punch holes for drainage.
2. Fill with dirt plant seeds, or small flowers, water, fertilize and watch the flowers grow!
3. The kids will love to work their “garden”
- With container gardening you control the soil and drainage; you can avoid most garden pests.
- In 3- to 5-gallon pots, you can grow beans, carrots, peppers, tomatoes, corn, broccoli, cabbage, kale, leeks and even melons.
- Pots as small as 4- to 6-inches are fine for growing peas (choose shorter peas, ones that grow to about a foot), lettuce, spinach and Swiss chard.
- Choose medium size pots for beets, eggplant and cherry tomatoes. Of course, all of your pots will need plenty of sun and water.

Continue on to the Gardening Theme pages. It’s the Science of Horticulture.
Science Categories:
- Animals and Plants. (this one)
- Miscellaneous Experiments for kids. It contains many popular activities such as the Mentos and Coke experiment, Alka Selter Rocket, Moo Goo, Volcanoes and Diapers. It’s a little bit of everything.
- Collecting Critters (Insects Theme)
- Mad Science Theme (Great for Clubs and Parties)
