Check out these fun mad scientist party ideas. Get inspiration for science themed games, activities, food, and decorations. Great fun for a club or party! Using the ideas in the following manner is a great way to spark interest in science activities.
Below are ideas for:
- Science Games for Kids
- Scientist Themed Prizes and Awards
- Science Activities for Kids
- How to Make a Volcano
- Science Themed Party Decorations
- Mad Scientist Themed Party Snacks
Science Games for Kids
1. Find the eyeballs
- Fill a large pot with cooked spaghetti noodles, and then bury ping pong balls in the noodles.
- See who can find the most balls in a set amount of time.
- For an added twist you can color code the balls and have each color worth a different amount of points.
- After the set amount of times, count up the points earned by each player.
2. Mad scientist soup
Materials:
- A bowl full of oatmeal
- Halloween type toys (or of your choice)
Instructions
- Find a big bowl and fill with cooked oatmeal.
- Put in the fridge to make it nice and cold.
- Mix in small plastic toys like eyeballs, bats, spiders etc.
- Have player close their eyes and reach in the bowl.
- Each player has to put their hand in and find one prize and then the next person has a go.
(I’ve also done this using lots and lots of Jell-O!)
3. Scientist Anagrams
Mix the letters up in the names of scientists and get the kids to work them out.
4. Science Treasure Hunt
Send the kids on a treasure hunt. Make the clues slightly cryptic by using mathematical formulas and scientific words which are appropriate for their age.
Instructions
1. Example of clues: 40+5-2 is the number of steps forward before your next clue.
2. Your next clue is where you might find H2O in the yard.
3. What did Alexandra Graham Bell invent?
5. What am I?
Get participants minds spinning with this scientific version of a classic party game.
Materials:
- Index cards
- Pens
- Tape
Instructions
- Write science words on the index cards such as: atom, constellation, electricity, magnet, microscope, or test tube.
- Tape a different word to each guest’s back without letting him or her read it.
- Everyone then tries to discover their identities by walking around asking fellow scientists questions that can be answered with a yes or a no. Example: “Do you need a microscope to see me?” or “Do I move around?”
- The first person who says the word on his or her back wins the game but encourage the group to keep playing until everyone has guessed correctly.
6. Magnifying Objects Game
Instructions
- Before the event, take close-up photographers of 10 to 15 everyday objects.
- Print the pictures and put them on a colored construction paper.
- Next draw a magnifying glass around each picture, so that these pictures look as if they are being viewed through a magnifier.
- Instruct youth to examine the pictures and try to guess which picture represents which everyday item.
- Since these items have been enlarged it will be a challenge to guess what the actual picture product is.
The child who guesses the most items correctly wins the game.
7. Burst the Atoms Games
Instructions
- Blow up two balloons (atoms) for each guest and tie one to each of their ankles.
- Let the mayhem begin as the mad scientist race around the room trying to burst each others atoms but at the same time trying to preserve their own.
- The scientist who manages to preserve the last atom is the winner.
8. Inventing a Rocket Balloon
This is an easy science game that will teach young scientists about Isaac Newton’s Third Law of Motion – “For every action, there is an equal and opposite reaction”.
Instructions
- For this game you will need long, torpedo-shaped balloons, a drinking straw, string, and tape.
- For each rocket, securely tape one end of a long string to the ceiling. Thread a drinking straw onto the string, then stretch the string taut and tape the other end to the floor.
- Have each child inflate a long, torpedo-shaped balloon and keep the neck pinched shut while you tape it to the straw.
- While everyone holds their balloons near the floor, count down to takeoff and see whose balloon goes fastest and highest.
9. Magical Magnetic Touch
A fun game to show the children the effect of a magnet on other objects. You need a variety of magnets and metal and non-metal products. The trick of the game is to have children guess which product will stick to the magnet once brought close to it and which will not. The participant with the most correct guesses is the winner.
10. Make a light bulb piñata
Materials:
- Water
- Bowl
- All-purpose flour
- Sugar
- Large, round balloon
- Newspaper strips
- Long string Craft knife
- Glue stick
- Yellow paper
- Wrapped candy
- Aluminum foil
- Black electrical tape
- Black marker
Instructions
- In a saucepan, bring 2 cups of water to a boil. In a bowl, whisk together 1/2 cup of all-purpose flour and 2 cups of cold water, then add the mixture to the boiling water. Once the solution comes back to a boil, remove the pan from the heat and stir in 3 tablespoons of sugar. When the paste cools, it will thicken and be ready to use (cover and refrigerate the paste between applications). Or…use one of the paste suggestions in the Goop Category, or Pinatas and Paper Mache. (I prefer to use liquid starch.)
- Shape the piñata by inflating a large, round balloon (about 14 inches in diameter). Tear 3 or 4 double newspaper sheets into 2-inch-wide strips. Apply the first layer of papier-mâché by individually dragging newspaper strips through the paste, wiping off the excess with your fingers, and pressing them onto the balloon so that they overlap slightly. Cover the whole balloon except for a 2-inch square opening at the knotted end. Let it dry for 24 hours. Pop the balloon.
- Tape the midpoint of a long string to the top of the bulb, then wrap the string ends around the bulb sides, taping them in place. Let the trailing ends dangle. With a craft knife (adults only), cut an asterisk-shaped opening in the bottom of a 32-ounce plastic deli container. Fit the top of the container snugly against the bulb bottom and tape it in place. The string ends should remain outside the container.
- Add a second and a third layer of paper-mache allowing the paper to dry in between. Cover the sides of the plastic container too, but not the container bottom nor the dangling string ends. Finally, use a glue stick to attach a layer of 5-inch yellow-paper squares to the bulb but not the container.
- Fill the pinata (through the container bottom) with 4 pounds of wrapped candy. Glue aluminum foil to the container to simulate the neck of a lightbulb. Secure the foil with 3 strips of black electrical tape. Hang the piñata upside down and when ready, play the piñata game.
Science Themed Prizes and Awards

(Visit Oriental Trading or one of the other Novelty Companies) some choices could be:
- Magnets
- Magnifying glasses
- Light up objects and glow in the dark objects light up/glow bracelets and neck rings
- Glow in the Dark Stars
- Colored hair gel
- Gel pens, notepads
- Silly putty and pots of goop
- Also present a science award to recognize children’s achievements.
Science Activities for Kids
11. Toothpick towers
Instructions
- Prepare large Ziploc bags with kid’s names written on them.
- Put small Ziploc bags inside the large ones.
- Fill one small bag with about 100 toothpicks, another one with Tootsie Rolls, another one with Cheese Puffs, and the last one with Gummy Bears.
- The kids’ task is to build the tallest, most stable structure, using the materials provided.
Extension idea: Make a Molecule Center.
You can have the kids make structures that resemble molecule shapes using the above same materials. For a more simple version, you can also ‘make molecules’ using toothpicks or spaghetti and mini-marshmallows or gumdrops.
*Remember, cooking and connections are all science too! Anything that starts out liquid and turns to a solid is science.
12. Static electricity
Give each mad scientist a balloon and an empty soda can. Have them blow up their balloons and rub them on their heads. Put soda can on a flat surface, and applying the balloon, see if the can moves. Next, get the kids to stick their balloons to the wall. (Of course-you”ll have a ‘hair-raising’ good time!)
Idea: Write ‘tiny’ messages. Put a magnifying glass or a microscope on the table so the kids can read them.
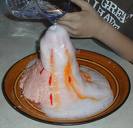
How to Make a Volcano
Note: K-A made version #1 with grandsons ‘N’ and ‘B’. Although the boys thought the experiment very cool, we would make the ‘mountain’ itself differently next time. The ‘dough’ material didn’t want to easily stay on the bottle. After adding more salt, water and oil we were able to make a mountain of sorts. Repeating this activity, we would use different playdough or modeling clay.
To the delight of the boys (ages 8 and 12), the volcano erupted for quite awhile. K-A has also successfully made volcanoes with the other methods.
Additional Note: ‘N’ thought it would also be cool to add ‘adventure-seeking climbers’ to the mountain. Hence, the dark blobs, aka gummy bears, on the face and bottom of the hill.
13. How to Make a Vinegar Volcano
This is a classic science experiment and an easy one. To make the volcano, mix 6 cups flour, 2 cups salt, 4 tablespoons cooking oil, and 2 cups of water. The mixture should be smooth and firm.
Stand a large soda bottle in a baking pan or shallow dish, and begin
to shape the dough around it. Don’t cover the hole and don’t drop any of the dough into it.
Fill the bottle about three-quarters full with warm water and a few drops of
red food coloring. Add 6 drops of liquid detergent to the bottle, and 2 tablespoons of baking soda.
Slowly pour vinegar into the bottle and step back.
14. Volcano #2
- Fill a child’s swim pool or sandpit with lots of slightly moist sand.
- Get the kids to each make a volcano sand mound with a hole in the center
- Place a small disposable cup in the hole; put in 1 tablespoon of baking soda plus 2 tablespoons of water in order to make it dissolve.
- Add 2 tablespoons of vinegar to which you have added a few drops of red food coloring, then watch it erupt.
You can repeat the activity over and over again.
15. Volcano #3
Materials:
- 1/4 Cup of Vinegar
- Red Food Coloring
- Liquid Dishwashing Soap
- 1 Tablespoon Baking Soda
- Modeling Clay (Plasticine)
- Newspaper or Vinyl Table Cover
Instructions:
- Clear a work surface and cover it with newspaper or a vinyl table cover.
- Model a volcano out of modeling clay. You could use red clay around the top of the volcano to make it look like red-hot lava.
- Make a hole at the top of the volcano.
- Stir in 1 tablespoon of baking soda
- Add a few drops of red food coloring
- Add a few drops of liquid dishwashing detergent.
- Get ready! Pour in ¼ cup of vinegar and stand back.
- The eruption is acid meeting another substance called an alkali.
16. Volcano #4
Instructions
- Before the eruption event, form a piece of modeling clay about the size of a baseball into a mountain shape.
- Put the shape on waxed paper.
- Using your fingers, pinch the sides of the clay to form lumps that look like lava coming down the sides of the volcano.
- Poke a hole in the middle of the volcano. Let the clay dry overnight.
- Paint the volcano with brown paint. Let the paint dry thoroughly.
- To make your volcano active: Put 1 tsp of baking soda in the center of the volcano. Then add 1 tbsp of vinegar to make it erupt. Watch out.
17. Rocket launch
(See a more detailed Rocket design in ‘Popular Activities in Science Category’)
Fill a small plastic film canister (Fuji works well) with one teaspoon of water. Quickly add one Alka-Seltzer tablet, put the lid on and place the canister on the floor with the lid side down. Wait about 10 seconds and whoosh! Your rocket should fly into the air.
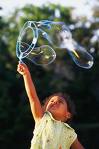
18. Giant bubbles
Make mega bubbles using this fabulous bubble recipe. The secret ingredient for big, strong bubbles is glycerin.
Ingredients:
- Dishwashing liquid – 1 part (many people recommend Joy or Dawn dish detergent)
- Soft tap water/ Distilled Water – 15 parts
- Glycerin – 1/4 part (available from drug stores)
Instructions
- Mix all together and leave for a couple of hours.
- The longer you leave it the better the bubbles.
- Make bubble wands out of coat hangers or wire and you will have happy kids for hours.
Make Goop, Gak, and Slime~ Kids never tire of making it. Click here for Science recipes.
19. Science Themed Party Decorations
Make one party room/area into the lab. It will be much easier to decorate and will contain the mess.
- On the entrance to the room put up some danger tape and a notice warning that only scientists may enter the “Secret Science Lab Zone”.
- Using black construction paper cut out large question marks, magnifying glasses, and mathematical formulas. Put these up around the room.
- Put up posters of famous scientists around the room with a small caption underneath of why they are famous.You could also hang some science clip art pictures in the room.
- Decorate the space with an array of lab items such as gummy frogs that have been pinned down so that they look as if they were being dissected. You can also keep jars of lab specimens like huge gummy snakes, lizards etc.
- Check out Halloween stores/sites/for slimy table decorations which are perfect for scientists; also skeletons and other gory accessories.
- A dry ice machine would make a great table centerpiece.
- Fill lots of different shaped jars with colored water and rubber body parts to put around the table. If you’re going for a ‘Frankenstein Lab’ purchase cobwebs/spider webs and spread them about tables, etc.
- Borrow microscopes, chemistry sets, molecule models, magnifying glasses, compasses, and so on, and place them on the table and about the room.
- Use a colored globe light to give the room an eerie appearance or just place colored light bulbs in regular lamps. Do you have a flickering plasma lamp? Kids of all ages love them!
- Set up a large chalkboard/whiteboard and write the recipes for the experiments that you are going to do.
- Hang a sign from the table saying “Welcome to the Science Laboratory”.
- Use a ‘weird or scary font’ to write signs such as “Electricity”, “Gas”, “Chemicals”, and put them around the area.
- Put a rubber band around several large test tubes. Tie a ribbon over the rubber band. Arrange tubes to stand with open ends up. Fill them with colored water and add a flower or two.
Note: Food itself is also part of decorating make it creepy, slimy and gross! See some ideas towards this page bottom and also in the Halloween Snack Category.
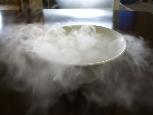
20. Decorate with dry ice and a plasma lamp
For truly dramatic effects, create fog using dry ice. Add one piece of dry ice to every gallon of very hot water. Make foggy smoking cauldrons. Note: Be careful and make sure that it is in a place where children cannot hurt themselves.
Whether you call them nebula spheres, plasma lamps, or lightening balls, these lamps put on one of the most unique displays available. Twenty years ago they cost $1500. Today you can get one for $40.00 or less.
Technically, they’re a clear glass orb, filled with a mixture of various gases at low pressure, and driven by the high-frequency alternating current at high voltage. Great for decorating a ‘Mad Science Lab’
21. Make lab coats
#1 Professor X Lab Coats: Cover the table with newspapers or freezer paper. Layout fabric markers. Give each child a plain white shirt to decorate as a lab coat. You can use T-shirts, or look for used front-buttoning shirts at thrift shops
Idea #2
Use white kitchen-sized garbage bags to make lab coats (A practical way to protect children’s clothing during experiments)
Cut a half-circle hole for the head, and half-circles for the arms. With a black permanent marker, draw a line down the front and buttons next to it. You can also draw a pocket on the side with a pen in it; write the children’s names on them (Example: Professor Smith, Dr. Susan.
22. Just like Einstein
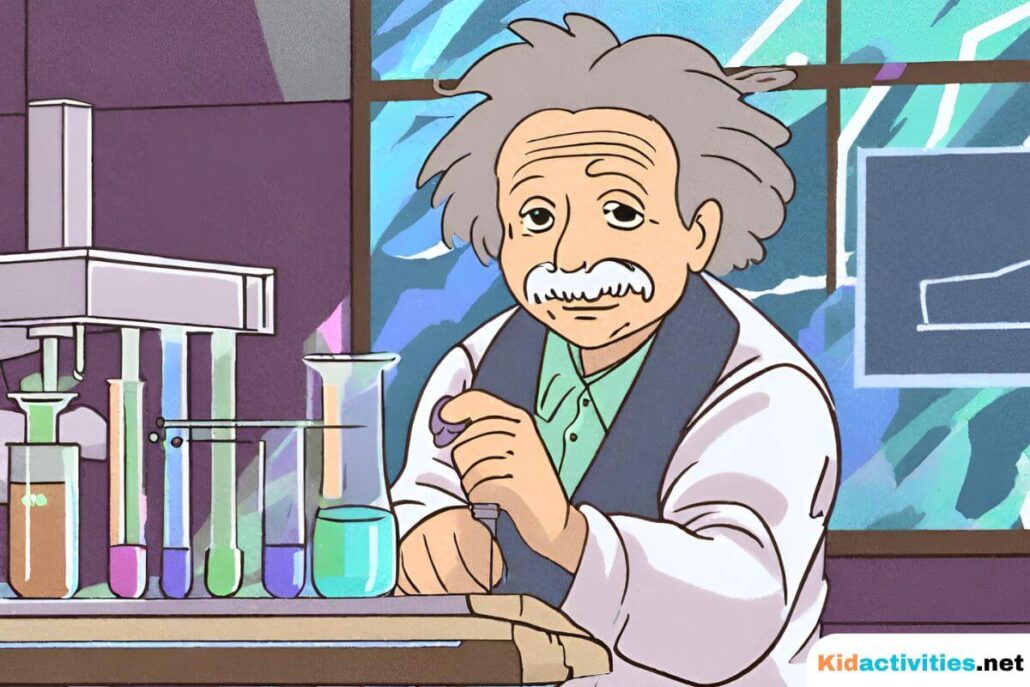
Purchase black party glasses with the noses and mustaches from a novelty or party store. Before kids enter the “science lab” have them don their coats and glasses. It would be great if staff could be wearing white lab coats, crazy wigs, goggles, or glasses too! Be sure to take photographs of this. Kids may not leave these on long but it will be great fun.
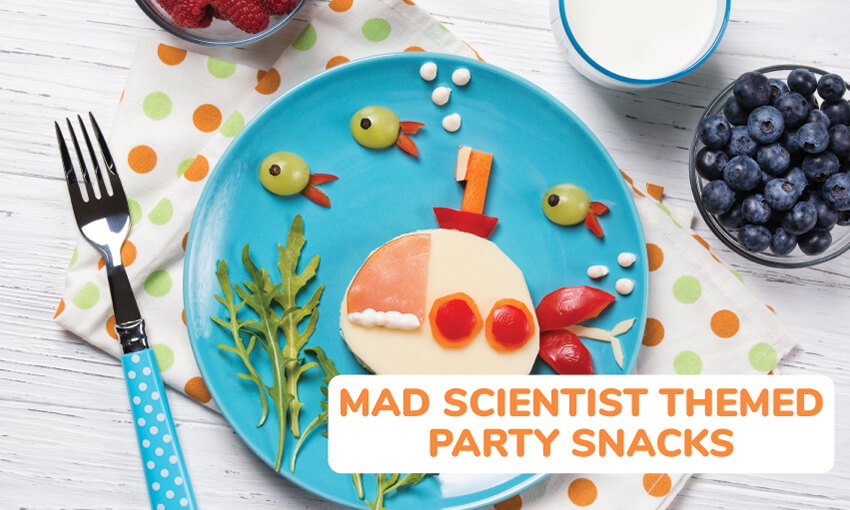
Mad Scientist Themed Party Snacks and Food
23. Make green slime punch
Ingredients:
- 1/2 gallon limeade
- 1 liter ginger ale
- 1/2 gallon lime sherbet
Instructions
- Mix together juice and ginger ale.
- Scoop sherbet and add to punch.
- Add marshmallows and maraschino cherries to float in punch.
24. Eyeball punch
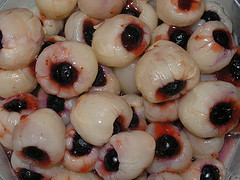
Ingredients:
- Canned litchis, drained
- Maraschino cherries without stems
- Dark red punch or fruit drink, chilled
Instructions
- Cut a slit in each litchi. Stuff a maraschino cherry into each fruit so it resembles an eye. Place stuffed litchis on a large baking pan. Freeze until solid.
- To serve, pour punch into a large bowl.
- Add the litchis or
25. ‘Eyes of newt’ for punch
Instructions
- Fill small muffin tins with apple juice and freeze slightly.
- Place a red grape in the center of each tin and freeze until solid.
- Float the “eye” in fruit punch.
26. Glow punch (Using a glow stick)
Materials:
- 1 quart pineapple juice
- 1 quart Mountain Dew soft drink
- 5 scoops of lemon or lime sherbet
- 1 clean (washed/dried) glow-stick
Instructions
- Chill all ingredients.
- Gently stir together the soda/soft drink and pineapple juice.
- Add the glow-stick and sherbet just before serving.
27. Wormy ice-cubes
Ingredients:
- 1 cup gummy worms or other creepy crawler candy
- 2 ice cube trays
- 1-quart fruit punch
Instructions
- Arrange gummy worms in ice cube trays, 1 worm per cube.
- Fill tray with fruit punch as you normally would water.
- Freeze until solid, 8 hours or overnight.
- Place into punch bowl/drinks minutes before serving.
28. Mad scientist gorp
Ingredients:
- 3 c. eyes of Newts (peanuts)
- 2 c. tails of dogs (pretzel sticks)
- 1 c. squishy, slithery parts of frogs (raisins)
- 2 c. warts of toads (Cheerios)
- 1/2 c. lizard lips (walnuts)
- 1 c. dinosaur toenail chips (banana chips)
- 1 c. teeth of bats (sunflower seeds)
- 1/2 c. of dandruff from the biggest rats (coconut)
- 1 c. chocolate cover iguana hearts (chocolate chips)
Instructions
- Measure and combine all of the ingredients in the order listed above.
- Mix well with mixing spoon. Of course, be sure to post the recipe for all to see!
29. Magnifying glass cake
- Make the cake in the shape of a magnifying glass by making one round and one oblong cake. You can also make a square cake and cut it in 3rds using 2/3rds for the handle. (See photo)
- Attach them together and cover with brown or any color) icing/frosting. Put a circular white area in the middle. The pictured cake has added a fingerprint piped in black icing.
29. Pond sludge (Green Jell-O)
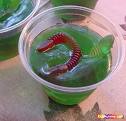
Instructions
- Fill clear plastic glasses with green Jello.
- When the Jello has almost set, add gummy worms, making sure a few of them are escaping over the rim of the glass.
- If desired, when the Jello has set, add a dollop of pond mud (chocolate pudding).
30. Slime JELL-O
Ingredients:
- Lime Gelatin
- Gummy Worm Candy
- Large clear glass bowl or baking dish
Instructions
- Make Jell-O following package directions.
- Pour into a baking dish or bowl.
- Once the gelatin has begun to set (about 1.5 hours) add gummy worms.
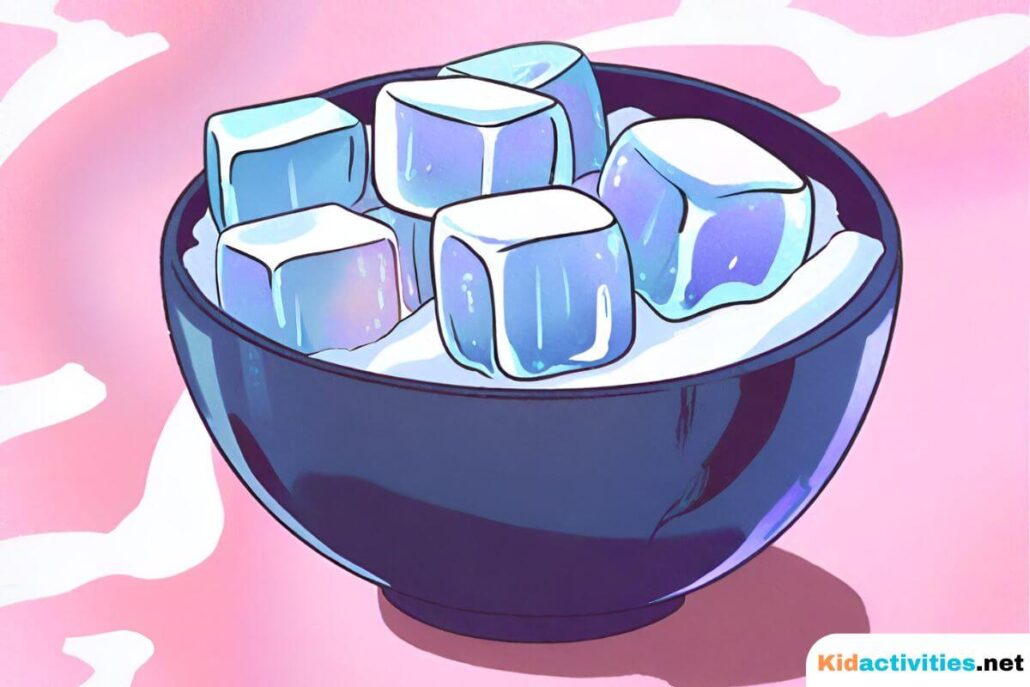
31. Jell-o jiggler eyeballs
Ingredients:
- Ice Cube Trays
- White Grape Gelatin
- Blueberries or Dark Grapes
Instructions
- Follow the directions to make jigglers from the gelatin.
- Fill ice-cube tray containers 3/4 full.
- Once they begin to set, add blueberries or grapes.
- Following package directions, use warm water to remove the jigglers from the tray.
- Place in a clear serving bowl or on a serving dish.
32. Scientific celery snack
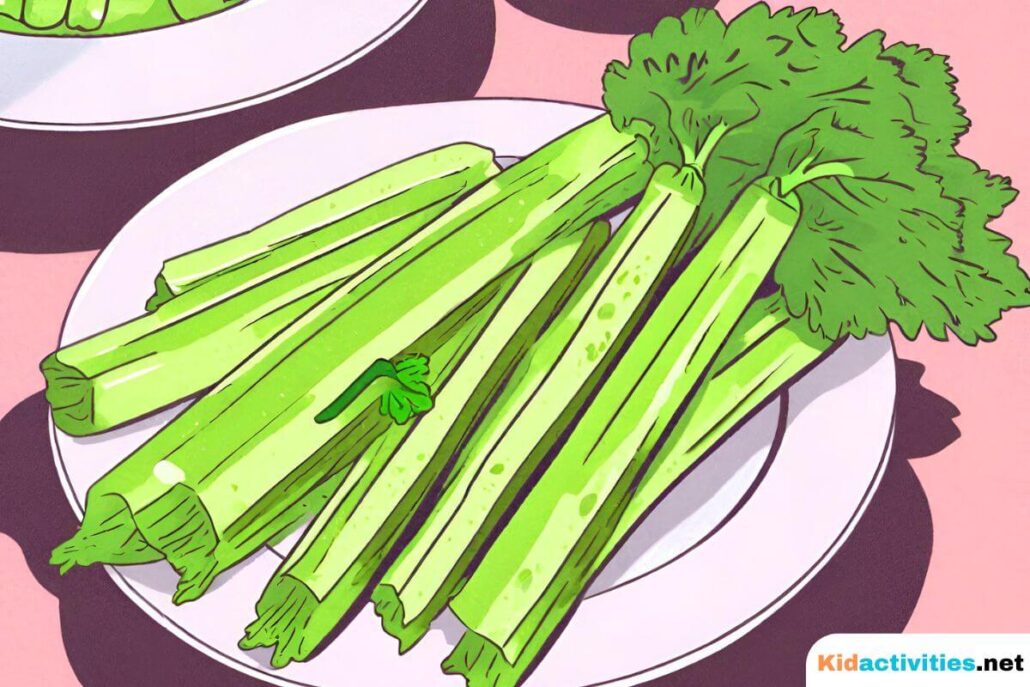
Instructions
- Cut celery stalks and set them in glasses of water tinted with food coloring.
- Let the celery stalks soak up the colored water. The longer they soak the deeper the color.
- Then remove them from the glasses, and serve to the kids with cream cheese or peanut butter.
33. Compass cake
Instructions
- Bake two round cakes.
- Cover one with frosting, top with second cake, and frost the entire cake with white frosting.
- Using a frosting tube, draw a compass face onto the cake, marking north, south, east, and west.
34. Popcorn volcano eruption
Instructions
- Spread out a large clean sheet on the floor and have the kids sit outside the edge.
- Set a popcorn maker in the center, and prepare popcorn according to directions. Do NOT put the lid on the popcorn maker!
- Watch the “volcano” erupt and shoot “hot lava” all over the sheet.
- Make sure that everyone stays away from the popper while it’s on, so the kids don’t get sprayed with hot oil or kernels.
35. Make a volcano cake
Instructions
- Bake two 8″ round cakes and two Pyrex-bowl dome cakes.
- Trim and stack the cakes to look like a mountain.
- Frost it brown and sprinkle it with crushed chocolate graham crackers.
- Use Fruit Roll-Ups: blue for the water around the volcano, red roll-up down the side for lava, green and yellow for the trees and foliage.
- Put several sparkles around the top.
- Cut out a hole from top down inside the cake.
- Put a tall glass in the hole filled with dry ice.
- Add some hot water inside the glass (on top of dry ice)
Watch the kids with all the oohs and ahhs when you do this.
Idea: Make mad science monsters. Cut a tray of rice krispie treats into rectangles. Have children decorate their treats to resemble scientists or monsters using green frosting, colored candies, licorice, and sprinkles!
Other snacks:
Serve food in glass bowls and give them names such as:
- ‘Electronic Chips’, ‘Bubble brew’, ‘Magnetic Munchers’.
- Serve different colored drinks in clear cups and use whirly straws.
- Make Sugar cookies shaped like stars
- Put Gummy worms crawling out of brownies
- Get some “crazy scientist hair”. (Cotton Candy)
- Place small signs with the name of the snack adjacent to each food.
Molecule fruit bowl Make melon balls from honey-dew, cantaloupe, and watermelon. Make them look like atoms.

Comments are closed.