 Leaf Activities
 Leaf Activities
If it’s the fall season, you have to check out these fun leaf activities for kids. Leaf themed games, art and craft ideas, poems, and much more. Kids love leaves especially jumping in a pile of them. These leaf ideas will have kids engaged and excited about autumn.
Table of Contents
- Leaf Themed Game Ideas
- Leaf Art and Leaf Crafts for Kids
- Leaf Science Activities for Kids
- Leaf Themed Snack Ideas
- Leafed Themed Songs and Poems
Leaf Themed Game Ideas
1. LEAF BLOW GAME
Have a leaf race! In this, the children blow a leaf across a table with a straw. The first one across is the winner…
2. LEAF, LEAF, PINECONE
The Leaf, Leaf, Pinecone is a version of the classic “Duck, Duck, Goose” with a nature-friendly twist.
This game is best played out-doors, but you can also gather pinecones and play this traditional game inside on a rainy day.
Whoever is “it” must not only touch the heads of the other players, saying, “Leaf, leaf, leaf,” but must also drop a fresh pinecone in the lap of the child they choose before running back around the circle without being tagged. The person trying to tag “it” can touch “it” with a hand above the waist or with the pinecone below the waist
3. BEAN BAG ‘LEAF BOX’ TOSS
Materials: Cardboard box and bean bags…
Depending on the size of your cardboard box, cut One to large leaf shapes into the cardboard.
Paint the cardboard colors of fall–yellow, red, orange, gold…
to play–children throw bean bags through the leaf shaped holes.
4. PARACHUTE LEAF TOSS (For younger children)
Take a sheet, or a parachute. Gather real leaves, fabric leaves, or paper leaves. Place them in the middle of the sheet. Gather around the sheet and have the children lift the sheet slowly and then quickly to see how all the leaves “float”.
5. Large-sized AUTUMN OR SPRING TIC-TAC TOE
Take a large piece of poster board and draw the tic-tac-toe lines on it; laminate it if possible.
Cut-two different leaf shapes; then simply play tic-tac-toe.
6. HIDE THE LEAF AND SEEK…
1. While children are out of the room (or if in room have them cover their eyes) hide a leaf. (The leaf can be ‘real’ or draw on cardboard and cut out.) Hide the leaf where the children will need to search–but not too difficult to find.
2. Instruct the kids to sit down in a pre-designated spot when they see the hidden leaf.
3. After all children are sitting–the first child to ‘spot’ the leaf hides it for the ‘next game’.
Leaf Art and Leaf Crafts for Kids
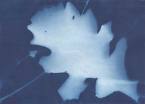 7. SUN PRINTS with paper taped to window…
MAKE LEAF PRINT ART… Materials: Colored construction paper (make sure you use paper that will fade), leaves gathered from yard, glue stick, masking tape
Optional: picture frames
1. Dab a bit of glue onto the back of a leaf, and attach to a piece of construction paper
(If you are going to frame–you can pre-trim the paper to fit a 5″x7″ frame–frames can be made from foam, cardboard or card-stock).
2. Tape the paper to a sunny window, with the leaf facing out. Leave up for THREE TO FOUR days, or UNTIL YOU NOTICE that the paper’s color has faded. (Some directions say a week or longer–I think this time estimate would be more accurate–you’ll know by the fading)
3. Remove from the window and gently peel the leaf off to reveal the print. Frame and hang.
This version from Parents Magazine, August 2005
8. LEAF MOBILE IDEAS…
 Glue colorful and different fabrics to both sides of several pieces of heavy paper. Cut out leaves from this. Tie a string on each leaf. Suspend the leaves from a small branch. Hang them where they might catch a breeze.
You can also make the mobile with leaves cut out of construction paper or found outdoors. Preserving the leaves in the glycerin mixture found in the Fall Nature Category would make the leaves look fresh for quite awhile. (Preserving leaves is also near page bottom in Science)
9. LEAF PEOPLE
YARN SHAPED … (Can be made into people)
Materials:
Leaves
Thin cardboard
Pencil or pen
Scissors
Tacky glue
Colorful yarn
Adhesive magnet strips
- Trace some leaves onto thin cardboard and cut them out.
- Coat one side of the cardboard with tacky glue and let the glue dry after covering the shape with yarn.
- Attach a strip of adhesive magnet to the back.
- You can also us colored foam (green, red, yellow, orange), that is peel-and-stick. Peel the backing off and “paint” the yarn right to the foam, much easier and neater than glue.
- Cut out the leaf shapes and paste them to background paper.
- You can add heads, arms, and legs. Suggest that children have the leaf people engaged in some activity.
LEAF PEOPLE #2 –Glue a leaf to a sheet of paper and draw features to make them into leaf people and animals… put arms, legs, necks, heads, tails, etc. when complete draw a scene around your leaf person!
LEAF PEOPLE #3
Place your leaves UNDER sheets of white paper. Rub the sides of red, orange and yellow crayons on the paper — Rub over the leaves until leaf shapes appear. Cut out leaf shapes and paste them to background paper. Add heads, arms and legs. It would be fun if the leaf people were engaged in some activity.
FALL FACES…#4
Cut 4 1/2 inch circles out of construction paper. Collect a variety of fall leaves. Glue the circles on paper and glue some leaves around the circles to make hair. Complete the faces by adding facial features with markers or paint.
NOTE: Be sure to check out the leaf fox/dog image a couple entries below!!! Soooooo cute!
 10. STAINED GLASS…LEAVES AND MELTED CRAYONS
Collect leaves and arrange them on a piece of wax paper. Add wax crayon shavings and apply another piece of wax paper on top.
- Iron the wax paper together until crayon shavings have melted.
- Let cool. Trim into desired shapes and hang in windows. Wonderful ‘Image Mosaic’ is from ArtfulParent
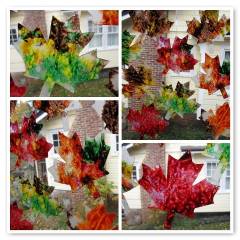
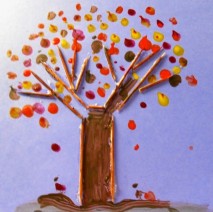
11. COFFEE FILTER LEAFED TREE
- Take coffee filters and cut them into the shapes of leaves.
- With cups of liquid watercolors in orange, yellow, red, and brown have the children use eye droppers to place watercolors on the filter leaves.
- The colors blend together for wonderful fall leaves.
- Create a tree trunk out of brown wrapping paper or butcher paper. Add leaves to the branches and also at the base of the tree.
12. LEAF RUBBING
Have children place a variety of leaves -underside up – under a piece of light colored construction paper. With the sides of crayons that have had the paper covering removed, make crayon rubbing of the leaves. This works better with green leaves. Great way to see the veins and differences in leaves!
13. USE LEAVES AS PAINT BRUSHES
Collect leaves with long stems. Have children paint with the leaves, using the leaves as brushes and the stems as handles.
Or…Collect leaves and tape them to a small stick and use them instead of brushes for painting.
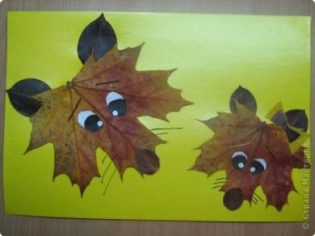 14. START WITH A LEAF AND LOOK WHAT YOU GET!
How cute is this?!!! Image was found on Pinterest and is originally from stranamasterov
 15. TOOTHPICK TREE
Have the children make a tree by gluing toothpicks on a piece of paper. Use a sponge, finger tips or smal paint brush– and fall colors of red, orange and yellow tempera paint. Using your paint choice of color application — add leaves to the top of the tree. The tooth picks were also painted brown before the leaves were added. The leaves were made by dipping fingers in paint.) Image by KidActivities.net
TIP: Instead of using toothpicks for the branches–pretzel sticks, pasta, or twigs can be used!
16. ALUMINUM FOIL LEAVES
You need:
Pieces of aluminum foil, leaves, glue, construction paper
Set out pieces of aluminum foil and a variety of fall leaves. Have each child select a leaf, place it under a piece of foil, and gently press and rub the foil with their hand to get a leaf print. Have children glue their leaf prints to the construction paper.
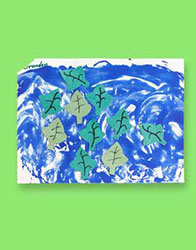 17. LEAVES BLOWING IN THE WIND
1. Draw leaves on construction paper with Crayola Markers or Crayons. Or gather fallen leaves from outside and trace them. (Wash hands thoroughly afterward.) Draw veins and other designs on the leaves.
2. Cut out leaves.
3. Spread newspaper over your craft area. Dip your finger tips in Crayola Washable Finger Paint. Spread the paint in swirling motions–like the wind–over white construction paper. Wash hands.
4. While the paint is still wet, place leaves on the paper. Arrange them in different directions so they appear to be blowing in the wind. Leaves stick to the paper when the paint dries.
5. Extension: Look at leaf patterns in a science book or collect real leaves. Draw different examples such as maple, beech, and oak. Use red, brown, orange, and yellow paper to make leaves for an autumn scene. Source: Crayola
18. SIX THINGS TO DO WITH PAINTED PAPER LEAVES…
Give children white paper and have them paint using red, and yellow paint. They can mix the paints to create orange.
When the papers are dry, using templates, draw leaf shapes on the back. Cut out the leaves.
With these children can…
- Make a leaf mobile
- Make a leaf collage
- Hang them from the ceiling
- Glue onto a paper. Make a trunk of a tree–glue on the leaves
- Put up on a bulletin board
- Hang them from a classroom size tree…
19. LEAF PRINTS USING PAINT
With a brush, paint red, orange and yellow tempera paint onto the front side of leaves. Press the painted side onto paper. For a variation, place the paint on the back side of the leaf and press down–you might see more distict markings on this print.
20. HAND PRINT TREE
- Using colored construction paper (red, orange, brown, green, yellow) trace the child’s hand onto several sheets of several colors. Cut out. (Children can also use their painted hand-prints)
- Next cut out a tree trunk with branches in proportion to the amount of leaves.
- Have the child glue the hand shapes to the tree to form the leaves of the tree.
- Consider having children think of things to be thankful for — and label the leaves.
21. LEAVES IN PLASTIC
Place leaves on the sticky side of clear self-adhesive plastic. Cover it with another sheet of plastic and press. Cut around the leaves. Punch holes in them and thread yarn or ribbon for a leaf hanging. Also…cut a single leaf and use it as a bookmark.
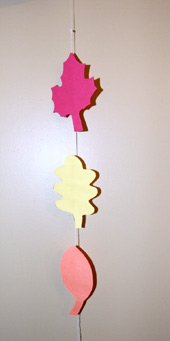
22. STRING OF LEAVES
Make a string of leaves to decorate a room. These simple-to-make strings make a great Fall or Thanksgiving decoration. You can drape the strings across rooms, over windows and from the chandeliers.
Need:
Construction paper (orange, red, yellow, brown, and other earth tones)
Crayons or markers
Scissors
Glue, tape, or staples
A long piece of green or brown yarn or string
- Draw a leaf on a piece of construction paper. Make sure to draw a long-thick stem on the top (your leaf will hang from this stem, which will be folded over.) It would be a good idea to make a few leaf templates for the children to trace and cut the shapes.
- Cut out the leaf. Draw the leaf veins if you wish.
- Fold the leaf’s stem in half.
- Attach the leaf to a long string using tape, glue, or staples. Make more leaves and attach them to the string.
- Hang your string of leaves across the room for a wonderful Fall decoration. Source: KinderCrafts
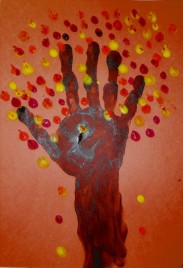 23. FINGERPRINT TREE…
Place the child’s entire hand and arm in brown paint. Place the painted arm and hand on the art paper to make the trunk and branches. With a variety of colorful finger paints—fingerprint leaves around and on the entire tree. Add some ‘leaves’ falling and swirling to the ground! Image by KidActivities.net
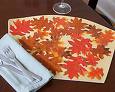 24. PLACEMATS
Have children glue several different leaves on a light-colored sheet of construction paper. Apply transparent Contact paper onto the leaf side and then the backside of the construction paper. Trim excess contact paper from the ends, and seal all the way around the outer edges with colored tape. (This sample is at PreschoolRock.com)
25. FALL NATURE BRACELETS
Wrap a piece of masking tape (sticky side out) around each child’s wrist. Go on a nature walk and have children collect a leaf from each of several trees—sticking it on their leaf bracelet.
Get a Book with a variety of leaves to compare ‘finds’ when you return. Children will also be able to go home and see what leaves they find there!
As shown, you can take clear packing tape and make bracelets with a variey of nature finds–as well as some wonderful bookmarks! Photographs are courtesy of Angela at Colorfool blogsite…Angela shares that flat items adhere better than bulky.
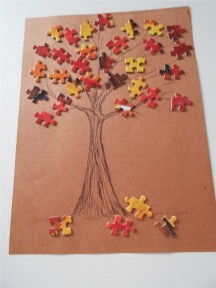 26. COLORFUL FALL PUZZLE TREE
We all have puzzles that have missing pieces (such as the 100 piece puzzle that only has 80 pieces left)
1. Either draw a tree trunk and leaves… or cut out the trunk of a tree with limbs. If cutting out a tree trunk, glue or staple the trunk to a piece of background paper.
2. Pre-paint the puzzle pieces in fall leaf colors (or they may already have a fall look.)
3. Glue the puzzle pieces to the branches of the tree.
This tree didn’t need the puzzle pieces painted–as most pieces were already in shades of red, yellow, orange, and brown)… This idea is also good for spring–using ‘spring’ colors. (Puzzle Tree Image by KidActivities.net)
27. CLAY LEAF PRINTS
Use a rolling pin to flatten clay or DRYING TYPE dough. Lay a leaf on the clay & roll over it. Remove the leaf & let the clay dry. Paint the clay with fall colors of tempera.
“Air dry and bake recipes” are on this site in the Play Dough Category!
28. MAKE LEAF GLITTER
Gather old brown leaves–and crumbel them up!
Draw your pictures (leaves or a fall scene would be nice)—-apply a light coat of glue or wet paint–sprinkle with you leaf glitter!
You could also paint the leaves before you crumble them to make different colored glitter.
29. MAPLE LEAF PASTA MAGNET OR PIN
Materials:
Uncooked spaghetti
Adhesive-backed magnet
Green food coloring
Cardboard
Recycled clean margerine container
Styrofoam vegetable trays
Spoon
Paintbrush and Scissors
1. Draw and cut out a maple-leaf shape on a piece of cardboard. (Good idea to make a template for the kids to trace)
2. Pour 1/4 cup (50ml) white glue into an empty margerine container. Add 2-3 drops of green food coloring to the glue. Mix well, until the color is a shade you like.
3. For a good work surface–Place cardboard leaf into a styrofoam vegetable tray. Paint the entire surface of the leaf with the colored glue.
4. Break spaghetti sticks in half. Line up the spaghetti sticks in a single direction on the leaf. Be sure the spaghetti is adhering to the glue. Leave the spaghetti untrimmed at this point.
5. Cover the untrimmed spaghetti with glue-coloring so that it is completely colored.
6. Let the leaf dry on a clean styrofoam tray. Once the glue has dried, carefully cut around the edges of the cardboard shape to remove the excess spaghetti. It is helpful to turn the leaf ‘spaghetti-side down’ while cutting the spaghetti.
7. Repair jagged edges with glue and pieces of trimmed spaghetti. Allow to dry a second time.
8. Adhere two magnets to the center of the cardboard back.
This project also makes a great lapel pin. Just use a pin backing instead of a sticky-backed magnet!
Adapted from TeaPartyCrafts
Leaf Science Activities for Kids
30. COLLECT LEAVES…
Go on a nature walk and collect different kinds of leaves. Sort the leaves by color, size or type of leaf. Place them on your science table.
Extension Ideas: GRAPH THE LEAVES
1. Have children count the number of leaves collected from each type of tree. Graph the results.
2. Get young children thinking about what they collected. Ask questions such as:
- What can you tell me about these leaves? What is the same about these leaves? What is different about some of these leaves?
What colors are the leaves? Look through the magnifying glass, what do you see? (veins, colors, size of the leaf seems to change) - How can we measure this leaf? Can someone demostrate (show me) how to measure this leaf? How long it is? How wide it is? (This leaf is __ inches/centimeters in length and __ in width.)
31. DISPLAY AUTUMN LEAVES ON YOUR SCIENCE OR COLLECTION TABLE along with other “Earth Wonders’…
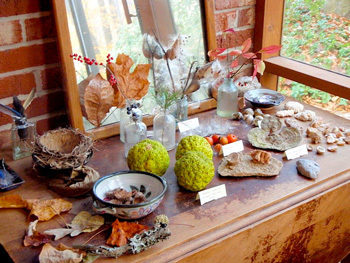 Display natural earth wonders such as :
Seashells, rocks, crystals, geodes, pine cones, seeds, leaves, twigs, etc.
Encourage children to add to the collection. Provide magnifying glasses to study the items at this center…Photograph courtesy of Restoration Place.
32. PRESERVING LEAVES MICROWAVE METHOD…
You can preserve fall leaves in your microwave oven.
- Choose fresh leaves with bright colors. Avoid fallen leaves that have already begun to dry.
- Place separate leaves in the Microwave oven on top of two pieces of paper towel. Cover them with one sheet of paper toweling.
- Run the oven for 30 to 180 seconds. Microwaves vary so watch carefully. The drier the leaves, the less time they will need.
- Be careful, if the leaves “cook” too long you could actually start a fire.
- If the leaves are curled on the edges they need more time.
- Let the leaves dry for a day or two and then finish the leaves with a sealant, such as an acrylic craft spray.
Source: Amazingmoms.com
THE OLD FASHIONED WAY…
- Place your autumn colored leaves between two layers of wax paper.
- Cover with a cloth rag. Using a warm (not too hot) iron, press down on the wax-covered leaves, sealing the wax paper together with the leaf in between.
- Cut your leaves out, leaving a narrow margin of wax paper around the leaf edge.
33. CONTRAST LEAVES…
COLLECT GREEN LEAVES and place them on a tray to dry…. Over time they’ll turn brown; without chlorophyll, the leaf loses his green color.
GLYCERIN LEAVES
Place a small branch with fall leaves on several layers of newspapers. With a hammer tap the end of the stem until it is slightly crushed.
Place the branch in a jar or baking dish with one part glycerin to two parts water. Keep it for 2 weeks. The leaves will be thicker to touch, colors will have changed & they will not disintegrate or fade..
In the autumn, you can also gather branches of oak, beech, and maple leaves just as the colors began to turn. Submerge them in vases filled with a solution of equal parts of water and glycerin. Over the next week, watch the color metamorphose as the chlorophyll ceased production, triggering the release of pigments. The glycerin, an emollient, fills the cells, rendering them supple and leathery. Leaves will last for years this way, more so if pressed.
34. IF YOU FIND A CATERPILLAR in late summer to late fall, put FRESH LEAVES in a tank or fishbowl with a few twigs on which to make a chrysalis.
Ask children what they think happens? Ask them what will happen later?
We have done this with our group in the fall. They found a caterpillar outside in early October and brought it in. We put it in a large clear bowl and after the weekend it had made a chrysalis hanging from a twig. Kids eagerly waited for spring so the butterfly could hatch! Sarah/Oakbrook
LEAF THEMED MATH ACTIVITIES
LEAF COUNT 1
After a naute walk…Have the children count how many leaves they have collected. (Individually and together)
LEAF COUNT 2
Make pictures of trees with different numbers of leaves on the trees. Have the children count the number of leaves on the tree.
LEAF MATCH
Set out two of each kind of leaf the children and/or you have collected… and have children find the matches.
 LEAF THEMED SNACKS
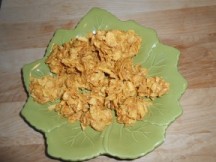
35. MAKE LEAF PILE TREATS
Nice for September through November
Ingredients:
6 cups cornflakes
1 cup Karo syrup
1 cup peanut butter.
You will also need some Wax paper to lay your leaf piles on.
Directions: In a microwave melt the Karo and peanut butter together. Pour over the cornflakes and place them in piles on wax paper. Let them cool and dry. (Image by KidActivities.net)
NOTE: When KA tested this recipe, there at first was an, “Oh No moment”! Halving the recipe — after mixing the Karo and peanut butter mixture in with the corn flakes– the leaf piles seemed rather loose when putting them together on the wax paper. I pushed each small pile as closely together as possible. After 2-3 hours, the leaf piles did firm and hold together. R pronounced he liked them… I see them as a nice Fall novelty.
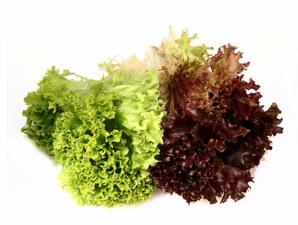 36. EAT LEAVES…
We usually eat the roots of plants–but there are many leaves we eat! These include artichokes, celery, lettuce, onions, cabbage, and spinach. We also eat herb leaves of sage, mint, parsley, thyme, bay-leaf, etc.
Each of these plants has very different looking leaves. Discuss the difference in these ‘leaves’ and have children try some! Maybe a salad made from a variety of lettuce/leaves — or a good cabbage soup?!
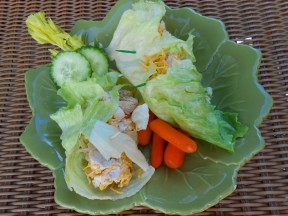 37. LETTUCE WRAP SANDWICH
Instead of using bread to hold your sandwich together-try lettuce! For best results, pick large, pliable lettuce leaves such as iceberg, spinach leaves, or red lettuce.
Lettuce wraps are easy to create; Use just about anything you would to fill bread, tacos, pita bread, or burritos. (Chicken, turkey, veggies, beans, eggs, bacon, cheese, etc.) The key to a good wrap is a combination of a warm and flavorful filling — rolled into the cold and crispy leaf!
The sample wrap by KidActivities.net is sliced chicked mixed with a little mayo. It is sprinkled with finely shredded cheese.
38. LEAF JELL-O JIGGLERS
Can you purchase a leaf shaped cookie cutter? Make jell-o jigglers from yellow, red and orange jello!
LEAF THEMED SONGS AND POEMS
39. THE LEAVES IN THE TREES
By Irmgard Guertges
(Sing to the tune of “The Wheels on the Bus”)
The leaves of the trees turn orange and red
orange and red, orange and red…
The leaves of the trees turn orange and red
All through the town.
The leaves of the trees come tumbling down
tumbling down, tumbling down
The leaves of the trees come tumbling down
All through the town.
The leaves on the ground go swish, swish, swish
Swish, swish, swish, swish, swish, swish,
The leaves on the ground go swish, swish, swish
All through the town.
40. AUTUMN TIME IS COMING (Sing to the tune of Frere Jacques)
Red leaves falling
Red leaves falling
On the ground
On the ground
Autumn-time is coming
Autumn-time is coming
All around
All around…
Orange leaves falling
Orange leaves falling
On the ground
On the ground
Autumn-time is coming
Autumn-time is coming
All around
All around…
Brown leaves scattered
Brown leaves scattered
On the ground
On the ground
Autumn-time is here now
Autumn-time is here now
All around
All around.
This would be cute if children make leaves before singing this song. As they sing the ‘individual’ color of leaf, they throw them up in the air. (Of course, when complete-leaves are then picked up!) If the weather is nice, collect leaves and sing/play outdoors!
41. THIS IS THE WAY WE…
Sing to tune of Here we go Round the Mulberry Bush
This is the way we rake the leaves rake the leaves, rake the leaves
This is the way we rake the leaves in the middle of Autumn.
This is the way we jump on the leaves, jump on the leaves, jump on the leaves
This is the way we jump on the leaves in the middle of Autumn.
This is the way we throw the leaves Throw the leaves, throw the leaves
This is the way we throw the leaves in the middle of Autumn.
This is the way we rake the leaves rake the leaves, rake the leaves
This is the way we rake the leaves in the middle of autumn.
42. THE LEAVES ARE FALLING DOWN
By June Haggard
(Sing to the tune of “The Farmer in the Dell”)
The leaves are falling down
The leaves are falling down
School is here and fall in near
The leaves are falling down.
The leaves are falling down
The leaves are falling down
Some are red and some are brown
The leaves are falling down.
The leaves are falling down
The leaves are falling down
They tickle your nose and touch your toes
The leaves are falling down.
43. A LITTLE ELF
A little elf
Sat in a tree
Painting leaves
To throw at me.
Leaves of yellow
And leaves of red
Came tumbling down
About my head.
44. I LOVE FALL
I love fall! Fall is exciting.
It’s apples and cider.
It’s an airborne spider.
It’s pumpkins in bins.
It’s burrs on dog’s chins.
It’s wind blowing leaves.
It’s chilly red knees.
It’s nuts on the ground.
It’s a crisp dry sound.
It’s green leaves turning
And the smell of them burning.
It’s clouds in the sky.
It’s fall.
That’s why…
I love fall.
45. LEAVES
by Elsie N. Brady
How silently they tumble down
And come to rest upon the ground
To lay a carpet, rich and rare,
Beneath the trees without a care,
Content to sleep, their work well done,
Colors gleaming in the sun.
At other times, they wildly fly
Until they nearly reach the sky.
Twisting, turning through the air
Till all the trees stand stark and bare.
Exhausted, drop to earth below
To wait, like children, for the snow.
46. AUTUMN BIRD SONG
Over the housetops,
Over the trees,
Winging their way
In a stiff fall breeze.
A flock of birds
Is flying along
Southward, for winter,
Singing a song.
Singing a song
They all like to sing,
“We’ll see you again
When it’s spring, spring, spring.”
47. OCTOBER
October’s the month
When the smallest breeze
Gives us a shower
Of autumn leaves.
Bonfires and pumpkins,
Leaves sailing down –
October is red
And golden and brown.
48. NOVEMBER
Now the autumn days are gone
Frost is sparkling on the lawn,
Windows winking cheerful lights
Warm the cold November nights.
49. BOOKS ABOUT LEAVES
Autumn Leaves (ages 3-7)
Written by Ken Robbins
Illustrated with full-color photographs, this book introduces young children to autumn leaves from thirteen different types of deciduous trees. Beginning readers will find the vocabulary very challenging, but even young children will enjoy listening and following the pictures as an adult reads it to them.
Red Leaf, Yellow Leaf (ages 4-10)
Written by Lois Ehlert
In this classroom favorite, Ehlert relates the life cycle of a sugar maple from a child’s perspective. The unique illustrations will grab the attention of the youngest listeners, while the captivating text will engage older readers.
Why Do Leaves Change Colors? (ages 5-9)
Written by Betsy Maestro; illustrated by Loretta Krupinski
In the simplest of terms, this book explains why leaves change colors and fall from the trees. Also included is a list of activities children can do with leaves.
There you have it, 49 leaf activities for kids. We hope you have enjoyed the various leaf themed art, crafts, activities, and games. These ideas are a great way to get kids engaged with the season. If you want more fall themed activities, check out our apple theme and our November activities list.
SaveSave
