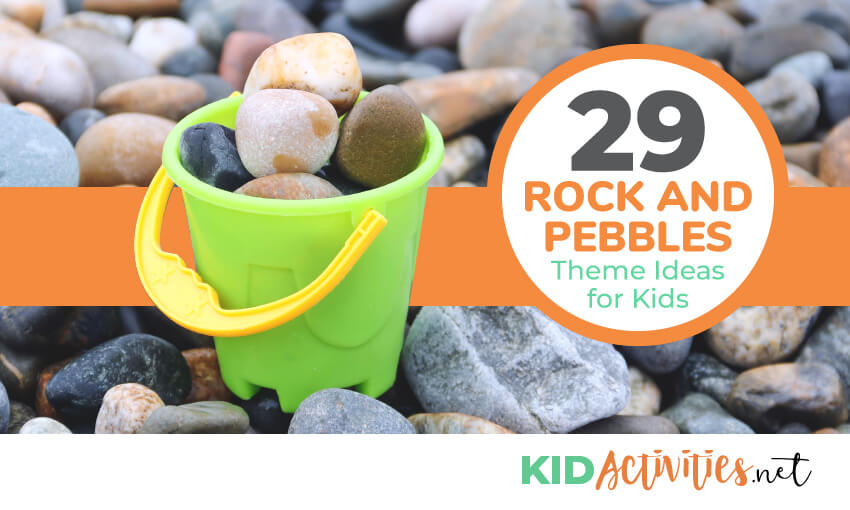
If you are looking for some rock and pebbles theme ideas for kids look no further. Here you will find rock themed arts and crafts, games to play with pebbles, and rock themed literacy ideas.
1. Rock art
Rock art make great gifts for people. They can be used as paper weights, decorations for indoor gardens or masterpieces to be shown throughout the home.
a. Gather various shapes and sizes of rocks found at parks or along beaches or in your own background. All sizes and shapes are perfect for rock art.
b. Clean the rocks and air dry.
c. Gather various art supplies. (Markers, paints, crayons, glue, fabric)
d. Decorate
2. Make a ‘rock’ necklace
Materials:
| Small rock | wire |
| sample used 22-gauge | small pliers |
| plastic lacing or other cord-type material |
Wrap the wire securely around the rock in a decorative fashion, being sure to include a loop at the top for the cord. Cut off the end of wire and tuck/wrap excess. String it through the cording and knot.
3. Cancelled rocks (These make nice paperweights)
Materials:
- Cancelled stamps from mail (small colorful pictures from seed
- catalogs and magazines may be used instead of stamps)
- White glue (the kind that dries clear)
- Clear shellac, varnish, or fingernail polish
- Smooth surfaced rocks
1. Wash, rinse, and dry rocks.
2. Carefully peel off stamps from envelopes. It’s ok if some tear.
3. On dry rock, spread a thin layer of glue. Arrange stamps (or small pictures) on rock, overlaping, until all rock sides showing are covered. Let dry.
4. Coat with thin layer of shellac or varnish, or fingernail polish.
Note: You can also coat the finished rock with a thin layer of white glue. It will dry clear, but it will not be waterproof.
Are you having a ‘Rock Themed’ or ‘Rock Climbing Party? Make a paper mache ‘rock’ piñata! See Paper Maché page for general piñata making directions…
4. Rocks of gratitude
Materials:
- Rocks (various sizes, avoid shiny or glossy rocks)
- Light stock paper (such as news print)
- Low-gloss varnish or clear finish
1. Collect an assortment of rocks.
2. Clean with soap and water, then paint with fall colored acrylic paints (It’s not necessary to cover the entire rock with paint, leave some areas exposed if you wish. Let dry.
3. Print words of wisdom on paper. Tear out the sayings (ragged edges).
4. Glue the sayings to your rocks using either white glue or Modge Podge.
5. Finish off the rocks by applying low-gloss varnish or polyurethane.
This makes a nice paper weight or addition to a garden!
5. River stone paper weight
Materials:
Smooth Stones (Stones can be purchased at craft stores)
Elmers Glue or good Craft Glue
Small tiles ( Sample shows 3”x 3” – you can also used jar lids)
Felt pieces for bottom
For a SAC program, I picked up discontinued tiles (see if you can get them donated-the store I got them from gave me about 100 for no charge! Barb)
1. Glue stones to the attractive side of the tile. Glue will dry transparent. Stones do not have to cover all edges as the tile underneath is nice looking.
2. Let stones dry for a couple hours fit, cut, and glue felt to the bottom. (Or attach self-adhesive pieces)
3. The tile I used had writing on the side, so black permanent marker was used along the edge. If your edges are nice this is not necessary.
Finishing off the side and bottom can be done before glueing on the stones if desired.
6. Make stepping stones
Materials:
Cake pans in a shape you would like, sand dough, paint, cooking spray, paint
1. Spray the cake pans with cooking spray. Vaseline also works.
2. Fill it with sand dough.(Recipes below)
3. Let dry for 3 days.
4. Children can paint the stepping stones when they come out of the pan. You can also make the stones to weatherproof.
7. Sand dough recipe
1 part white glue
2 parts flour
2 parts sand
2 parts water
Mix together to create a dough. You may need to add water or flour depending on the consistency.
8. Sand dough recipe version 2
Add sand to quick set cement and follow the instructions for mixing the cement. Use this recipe when you have a mold or have created a pattern in the sand.
9. Make moon crates
Materials Needed:
- Liquid Starch
- Rock Salt
- Glue with food coloring
Mix 1/2 cup of liquid starch with 2 cups of rock salt and 1/2 cup of glue plus food coloring or tempera.
This makes a gooey, rocky mixture.
Let the children freely pile onto cardboard to create a three dimensional structure.
10. How to make pet rocks
Find smooth, flat or round rocks. Be sure to clean off any dirt or sand and dry completely before starting. Paint with acrylic paints. Decorate faces by using google eyes, yarn for hair, markers, glitter, and any other tidbits you like.
Pet rocks can be a lot of fun!
Extension Ideas:
Investigate what type of rock your pet is. What are the three main types of rock? Discuss their characteristics and give examples of the different types.
(See “Word List’ down middle of the page under Literacy Section)
Activities:
- Write down its funniest sayings
- Dress it up for a costume party
- Send it on a holiday/vacation
- Write it a bedtime story
- Make it a form of transportation or a bed/house/etc.
- Give it a name
- Give it a birthday party and a present
- Take it for a walk in the park and write what the two of you did
- Have a picnic
- Teach it a trick
- Write out a word bank/haiku/pet journal
- Prepare it to go to a class such as dance class/gymnastics/playgroup/sports day
- Send it for a sleepover with a friend
- Write out a menu sheet for its food
- Photograph it/blog about it
- Make a scrapbook page about it
- Inspired by My Science Program
11. Rock collage craft idea
Set out a variety of small rocks, glue, and squares of cardboard.
Children can glue the rocks on the cardboard squares to create rock sculptures or designs. Designs could also be painted on the rocks.
12. Make ‘treasure’ rocks
Materials:
1 cup Dried Used Coffee Grounds
1/4 cup Sand
1/2 cup Salt
1 cup Flour
1 cup Water
Large Mixing Bowl and spoon
Small prizes to use as hidden ‘Treasure’
Makes about 3 cups of dough.
1. Stir together all the dry ingredients.
2. Add water SLOWLY and continue to stir. Continue adding slowly until the mixture forms a dough.
3. Knead the mixture of dough until it is well blended.
4. Shape into small balls about 3 to 4 inches in diameter.
5. Poke a hole in the dough ball to add the treasure. Cover the hole with dough and smooth over as needed.
Let the ball air dry for 2 to 5 days or longer depending on its size.
When the dough is dried and hardened, treasures can be reclaimed by opening with a chisel, craft stick or screw driver. (Be sure to supervise when screw drivers are used)
Idea: Have children make a couple balls with the prizes inside. Group together as they dry and have children randomly take fossils; their ‘treasure’ will then be a surprise to them.
13. Make an earth terrerium
Make an earth terrerium inside a small to medium glass vase.
Use pebbles, green moss, foliage, twigs, small pieces of wood and stone for the earth terrarium.
Tip: Put small glass vases in your wish list. Parents may have quite a few vases in their cupboards that they could donate I get a couple every year with gifts of flowers.
14. Crayon covered rocks
Materials:
Zip close plastic bag,
Wooden or rubber mallet
Smooth, flat rocks about the size of your fist
Aluminum foil or an old pie tin
Felt scraps
Scissors
White glue
In the sun method:
1. Choose crayons in three or four light or bright colors. Dark crayons will make the color on the rock look muddy.
2. Peel the crayons, put them in the zip-to-close bag, and seal it.
3. Place the bag on a hard surface such as a floor or sidewalk. Using the mallet, pound the crayons into small pieces.
4. Place the rock in the pie tin or on a sheet of aluminum foil in the hot sun. Sprinkle it with the crayon pieces.
When the crayon pieces have melted, but before they reach the point that they run off the rock, take the rock out of the sun to cool. The crayon will quickly harden and form a colorful and waxy coat over the rock.
Cut a piece of felt to glue to the bottom of the rock to keep it from scratching the table.
In the oven method:
The sample photograph is by permission of World Preschool Mom. The rock was made by a four year old boy; it was colored after being in the oven for about ten minutes. With this method, as Deneal states, place the rock on a sheet of foil (with a hot pad or towel under the foil) before decorating with crayons. The hotter the rock, the more runny the wax will be. (Use caution and supervision with this method.)
Tips: If weather isn’t hot:
- Preheat the oven to 350 degrees. Place the rocks on a foil covered cookie sheet and put them in the oven for the children. Keep an eye on them because the crayon melts quickly. It will re-harden within seconds of taking it out of the oven.
- To do outside this project needs a hot, direct sun.
- If you’re unhappy with the color of a crayon-coated rock. Reheat the rock and allow the crayon to melt to the point where most of it drips off the rock and onto the foil under it. Cover the rock with a new selection of crayon bits and see if you get a swirl of color you like better. Remember to avoid dark colors.
- A goal is to get it looking like a tie-dyed rock! The distinct lines of color can be very beautiful. Because the rocks can be easily redone, remember not to place the completed ones that you like in a sunny window or direct, hot sunlight because they will re-melt.
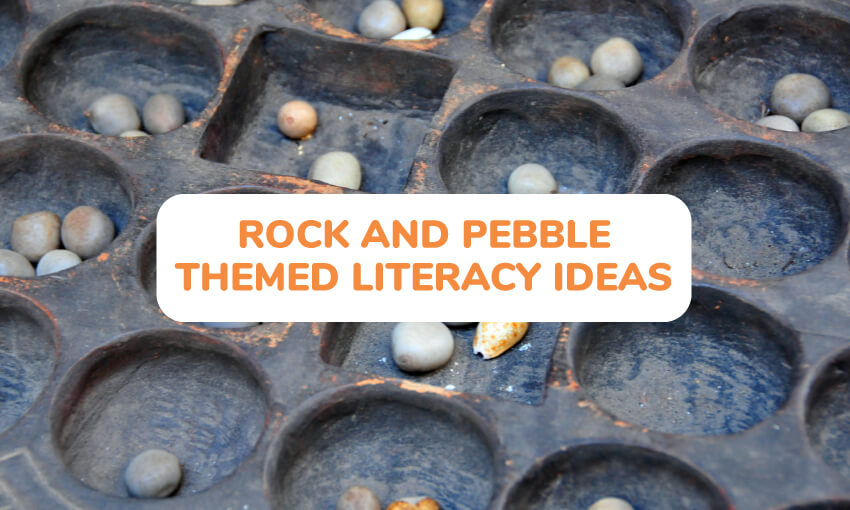
Rock and Pebble Themed Literacy Ideas for Kids
15. Poetry pebbles grade: 4-8
Materials:
| Small rocks or pebbles | Small paint bushes |
| Water and water containers | Magic markers |
| Paint (make tempera paint thicker by adding glue or flour) | A covered work area |
| A shoebox, yogurt or empty “Jiffy Pop” popcorn container | Hairspray or a spray varnish |
- Make sure your pebbles are clean.
- Paint words onto the pebbles. You could also use markers instead of paint.
- Choose a number of words-people, places, things, action words etc. Example:
1. he
2. she
3. to
4. love
5. dog
6. went
7. walk
8. you
9. happy
10. in
11. to
12. a
13. my
14. your
15. orange
16. red
17. blue
18. purple
19. green
20. swim
21. bike
- Use your imagination and make sure you draw some punctuation marks on some pebbles as well (comma, exclamation point, period, question mark etc.)
- Once the pebbles are painted, let them dry and seal them with hairspray or spray varnish.
- Put all the pebbles into a show box or Jiffy Pop container. You can decorate your container with paint or markers as well.
- Play a game of poetry pebbles. Each player chooses a number of pebbles from the box and tries to come up with a poem or story. Makes for a great way to begin a short story for those times when you have writers block.
16. Read stone soup and then make stone soup
Stone soup by Marcia Brown, tells the story of three hungry soldiers who come into a village and cleverly trick the peasants into sharing their food by making a lavish soup out of seemingly nothing but stones. Like the soldiers’ soup, this recipe turns basically whatever vegetables you have on hand into a hearty meal.
Stone soup is a wonderful story to share with children in a group setting. Read the story one day and the next day have children bring a ziploc baggie of chopped up vegetables, herbs and/or spices (you can assign things to bring for a well rounded soup, or let the children bring whatever they like for a mystery pot).
For child participation:
- Everyone can chop or measure ingredients.
- Put all in a large crock pot. Cover with water.
- Cook 2 to 3 hours on high. Remove bay leaf before serving. (You can also do this at home in conjunction with reading the book)
Think about making the big pot of soup in a crock pot. You can start it in the morning program/classroom, and let it go on low during the day. Have kids sign up to bring potatoes, small onion, carrots, celery, cans of beef broth, can of diced tomatoes, seasoning, crackers or rolls, etc. (Don’t forget the ‘clean scrubbed stone’!)
*Each child would only have to bring a single item to make a huge pot.
17. ‘Cooking stone soup’ song
Sing to tune of Farmer in the Dell.
We’re cooking stone soup,
We’re cooking stone soup,
Stir the pot,
It’s getting hot,
We’re cooking stone soup.
First, we add potatoes,
First, we add potatoes,
Stir the pot,
It’s getting hot,
We’re cooking stone soup.
We’re cooking stone soup,
We’re cooking stone soup,
Stir the pot,
It’s getting hot,
We’re cooking stone soup.
Continue with rest of ingredients: tomatoes, onions, water, celery, carrots, etc.
18. Combine literacy and science
Words to investigate and know: Challenge the kids in your class/group to learn the meanings of:
- igneous, sedimentary, metamporphic
- molten, magma, lava
- chemical, organic
- crystalline
- sandstone, basalt, crystal, marble, quartz, limestone, granite
- smooth, rough, layers, hard
- geologist
- clastic
- fossil
- rock
Rock Themed Science Projects for Kids
19. Kids like to collect things:
Capitalize on this interest by encouraging kids to bring their finds to your program for your science center.
Example: Rock collecting – Geology
- Lots of kids/families have rock collections. Do a ‘geology theme’ and have kids bring in interesting and different rocks and minerals they have collected.
- Provide field guides and a mineral test kit to identify each rock or mineral sample. They can learn about the properties of rocks and minerals as they perform tests on their own specimens, checking the streak, color, hardness, luster, and more.
20. Rock collections for pre-k and lower elementary
Take children on a rock gathering expedition. After stones/rocks are collected have children wash them.
- Examine them with magnifying glasses.
- Sort rocks by size, color, markings, etc.
- Are they hard or soft? Scrape rocks with nails to see.
21. Crack open geodes.
Information on a variety of methods (good for all ages) and where to purchase small geodes is here
22. For middle school and high school
Science for a changing world at U.S. Geological Survey provides resource collections and maps for studying earthquakes, hurricanes, floods, wildfires, and other natural disasters, as well as rocks and minerals, plate tectonics, earth’s interior, fossils, coastal wetlands, deserts, the carbon cycle, climate change, and the solar system. Learn about the San Andreas fault system, the life cycle of a mineral deposit, fire ecology research, big floods in the U.S., and more.
23. How to Make Volcanoes for Kids
Kids always love making volcanos. Directions and images are in the Science category (Scroll down towards the bottom of the page)
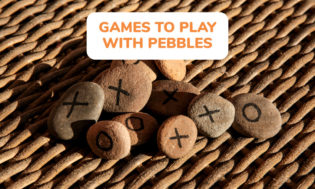
Games to Play Using Pebbles
24. Hop scotch (Use rocks/stones as markers)
Equipment: Pavement, stones, chalk
Draw the layout with the chalk – From bottom to top
3 single squares, 1 double square, 2 single squares, 1 double square, 1 single square.
Number the squares.
The two basic rules of hop scotch are:
1) One foot in each square only.
2) Hop over the square with the rock in it.
Use a rock to throw into the first square.
Hop on one foot over the square with the rock in it.
Land with two feet on the double squares.
On the second turn, throw the rock into the second square, and so forth.
The tricky part is staying on one foot when the rock is in one of the side-by-side squares.
If you have a side walk you can also play by marking two side walk squares with an “X” going from corner to corner in each square.
The part of the “X” portion closest to you (at the very bottom) would be #1,
#2 would be above that to the right
#3 is to the left of 2 and #4 goes in the top portion of the “X”
Mark the square above the same with #5, 6, 7, and 8, Proceed to play as above.
25. Sifting for gold
Have children pretend to be gold miners.
Paint very small rocks, gold.
Hide them in the sand.
Give children small sifters to sift through the sand looking for gold.
26. Play Bing Using Pebbles as Markers
Play bingo using pebbles or polished stones for the markers.
27. Popcorn volcano eruption
1. Spread out a large clean sheet on the floor and have the kids sit outside the edge.
2. Set a popcorn maker in the center, and prepare popcorn according to directions. Do not put the lid on the popcorn maker.
3. Watch the “volcano” erupt and shoot “hot lava” all over the sheet.
4. Make sure that everyone stays away from the popper while it’s on, so the kids don’t get sprayed with hot oil or kernels.
28. Rock themed Food Ideas
- Serve fruits with stones in them. Peaches, plums, nectarines, avocados, cherries.
- Rocky Road Fudge (See recipe in the Candy Category-near top of page with other fudge goodies)
- Rocky Road Ice-Cream, if you can’t find Rocky Road — get flavor of choice and mix in (or top it) with mini-marshmallows and chocolate chips!
- Trail mix (See ‘Snack Mix’ Category)
- Dirt Cups (Dirt Cup recipes are in the ‘Garden Theme’ page; Snacks are towards page center)
- Read the Book Stone Soup and then make some! (Scroll back up towards the middle of the page for directions)
29. Make a volcano cake
- Bake two 8″ round cakes and two Pyrex-bowl dome cakes.
- Trim and stack the cakes to look like a mountain.
- Frost it brown and sprinkle it with crushed chocolate graham crackers.
- Use Fruit Roll-Ups: blue for the water around the volcano, red roll-up down the side for lava, green and yellow for the trees and foliage.
- Put several sparkles around the top.
- Cut out a hole from top down inside the cake.
- Put a tall glass in the hole filled with dry ice.
- Add some hot water inside the glass (on top of dry ice)
Watch the kids with all the ‘oohs and ahhs’ when you do this!!!
Do you know what your birthstone is & what it means?
Modern birthstones are linked to calendar months, and each month has its own unique birthstone, with its own fabled properties. Many people love to wear jewelry set with their birthstone, as the ancient meanings and associations with these stones still intrigue them.
January Birthstones
- Garnet for Strength for perseverity, prosperity,and health
- Rose Quartz for Emotional balance, forgiveness
February Birthstones
- Amethyst for Wisdom, spirituality, sobriety, security
- Onyx for Relaxation, comfort
March Birthstones
- Aquamarine for Beauty, honesty, loyalty, happiness
- Bloodstone for Endurance
April Birthstones
- Diamond for Invincibility, clarity, purity, eternal love
- Rock Crystal / Quartz for Balance, clarity, energy
May Birthstones
- Emerald for Patience, understanding, foresight
- Chrysoprase for Fertility, secrecy
June Birthstones
- Alexandrite for Balance, confidence, joy
- Moonstone for Balance, good fortune, tender passion
- Pearl for Modesty, purity, beauty, happiness
July Birthstones
- Ruby for Love, success, integrity, passion & promise
- Carnelian for Luck, safety
August Birthstones
- Peridot for Fame, dignity, protection, succes)
- Sardonyx for Relaxation, security
September Birthstones
- Sapphire for Truth, sincerity, commitment, loyalty
October Birthstones
- Opal for Hope, faith, confidence
- Tourmaline for Balance, endurance, safety
November Birthstones
- Topaz for Strength, wisdom, courage
- Citrine for Hope cheerfulness, youth, health, fidelity
December Birthstones
- Tanzanite for Contentment, understanding
- Zircon for Wisdom, honor, wealth
- Turquoise for New possibilities, happiness
What and when is ‘old rock day’?
Did you know that ‘Old Rock Day’ is celebrated each year on January 7th? You can celebrate the day by collecting different rocks, or have fun doing a variety of things to go along with the theme! (Such as the ideas on this page!)
The day does not have a specific meaning nor is it known how or when it began. So, have fun with it as you like! (Just be sure to include a stone, rock or pebble in some way)
