This article shares dozens of exciting Colonial Kids Activities! They are fun activities that help children learn more about colonial history in the United States.
Kids love to learn about our colonial past.
The best way to teach them more about colonial history is through colonial kids activities, because they are so fun and engaging. These activities are perfect for November, Thanksgiving, President’s Day, and any other patriotic holidays.
To help you plan your colonial themed day, we’ve gathered together 33 different colonial activities including colonial crafts, colonial food recipes, colonial outfit ideas and children’s colonial games. Your children will have fun while learning what colonial kids did to keep themselves occupied.
This article is useful if you are looking for:
- Colonial food recipes
- Colonial children’s clothing
- Colonial crafts ideas
- Colonial paper art ideas
- Colonial children’s chores
This first page of this category has colonial themed ideas and activities. Games, Food, Crafts, Literacy, Discussion, and more!
Brief history and information on colonial daily life, school, food, and clothing. Be sure to check out page 2 – the gathered data is not only informative but will help you in making the most of a Colonial Theme!
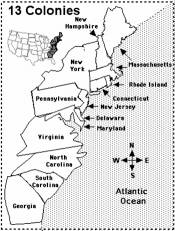
THE THIRTEEN COLONIES
New England:
Province of New Hampshire, later New Hampshire
Province of Massachusetts Bay, later Massachusetts and Maine
Colony of Rhode Island and Providence Plantations, later Rhode Island and Providence Plantations Connecticut Colony, later Connecticut
MIDDLE COLONIES:
Province of New York, later New York and Vermont
Province of New Jersey, later New Jersey
Province of Pennsylvania, later Pennsylvania
Delaware Colony later Delaware
SOUTHERN COLONIES:
Province of Maryland, later Maryland
Colony and Dominion of Virginia, later Virginia, Kentucky and West Virginia
Province of North Carolina, later North Carolina and Tennessee
Province of South Carolina, later South Carolina
Province of Georgia, later Georgia
In early times cities were commonly known as provinces and after 1776 they became known to as states.
COLONIAL FOOD IDEAS
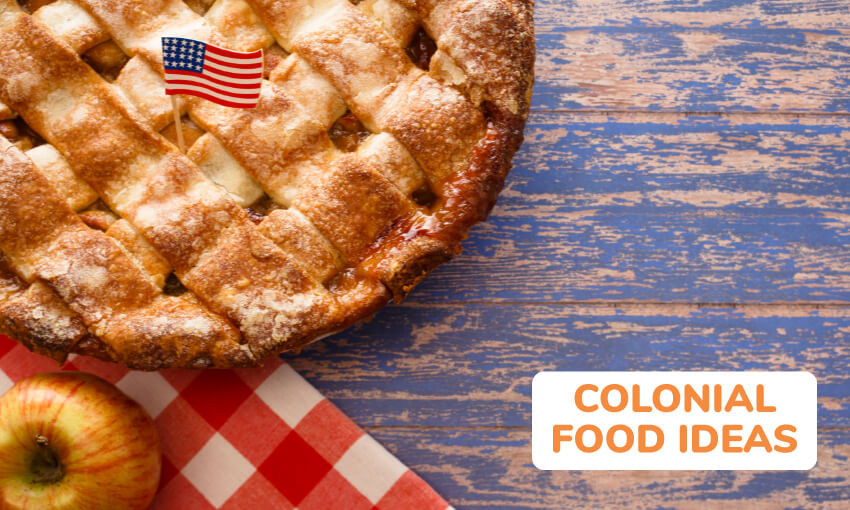
Here are a few delicious colonial food ideas that the kids will love!
- Ginger Cake
- Pumpkin Pie
- Succotash
- Stewed Pompion (Pumpkin)
- Johnny Cakes (Recipe below)
- Hobnob Cookies and Applejack Cookies (Recipe below)
- Corn bread or muffins
- Bread with apple butter
- Baked beans
- Corn on the cob
- Roasted chicken or stew
- Rock candy
- Old-fashioned stick candy
- Fruit pies and tarts
COLONIAL FOOD RECIPES
1) COLONIAL JOHNNY CAKES RECIPE
During colonial times, Johnny cakes were likely to appear at any meal. Many think that the original name was “Journey Cakes”, because they were so often taken along on a journey, since they could be stuffed into a traveler’s pockets. Try them hot or cold, with butter and syrup.
Ingredients:
1 cup yellow cornmeal
1/2 teaspoon salt
1 cup boiling water
1/2 cup milk
Mix the cornmeal and salt.
Add the boiling water, stirring until smooth.
Add the milk. Stir well.
Grease a heavy, 12-inch frying pan. Set over medium-low heat.
Drop teaspoons of the batter onto the pan. Cook until golden, about five minutes. Turn the cakes carefully with a metal spatula.
Cook the other side five minutes.
Serve the cakes hot with butter and maple syrup. Makes 12-15 cakes. Source: Colonialcooking
2) COLONIAL COOKIES FROM EARLY NEW ENGLAND
Ingredients:
1 cup brown sugar
1/2 cup shortening (margarine)
1 egg
1 1/2 cups flour
1/2 tsp. baking soda
1/2 tsp. salt
1/2 tsp. cinnamon
1/2 tsp. nutmeg
For HOBNOB COOKIES, add 1 tsp. vanilla and 1/2 tsp cup raisins.
For APPLEJACKS, add 1 cup chopped unpeeled apples.
Cream together sugar and shortening.
Add egg (and vanilla if you are making Hobnobs). Beat well.
Mix dry ingredients together in another bowl.
Add slowly to sugar mixture, beating well after each addition.
Stir in raisins or apples.
Grease cookie sheet.
Form into small balls, or drop in the shape of balls on the greased sheet, 3 inches apart.
Bake at 375 degrees for 12-15 minutes.
COLONIAL FOOD PRESERVATION
Most of the food required by a farm family was produced on their own farm in season and had to be preserved for future use. Summer and fall were the busiest times for food preservation: the abundance of these seasons supplied the long winter and spring. The wife use methods derived from tradition, experience, periodicals, and recipe books.
Proper storage, drying, pickling, and smoking were the methods used. Some produce, such as corn, beans, and apples were dried in large quantities and used as a barter item a local stores
3) COLONIAL FOOD PRESERVATION – DRIED APPLES
Needed:
Apple corer,Apples, String, Paring knife or vegetable peeler
Using the apple corer, core the apples.
Peel the apples and cut them into slices with the hole in the middle.
Pass a length of string through the apple rings.
Hang the apples up to dry. This will take about three weeks.
When they are dry, try storing them in paper bags until spring and use them in a recipe. Before using them, soak the dried apples in warm water until they are soft and use them as you would fresh apples in pies or sauce.
4) COLONIAL RECIPE – HOMEMADE BUTTER
Need:
Baby food jars
A bowl of ice
Small bowl to put the butter in the ice
Spoon to press butter on the bowl
Measuring spoon
1. Put 2 tablespoons whipping cream in each baby food jar. Put lid on tightly and shake as long as can.
2. Remove lid and pour off excess liquid.
3. Spoon butter into the smaller bowl and set this bowl in the bowl of ice.
4. As butter chills, continue to press it again the side of the bowl to get rid of any remaining liquid.
5. When ready…enjoy on some good bread or rolls!
Tip: To speed up the process you can add a marble to the jar when shaking it!
5) COLONIAL CRANBERRY DRINK
The Wampanoag Indians called the cranberry “sasemin” and made a juice from it which they sweetened with maple syrup or honey.
6) COLONIAL AMERICAN CRANBERRY APPLE CRISP
3 cups apple slices, 2 cups whole fresh or frozen cranberries, 2 tablespoons honey, 1/3 cup butter or margarine, 1 cup rolled oats, 1/2 cup whole wheat flour, 1/2 cup brown sugar, 1/2 cup chopped nuts, 1/2 tsp. vanilla
Toss together apple slices, cranberries, and honey. Make topping in a separate bowl. Mix butter, rolled oats, flour and sugar until crumbly. Stir in nuts and vanilla. Place the apple/cranberry mixture in a 11 3/4″ x 7 1/2 inch dish. Put on topping. Bake at 350 about 50 minutes or until fruit is tender. If mixture gets too dry pour a little hot water over it.
Source: One-writer’s-way
Original Source: The Good Land; Native American and Early Colonial Food by Patricia B. Mitchell
Native American and Colonial America also used cranberries as a curative for cuts and arrow wounds. The mashed fruit was placed on open wounds to draw out the poison that we call bacteria.
Additionally cranberries were also used as a dye for blankets and rugs. The berry grows as far South as parts of Northern Carolina and West Virginia and was regarded by the Delaware tribe in New Jersey as a symbol of peace.
7) AUTHENTIC COLONIAL RECIPE FOR APPLE BUTTER
Ingredients: 4lbs. apples, 1/4 cup water, 1/4 cup apple cider vinegar, 1/2 cup brown sugar, 1 teaspoon cinnamon, 1/2 teaspoon cloves (ground)Core and quarter unpeeled apples; chop or put in blender with water and vinegar.
Cook in a saucepan over low heat until the mixture gets thick and turns brown.
Stir occasionally. This will take 2-3 hours (1/4 of that time in a microwave oven).
Add sugar and spices and cook for 1/2 hour more.
Refrigerate, then spread on toast or muffins.
8) COLONIAL RECIPE APPLE BUTTER #2
6 pounds of tart apples
6 cups apple cider or juice
3 cups sugar
2 teaspoons ground cinnamon
1/2 teaspoon ground cloves
Core and quarter apples; cook with cider in a large heavy saucepan until soft, about 30 minutes. Press through a food mill. Boil gently 30 minutes; stir often. Stir in sugar and spices. Cook and stir over low heat until sugar dissolves. Boil gently stirring often until desired thickness about 1 hour. Pour into hot 1/2 pint jars adjust lids. Process in boiling water bath 10 minutes. (Start counting time after water returns to a boil.) Makes 8 half-pints.
9) STEAMED PUMPKIN PUDDING – AUTHENTIC COLONIAL RECIPE
6 tablespoon butter
3/4 cup brown sugar
1/4 cup granulated sugar
2 eggs
11/2 cups all-purpose flour
1/2 teaspoon salt
1/2 teaspoon baking soda
1/2 teaspoon ground cinnamon
1/2 teaspoon ground ginger
1/4 teaspoon ground nutmeg
3/4 cup mashed cooked pumpkin or canned pumpkin
1/2 cup buttermilk
Cream butter and sugar together until light. Beat in eggs. Stir together flour, salt, soda cinnamon, ginger, and nutmeg. Mix pumpkin and buttermilk; add to creamed mixture alternately with dry ingredients, mixing well after each addition. Spoon into greased and floured 6 1/2 cup ring mold. Cover tightly with foil. Bake 350 for one hour. Let stand 10 minutes. Unmold. Serve with whipped cream. Serves 12 to 16.
10) SUCCOTASH RECIPE FOR KIDS
2 cups fresh or frozen baby Lima beans
2 ounces salt pork
1/2 cup water
1/2 teaspoon salt
1/2 teaspoon sugar
Dash pepper
2 cups fresh or frozen whole kernel corn
1/3 cup light cream
1 tablespoon all purpose flour
In saucepan combine beans, pork, water, salt, sugar and pepper. Cover; simmer until beans are almost tender. Stir in corn. Cover and simmer until vegetables are tender. Remove salt pork. Blend cream slowly into flour. Stir into vegetables. Cook and stir until thickened and bubbly. Serves 6.
COLONIAL LITERACY AND DISCUSSION ACTIVITIES
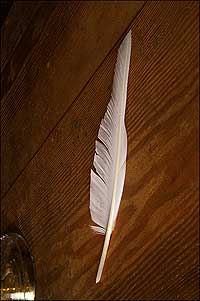
11) COLONIAL WRITING ACTIVITY
Have the kids write their names using a QUILL PEN and parchment paper.
MAKE A QUILL PEN (Good only for older youth)
Materials: Large goose, swan or turkey feathers from a craft store, pen knife, washable ink
Cut 1/4 inch off the back of the quill. Next cut approximately 1/2 inch off the front, forming a point. Adjust as necessary to get a suitable writing point. Pour some washable ink into a container and test out the new pens. Most will find writing with the new pen a challenge!
12) START A COLONIAL DIARY/JOURNAL
Just like Noah Webster did!
Noah Webster wrote in his diary almost every day during his entire life. The following are excerpts from his diary.
Share them with your group and instruct kids to start their own! They don’t need to write much. Just go with it and have fun. It’ll be a nice memento in years to come.
NOAH WEBSTER’S DIARY EXAMPLE.
- 1784, August 10. Had fun reading books and playing the flute.
- 1784, September 29. Rode to West Division with Mrs. Fish to buy peaches. Returned and
had dinner at Mr. Pratt’s. We ate Sea-Turtle. - 1784, October 25. Came up with the idea to have a dance tomorrow.
- 1784, October 26. Many people attended the dance. It was very fun!
- 1784, October 27. Very tired from the dance.
- 1784, December 1. Walked to West Division to celebrate Thanksgiving.
- 1784, December 2. Spent Thanksgiving at my father’s, as usual, with my brother Charles and sisters
WHO WAS NOAH WEBSTER?
Noah Webster (October 16, 1758 – May 28, 1843) was an American lexicographer, textbook pioneer, English spelling reformer, political writer, editor, and prolific author. He has been called the “Father of American Scholarship and Education.” His blue-backed speller books taught five generations of children in the United States how to spell and read, and made elementary education more secular and less religious. In the U.S. his name became synonymous with “dictionary,” especially the modern Merriam-Webster dictionary that was first published in 1828 as An American Dictionary of the English Language. Source: Wikipedia
13) LEARN SOME COLONIAL NURSERY RHYMES
Colonial children, like children today, also told nursery rhymes and Tongue Twisters. Click here for KidActivities Super Tongue Twisters and Tongue Twister Games!
14) COLONIAL SONGS FOR KIDS
Children also enjoyed singing and playing games such as “London Bridge is Falling Down” and “Here We Go Round the Mulberry Bush. You could even teach the kids the 13 Colonies Song (sung to the tune of Yankee Doodle)
15) LEARN SOME COLONIAL CHILDREN’S CHORES
Note: there is some great information on page 2 about family life and children’s chores in colonial America.
Some of the things kids did back then may be just like chores that kids do today. Unlike today, many of the kids in Colonial times did not get paid or get an allowance for doing chores, but had to work like everyone else in the house to “earn their keep.” In other words, they worked in order to eat, have a nice place to sleep, and help their families.
See how many of these activities your kids do to help at home…
1. Help mom with the laundry
2. Gather the eggs the chickens laid; gather acorns to feed the pigs; scatter food to feed the chickens; milk the cows
3. Work with mother in the kitchen garden or scare away birds from eating seeds planted in father’s fields
4. Babysit or help take care of younger children in the house
5. Fetch water for cooking, cleaning dishes, washing faces, and doing laundry
6. Bring in fire wood to cook, do laundry and keep the home warm
7. Help mom cook, preserve foods for winter… or turn vegetables kept in the root cellar (under ground cold storage room) to keep them from going bad
8. Visit the sick; children were told to visit sick family members and neighbors to bring them good cheer and news from the outside world as well as bring them treats or things needed to help them feel better
9. Walk to the market or store to trade items for the family; deliver goods the family sells to the store– or buy things needed for the home
10. Sew items for the family such as– fixing (darning) holes in socks; carding (like brushing hair) wool from the sheep to be spun into thread; weaving narrow tape (strong threads for tying on clothing and other goods); knitting
10. And Yuck…how about this one! Emptying the chamber pots (no indoor bathrooms)
Some youth might also start to learn the family business at a very young age.
Example: blacksmith, tinsmith, miller, or working with a doctor or a store clerk. If family knew someone in town who could teach some of these things, children may be sent to live with them and learn the activity as their apprentice.
COLONIAL GAMES FOR KIDS
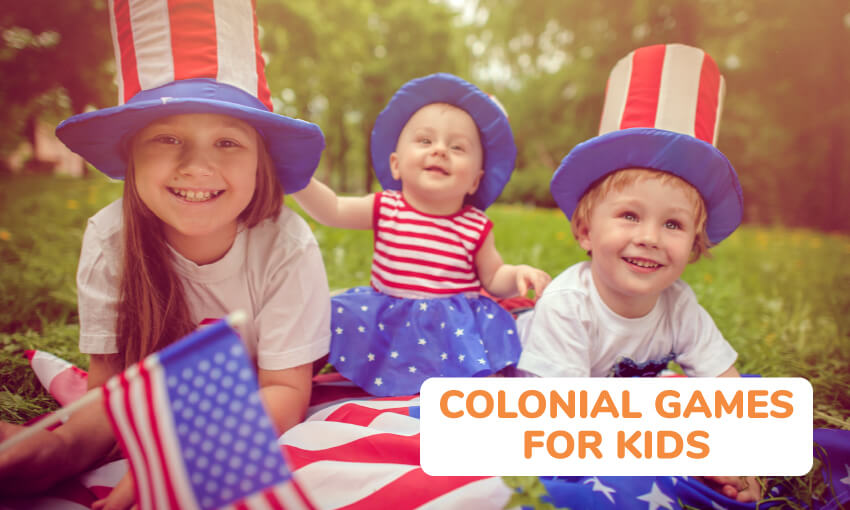
Colonial life was filled with work, but it wasn’t always hard or boring. Early Americans knew how to turn work into fun by singing or telling stories, having contests, or working together in spinning or quilting bees. Some liked to dance to fiddle and fife music. They enjoyed the time they spent playing games.
Colonial often played outdoor games that didn’t require toys. Many of our games today have changed very little over the centuries, and these activities give a sense of how old some of today’s pastimes are.
KIDS LIKED TO (Directions are below for most games)
•Play Tag
•Hide and Seek
•Marbles
•Leap Frog
•Blind Man’s Bluff
•Jack Straws
•Play Jackstones (Jacks)
•Play ‘Scotch-Hoppers’ or as we know it, Hop Scotch
They also liked to
•Fly kites
•Spin tops
•Play with string and make a Jacob’s Ladder/Cat’s Cradle
•Jump Rope (See Jump Rope Category)
•Blow bubbles
•Play on a see-saw and swing
•Some children had rocking horses and used a bow and arrow.
The following games are from KidActivities ‘Outdoor Games Category’
16) COLONIAL CHILDREN’S TAG GAME
It’s best played with lots of places to hide. The person who is the counter (or seeker) stands next to a designated tree and closes their eyes while counting to ______. The rest of the players run and hide. When the seeker is done counting, they call out “Ready or Not, Here I come!” and begin searching for everyone else. The goal for those hiding is to get back and touch the tree before being tagged. Those who are tagged before touching the tree are also “It” and join the seeker. The last one to reach the tree or be tagged is the seeker for the next game.
17) COLONIAL GAMES FOR KIDS – “T” TAG
This game is played like traditional tag.
The number of children playing, will determine the number of “ITS” you have which would normally be from 1 to 3.
Every ______ minutes, change your “It”.
When children get tagged, they must remain still and put their arms out in a “T” position.
They are released from this ‘Frozen T’ position when another child runs under their arms.
18) ELBOW TAG – AMERICAN COLONIAL STYLE
Divide children into pairs leaving one child who is “It” and one child who will be the first to be chased.
Have each group of partners link elbows and all of the pairs form a large circle, allowing 10 feet of space between each pair.
“It” runs after the other “not joined by the elbow” child inside the circle as in a traditional game of tag.
If the child being chased needs a break he or she can run to a pair of children and link elbows with one of them.
The child in the pair who WAS NOT linked by the chased child is now “It’s” new target and must break away quickly to avoid being tagged by “It.”
19) SIMPLE COLONIAL CHILDREN’S GAMES – HOP SCOTCH
Equipment: Pavement, stones, chalk
Draw the layout with the chalk – From bottom to top
3 single squares, 1 double square, 2 single squares, 1 double square, 1 single square.
Number the squares.
The two basic rules of hop scotch are:
1) One foot in each square only.
2) Hop over the square with the rock in it.
Use a rock to throw into the first square.
Hop on one foot over the square with the rock in it.
Land with two feet on the double squares.
On the second turn, throw the rock into the second square, and so forth.
The tricky part is staying on one foot when the rock is in one of the side-by-side squares.
If you have a side walk–you can also play by marking two side walk squares with an “X” going from corner to corner in each square.
The part of the “X” portion closest to you (at the very bottom) would be #1…
#2 would be above that to the right
#3 is to the left of 2 and #4 goes in the top portion of the “X”
Mark the square above the same with #5, 6, 7, and 8…Proceed to play as above.
20) COLONIAL BLIND MAN BLUFF
This game does not really have an object, but it is fun.
One person puts on a blindfold while the others spin him around a few times.
The blindfolded person is led around the yard in winding circles, etc. until they get to their destination point.
The blindfolded person then gets to guess where he is and then has his blindfold removed to reveal his location.
21) CHILDREN’S COLONIAL GAMES – PLAY JACKSTONES (JACKS)
The game the colonists called jackstones is known today as jacks. You can buy a set, which includes six 6-pointed metal jacks. Or you can be like colonial children and use six small stones, pumpkin seeds or any other small objects that are all the same size.
A set will include a small, bouncy ball, but any small ball with a good bounce will do. Or, like colonial children, use a round, smooth stone. If you use a stone, toss it the air rather than try to bounce it.
GENERAL RULES for Jacks
There are more than 100 different jacks games, but most follow these basic rules.
1. Two or more people can play, indoors or out.
2. To start: a player tosses the ball in the air, scatters the jacks, and catches the ball on one bounce.
The player wants the jacks to land pretty close together, but not so close that they’re hard to pick up one at a time. Even if the player doesn’t like the way they landed, they must play the jacks as they lie.
3. During play, the player must pick up the jacks and catch the ball on one bounce with the same hand.
4. When picking up jacks, the player can touch only the ones they are picking up. If player moves or touches others, their turn is over.
5. On any play, each player has only one try. If they makes a mistake, it’s the next player’s turn.
6. If a player makes a mistake and loses their turn, on the next turn they go back to the beginning of theplay in which they made the mistake.
PLAY ONE THROUGH SIXES (also called Onesies, Twosies)
Note: Remember that to start, the first player tosses the ball, scatters the jacks, and catches the ball on one bounce. The ball can bounce only once; if a stone is used, the stone is tossed in the air and must be
caught before it lands.
TO PLAY
•For ones (onesies):
Player 1 tosses the ball again, picks up one jack, then catches the ball on
one bounce with the same hand. Player 1 then puts the jack in the other hand and repeatsthe play, again picking up one jack. Player 1 continues until all six jacks have been picked up,one at a time.
•For twos (twosies):
Player 1 bounces the ball, picks up two jacks, catches the ball on one bounce in the same hand, then puts the jacks in the other hand. Player 1 continues until he/she has picked up all six jacks, two at a time.
•For threes (threesies):
Player 1 bounces the ball, picks up three jacks, catches the ball on one bounce in the same hand. He/she then puts the jacks in the other hand and repeats the play to pick up the remaining three jacks.
•For fours (foursies):
Player 1 picks up four jacks on one toss, then two on the next toss.
•For fives (fivesies): Player 1 picks up five jacks at once, then one jack on the next toss.
•For sixes (sixies):
Player 1 picks up all six jacks at once and catches the ball on one bounce
with the same hand.
TO WIN:
A player who goes from ones through sixes without an error is a winner, but this player canbe tied if another player also has a perfect round. Remember, when a player loses a turn, he/she starts the next turn at the beginning of the mistake. If the error was made on threes, for example, the player starts over at the beginning of threesies. To see a few other variations of Jacks-visit Games for Small Groups. Jacks is #40 page bottom.
22) COLONIAL LEAP FROG GAME
1. If you are playing in a group with more than three players, you start by lining up in single file.
2. The first person in the line takes a few steps forwards and then bends over to make the first frog.
3. The next person in the line then leaps the first frog, carries on for a few steps and then bends over to make the second frog.
4. The third person in the line then has to run and leap frogs one and two and then bends over to make the third frog.
5. This carries on until all the players have jumped.
This can be played with one line or in Teams.
If you are playing with 2 or three children to a line–introduce a MATH component to the ‘Leap Frog’ and MEASURE HOW FAR each child jumps!
23) CLASSIC COLONIAL GAME – HIDE AND SEEK
First you pick someone to be ‘It’ (the person who seeks).
While standing at a ‘base’, ‘It’ turns around and counts with their eyes closed. The rest of the players hide. (A number count is predetermined by the players)
When that number is reached, “It” says “Ready or Not, Here I Come” and rushes to find everyone.
Players try to get to base without being tagged or else they are the new “It”. If the person who is “It” doesn’t get someone in three tries he gets to pick a child to be it!
COLONIAL CARD GAMES
Most colonial CARD GAMES were made for adults and were not considered games for kids. If the children played with cards it was as many kids do today, stacking them into a “house” of cards.
24) COLONIAL CARD TOWERS
Get out a deck or cards (or several) and use them to build a tower. Lean one card against another, creating a triangle with the table top or floor.
Create a second triangle a couple inches to the left or right of your first one, and connect the two with a card laying flat over top.
See how tall you can make your tower. This can be done as an individual, a team, or as a competition.
OTHER COLONIAL ACTIVITIES FOR KIDS
25) COLONIAL PUZZLES FOR CHILDREN
Can you believe that jigsaw puzzles have been around since the 1760’s? A man named John Spilsbury, an engraver and mapmaker in London, attached maps of England to thin pieces of mahogany wood and then carefully cut around the shapes of the counties.
Around the same time in France, a man working for the King made a similar game and thus the puzzle was born. These map puzzles or “dissected maps” were soon put to use with American Colonial children to teach them the way each county looked and what counties were next to each other. It was not until 1840 that puzzles began to have “snap-in” or interlocking pieces like most of our puzzles do today.
Map puzzles were the most popular puzzle, but by 1787 puzzles with pictures of different kings were also made. What would Mr. Spilsbury think of all the different types of puzzles we have today?
26) MAKE AN APPLE POMADOR BALL – COLONIAL STYLE
(These are now traditionally made with oranges, however, apples were used in Colonial Days)
A Pomador Ball was a large apple with cloves in it to give it a nice smell.
Materials: Large apple, box of cloves, cinnamon, a plastic net bag, ribbon or yarn
1. Use a fork to make many little holes in the skin of an apple.
2. Insert a clove into each of the holes. Do this until the entire apple is covered with the cloves.
3. Put the apple into a bowl and pour some cinnamon on it. Set the ball in a cool place for a few days.
4. To hang the ball cut the ends off the net and leave it so it is about 10 inches long.
5. Slip the ball into the net. Tie a bow with the yarn at the top and the bottom of the net.
6. Cut an 18-inch piece of yarn. Tie a knot forming a 6-inch loop.
7. At the top of the pomander ball tie the remaining string from the loop into a knot and then hang.
27) COLONIAL CORNMEAL DOUGH
2 cups cornmeal
1 cup salt
Tempera paint for color
Water
Mix cornmeal, salt and paint with enough water to make a play dough texture.
NOTE: A comment from Michele Ridgeway was made on Kid Activities face book page. It comes out just like wet cornmeal and salt would not very doughy at all. The children liked patting it on trays and squishing it around and it smells really nice. I didn’t add any color to it, as we’re talking about harvest and native americans in our classroom. I’m going to put it out again tomorrow. Children helped to make it as the recipe is pretty simple. Thanks (Thank you Michele!)
COLONIAL WORKING BEE ACTIVITIES
(Not ‘insect bees’ but where small groups of people work together!)
When colonial families faced a hard task, they made the work lighter and more enjoyable by working together.
They held flaxing bees, quilting bees and corn husking bees. (A Colonial Quilt Activity – to simulate a Bee – is below)
One family would host the ‘bee’ and everyone would work together and tell stories or sing songs. In the evening, after the work was done, the host family would serve a big meal and the children would play.
28) COLONIAL CRAFTS FOR KIDS – MAKE A COLONIAL QUILT
For colonial women, quilting was not just the creation of a needed household item. Quilts were a thrifty use of material leftovers, a form of decoration and an expression of pride. In Colonial day, when every piece of cloth was brought from Europe at an opulent cost, each scrap left from the cutting of clothing was worth as much as its equivalent to the garment itself. Thus the “Crazy Patch,” quilt was invented.
Each piece of cloth was fit together so that not a strand of the valuable material was wasted. It mainly consisted of silks, ribbons, wool, and velvets. It not only was the humblest of all bed-coverings, but it served the purpose of keeping the family warm on those cold winter nights. Ladies exchanged intricately designed patterns, each with its own name such as Crow’s Foot, Chinese Puzzle, Love-Knot, and Sunflower. Groups of women would gather together for several days in quilting bees, working together to make one beautiful quilt.
29) COLONIAL CARD STOCK QUILT
You need:
8″x8″ pieces of white oaktag, crayons or markers for decorating your squares, yarn
Your squares should represent yourself. Draw your favorite food… write your name in calligraphy…draw a picture of a colonial craft item or someone using the craft item.
When the square are done, punch holes along the edges and then use yarn to tie the squares together. Source: ColonialFair (ColonialFair’s page has been removed from the internet)
COLONIAL CRAFTS
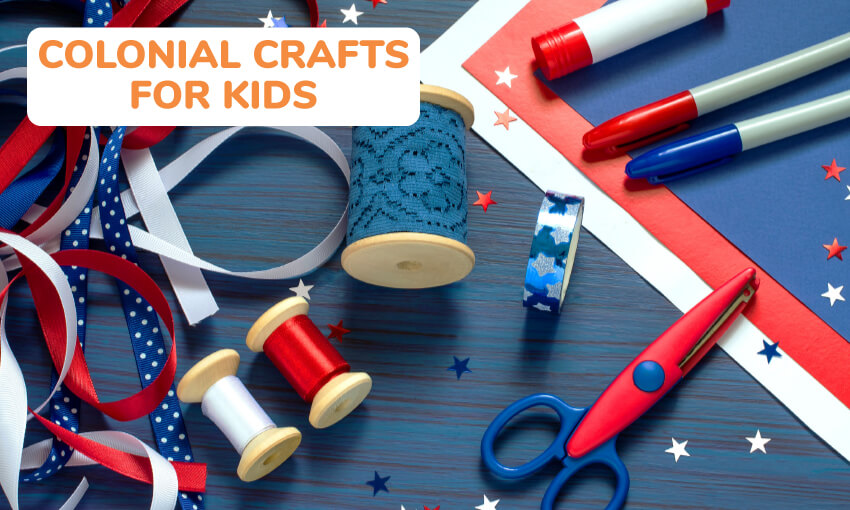
CHILDREN OF COLONIAL TIMES ALSO USED ‘NATURAL MATERIALS’ FOR FUN!
- CORN COBS…Cobs were cut into pieces and used as building blocks
- SHELLS…Were used as dishes for dolls or used in hopscotch
- DANDLIONS/WILD FLOWERS were used to make necklaces and bracelets…
Remove dandelions from the lawn. Pick those with long, thick stems.
Attach them by tying one stem in a knot high up near the flower of another dandelion, and so on until reaching the desired length.
TIP: Remind children that their new necklaces/crowns are made of weeds and will wilt in a day or two, but they can always make a fresh one.
- WALNUTS were halved and then gilded and hung on Christmas trees
- FRUIT PITS were used as counters in games
- GOURDS were hollowed out and then blown through to make noise
- PRESSED FLOWERS were used for designs or pictures
30) COLONIAL CRAFTS – FLOWER LEAF PRESS NOTE CARDS OR PICTURES
Type of Activity: Nature Art
Materials needed:
Old phone book, Collection of colorful leaves, grasses, flowers, herbs,
Craft glue, Plain note cards/postcards/watercolor paper.
1. Take a nature walk on a clear, dry day. Collect any attractive flowers, leaves, grasses, and herbs.
2. Separate each stalk or blossom. Place each one separately between the pages of the phone book, spacing them well apart from each other.
3. Place the phone book in a cool, dry place for a week to ten days. Your leaves will then be totally dry and ready for use.
4. Carefully apply craft glue, just a dab, to the back of the dried leaf or flower.
5. Center it on a note card for a single design or place several as a collage on a sheet of watercolor paper, which can later be framed.
6. Your leaf press can be used over and over again. Flowers can be stored in them for several months.
- KNIVES…most boys owned a pocketknife. It was used to make toys and to work around the house. The name ‘jack knife’ came about by saying Jack’s knife
- APPLES… APPLE DOLLS are folk dolls originating from early rural America when settlers made dolls from whatever was at hand. Apple dolls are made by carving a face in an apple and drying it. Due to the different effects drying produces, no two dolls are alike
31) COLONIAL CRAFTS – MAKE SHRUNKEN APPLE HEADS
Choose the largest, firmest apples you can find. The apples shrink a lot when they dry so you want to be sure that they are big enough to begin with. Firm apples will be easier to carve and will dry out much better.
• The first step in making your shrunken apple heads is to peel the apples. You can core them if you would like, although it is not necessary. Next, brush a mixture of lemon juice and salt onto the peeled apple. The lemon juice and salt mixture will help to keeping the apples from turning as brown as usually when they dry.
• Next, you will want to take a paring knife and carve out the basic features of a face from one side of the apple. Don’t go into too much detail since when the apple dries any small details will be lost. Focus on creating large features like the eye sockets, a nose and a mouth. Example: To make a shrunken apple for a witch’s head you would most likely carve a large nose, two deep holes for the eye sockets and a sneering hole for the mouth. Keep the shapes that you carve simple and larger than you think you need them to be since they will shrink as they dry.
• Place the carved apples somewhere dry and out of the way. Turn them every couple of days in within about 2 weeks they will have shriveled up into ghoulish little faces. You can speed up the drying time if you would like by setting them on a cookie sheet in the oven on the lowest setting or by using a food dehydrator, although it will still take some time for them to dry and shrivel.
• You can make a body by putting the heads on small bottles (shampoo, dish soap etc.) Make a dress out of a piece of fabric. You can even use a small paper clip to make glasses.
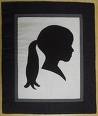
COLONIAL ART – SILHOUETTES
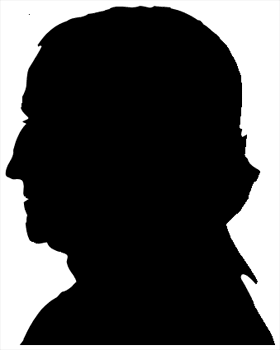
Silhouettes are a type of shadow picture. They have been made for centuries and became very popular during the life time of George Washington. Before cameras which make photographs were invented, the only way you could have a picture of a person was to have a painting or sketch made of that person. If you weren’t able to paint a portrait yourself or unable to pay for an expensive portrait to be made, you could have a cheaper version made for you, namely a silhouette.
A silhouette traced the outline of a person’s profile. Though it didn’t show you the color of a person’s hair or eyes, it did give you a reminder of how the shape of the person’s face appeared.Since silhouettes required little skill as the shadow of a person was shown on a canvas and the outline painted in, they were inexpensive to have made. Beyond a painted version, others trained in making silhouettes could cut out the profile of a person using black paper and then glue the black shape onto white paper. These artisans could look at a person and from the shape of their face, they could cut a silhouette without tracing it first.
Some simple machines (like a pantograph which uses two pencils attached by grids which move at the same time) were used to make copies of a silhouette or change their size. These copies were often made of famous people and could be given out to their many admirers.
32) MAKE YOUR OWN SILHOUETTE – VERSION #1
Materials: 2 Pieces of White Construction Paper
1 Piece of Black Construction Paper
Pencil
Glue
Tape
Scissors
Flashlight or Lamp with the Shade Removed
- Tape a piece of white construction paper onto a wall.
- Have the person sit sideways in front of the paper; have someone use the light to cast a shadow of the profile on the paper.
- Trace the profile.
- Trace the profile onto the black paper and cut it out.
- Glue the profile onto the other white paper.
33) MAKE YOUR OWN SILHOUETTE! VERSION #2
To make a shadow picture of your friends and family, attach a black piece of construction paper to a hard surface like a door or a wall. Have your subject (the person) sit in a chair in front of the paper and place a light on the other side of the person so that the subject’s shadow will appear on the paper. Trace the shadow of the person on the paper with a piece of white chalk. Remove the paper from the wall and carefully cut along the chalk line. Attach the cut out to a piece of white paper. (Glue the chalk-line side down, so if you made any stray marks they won’t appear on the finished side.) You now have a finished silhouette!
You can also use a pencil to trace the shadow on a white piece of paper. After tracing, color in the outline with a black crayon or marker.
Colonial Life
Colonial daily life, school, food, and clothing. Be sure to check out both pages. The combined data is not only informative but will help you make the most of this theme!
The image to the left is the Noah Webster House, built about 1748. It is the restored birthplace and childhood home of the great lexicographer, Noah Webster. The house was once part of a 120-acre farm.
This is a late 18th century tobacco farm in Virginia. It is the Claude Moore Colonial Farm of Turkey Run a living history museum that portrays what low income family life was in Colonial Days…
COLONIAL AMERICA: 1607 to 1776
Colonial America generally refers to that period of history prior to the American Revolution dating back to the establishment of North American settlements controlled by various European powers including France, Spain, the Netherlands, and in particular, Great Britain. It commenced in 1607, and ended with the onset of the American Revolution and the subsequent founding of an independent United States of America.
THE FIRST PERMANENT SETTLEMENT in North America was the British colony at Jamestown, in 1607, in what is now the State of Virginia. Although of questionable success, Jamestown set the stage for other chartered incursions into the New World, including the Pilgrims of Mayflower fame who, seeking refuge from religious persecution, soon followed in 1620, settling near Plymouth Rock in coastal Massachusetts.
In rapid succession, prosperous British colonies sprang up along the Atlantic coast, from Maine in the north, to Georgia in the south. Swedish and Dutch colonies also took shape in and around New Amsterdam in what is now New York State, while France and Spain continued to slowly expand their vast territories to the north, south, and west.
As more and more people arrived in the New World, territorial disputes invariably arose between the competing European powers, as well as with the several Native American tribes whose homelands the Europeans had co-opted as their own. Colonial America history was characterized by continuous expansion, hardship and privation, prosperity, and internecine warfare. By the end of this period, the two continental powers with the largest holdings in eastern North America were Great Britain and France.
These two nations fought for control of eastern North America in what is known as the French and Indian War (1754-1763). The British won the war and gained control of the valuable French settlements in Canada, as well as retaining control of their own highly productive colonies which stretched southward from Canada along the eastern seacoast. Those thirteen colonies included Massachusetts, New Hampshire, Connecticut, Rhode Island, New York, New Jersey, Pennsylvania, Maryland, Delaware, Virginia, North Carolina, South Carolina, and Georgia, and would soon band together in a war of independence from Great Britain.
What Are the Thirteen Colonies
The thirteen semi-autonomous colonies can be grouped into three general regions: New England, the Middle Colonies, and the Southern Colonies. Life within each region tended to evolve from the opportunities the land itself presented.
THE NEW ENGLAND COLONIES…
consisted largely of farming and fishing communities. Dietary staples such as corn and wheat grew in abundance, and much of it was shipped abroad. Because of its proximity to the Atlantic Ocean and the abundance of natural harbors and interior waterways, New England evolved into the hub of transport and commerce between colonial America and Europe, and Boston became its predominant port.
THE MIDDLE COLONIES…
were partly agrarian and, partly industrial. Wheat, barley, and other long grains flourished on rolling farmlands of Pennsylvania and New York. Foundries in Maryland produced pig-iron, while factories in Pennsylvania produced paper and textiles. Raw materials and bulk products were shipped overseas and commercial trade was plentiful.
THE SOUTHERN COLONIES…
were almost entirely devoted to large scale labor-intensive agricultural production, whose characteristic feature became the development of plantations, large privately-owned plots of land comprised of farmlands dedicated almost exclusively to cash crops in high demand, including tobacco, rice, indigo, and cotton. Plantations served as agricultural factories whose production demands induced landlords to maximize profitability in high-risk ventures. Thus, the tragic trade in human slavery — long a staple of the British Empire — was introduced in 1639, expanding rapidly throughout the south alongside the geometric rise of the wealthy land barons, whose power and influence would extend across the greater part of the next two centuries.
EDUCATION
Many colonial New Englanders believed that religion and in particular, Christianity in its various manifestations should be an integral part of every child’s education. To that end, parents taught their children to read the Bible, and to endeavor to adhere to their interpretations of its teachings.
However, New England villages established the first public grammar schools in which young men were taught Latin, mathematics, language composition, and other subjects needed to further their education toward a profession, or to secure a useful trade. The emphasis was largely upon self-reliance, pragmatism, industry, and the adherence to Christian theology. Higher education was private and reserved for the wealthy few who could afford to send their young men abroad to study.
By contrast, although many young women learned to read, initially they were not allowed to attend grammar schools, but were instead encouraged toward obedience, chastity, and domesticity.
SIMPLE ONE ROOM SCHOOL HOUSES were the norm for most grammar schools which were often located in small villages, or at key crossroads in the surrounding countryside. Heating came from large fireplaces, and later, cast iron stoves.
TEACHERS often had few tools and little formal training.
Because teachers were not well trained, students spent most of their time reciting and memorizing lessons. All grades were taught in one room, at one time, by one teacher, sometimes with as many as seventy students in a single classroom. Primers were generally shared among students. Chalk and practice slates were also shared. Students wrote with quill pens in copybooks that were sometimes fashioned at home. The first schoolhouses did not have desks or chairs. Rather, students sat on chairs or backless benches, or in their absence, on the floor. Smaller, younger students sat in the front, while older, taller students sat further back.
Connecticut established the first six-month school year. Boys generally attended school only during the winter months when there were fewer farm chores for them to do, while girls and younger children attended school during the summer. Students ranged in age from four to twenty years. Additionally, as children were still considered to be essential contributors to their family’s economic welfare, if their parents needed them to work at home, they did not attend school, and most were required to do daily chores before and after the school day.
HOME LIFE
The center of family activity colonial homes was the kitchen. With its large fireplace and hearth, it was the busiest and warmest room in the house.
COOKING
Most cooking utensils were made of cast iron. Large kettles could be very heavy. Skillets were sometimes equipped with legs so they could be placed directly over the fire. Some colonial kitchens had wood-fired ovens. To place baked goods in the oven a long flat shovel called a ‘peel’ was used.
This is a typical fireplace from the colonial settlement at Jamestown. What you’re seeing in this picture is half of the entire cottage/house.
The earliest fireplaces were simply places where you set the fire. There might be an opening in the wall or roof to let out the smoke. Later a smoke hood would be added to channel the smoke up and away from the room, and eventually the fire place evolved into what we think of now as a fireplace.
Women often began cooking the daily meals before dawn as they could take hours to prepare. They built wood fires in the fireplace, carried water indoors using wooden buckets, picked vegetables from their gardens, milked cows, gathered eggs, or hung and salted fresh meat to cure. Large breakfasts were served only after the other family members had completed their morning chores. Generally speaking, the day’s main meal was served at mid-afternoon.
When not attending to faming duties, men trapped, fished, and hunted wild game. Meat was generally boiled, seared over an open flame, or simmered in stews. Colonial families also owned domesticated animals to provide their households with milk and eggs, and grew their own fruits, vegetables, and grains. They also learned how to use herbs such as thyme, sage, marjoram, and dill that grew in the surrounding wilds. Natural fruits and berries were also harvested during their appropriate seasons. Waste was considered a sin.
FOOD SOURCES
American colonists got their food from several places.
People who lived on the Atlantic coast often caught fished and hunted whales. They sold fish and whale blubber at fish markets, which were usually down by the docks. Eventually, whale hunting became a major industry along the east coast. Gigantic sperm whales were particularly prized for their reserves of natural oils which were used lubricants in developing industries. Prior to the development of refined petroleum in the 19th century, whale oil was burned in lamps worldwide because of its ability to produce clean, bright, white light.
Unlike the Southern Colonies where the climate and terrain favored the development of large plantations dedicated to the production of a single cash crop, New England colonists and farmers from the Middle Colonies grew a variety of crops on smaller parcels of land, Wheat, barley, corn, rice, and tobacco grew in abundance and provided a basis for barter and trade between the Colonies and Europe. The preponderance of navigable inland waterways facilitated this trade.
TYPES OF FOOD
Colonists loved sweets and desserts.
Pies, cobblers, and cakes were commonly served at the end of a meal. Apple Tansey was a favorite. This sugary dessert was made from apples covered with a sauce made of beaten eggs, cream, nutmeg, and sugar. Maple syrup was used to sweeten foods, especially popped corn. Various teas were made from native roots and leaves. Cider was made from peaches or apples and fomented into a popular alcoholic beverage. The colonists also drank locally distilled beers and ales.
Winter famine was greatly feared, and unfortunately, was all too common, especially if one was unprepared for the long, harsh winters typical from the mid-Atlantic region upward into Canada. Therefore, it was very important that food stocks be prepared to last through the winter months. Meats were pickled, salted, or slow smoked for storage. Apples, peaches, and pumpkins were peeled, sliced and hung to dry. Canning in tins or glass jars, or pickling in brine-filled wooden casks, were common methods for long term food storage. Roots, tubers, potatoes, and other staples were stored in underground cellars, far below the killing frost line.
Colonial Clothing
Colonists made much of their own clothing, using wool, linen, and tanned animal hides. The colonists grew flax to make linen thread, and raised sheep for wool production. Clothing was generally limited to two sets, one for every day, and one for Sunday. Every person in the family worked on clothing. Children would gather berries and roots to make dyes to color the thread. Colonists liked brightly colored clothing. Yellow, red, purple, and blue were their favorite colors. Thread was sometimes dyed with poke berries and used to make brilliant red capes for woman and girls.
Women and young girls spun woolen thread at foot-peddled spinning wheels. Girls were encouraged to learn how to knit stockings, caps, and warm winter gear. Boys and men also produced hand-woven fabrics on household looms from which woman and girls would sew clothing for an entire family.
CLOTHING AND THE WORD ‘UNDRESS’… ‘Undress’ in the 18th century referred to the everyday, utilitarian working clothes. Much of the following clothing is of for ‘undress’ and not more formal.
MEN wore long stockings and knee-length pants called breeches, linen blouses, and long buttoned waistcoats similar to today’s vests, and topped by a long woolen coat, split at its back to accommodate riding.
They sometime wore WIGS made of human hair, goat hair, or horse hair. Wigs were made to fit tightly on the head and prized for the quality of their materials as well as their size. One’s social status might be determined upon the basis of whether one were a wealthy “big wig” a term that endures even today or considered to be poor due to the condition of one’s wig made of ordinary powdered thread.
UP TO THE AGE OF FIVE, YOUNG BOYS were often dressed identically to young girls in loose-fitting gowns. After the age of five, boys were dressed in attire similar to their father’s.
A philosophical movement toward less restrictive dress for children occurred during the second half of the eighteenth century.
At the same age, YOUNG GIRLS were previously encouraged to dress more like grown women. Around the mid-eighteenth century, the concept of dressing children to resemble “little adults” began to give way to clothing designed specifically for their needs. By 1760, for dress wear, instead of wearing the tight dresses styled similar to those of grown women, little girls and boys who were not yet breeched were attired in more comfortable white cotton or linen frocks that had drawstrings tied at the back, low necklines, and often were decorated with wide, colorful sashes around the waist.
Late in the 1700s, boys began to wear suits with long trousers rather than knee breeches, a fashion that won favor about twenty years before it was accepted by adult men for dress wear. Throughout the century, the time when a little boy went from skirts to pants, which was called, “breeching,” occurred anytime from age three to seven and was symbolic of his first step toward becoming a “little man.”
MOB CAP
A mob cap was undress (casual) headwear; becoming popular in the 1730s and worn in some form into the next century. It had a puffed crown placed high on the back of the head, a deep flat border surrounding the face, and side pieces carried down like short lappets, which could be left loose, pinned, or tied under the chin. The flat border usually was frilled or had lace.
SHIFT
A shift was the undermost garment worn by children and women. It served the same purpose as the man’s shirt. Made from various qualities of white linen, it had either a drawstring or plain neck, as well as drawstrings or cuffs at the elbows. It could be plain or lace trimmed
In order to enhance their feminine curves, wealthy women sometimes wore corsets into which were sewn whalebone stays. These stiffened undergarments were then tightly laced to draw in the waistline. Working-class women did not wear these undergarments because they made everyday labors impossible.
BABIES of both genders sometimes wore a small soft pillow tied with ribbon around their middle to keep prevent injuries from falls. These pillows were referred to as ‘pudding’.
SHOES.
The shoe image is of dress shoes-not for utalitarian undress.
Shoes were made of silk fabrics, worsteds, or leathers. Depending on currentfashions, they may or may not have had elevated heels. They would fasten by buckles, clasps or, if very utilitarian they might have ties. The everyday footwear was made to fit either foot; there was no right or left, and the shoes offered little or no support.
ARE YOU HAVING A COLONIAL THEME IN YOUR SCHOOL, CLASSROOM OR AFTER SCHOOL PROGRAM?
Have children come in Colonial Attire…the image to the right is made with clothing that children of this century put together on their own.
COLONIAL DRESS
All costumes can be made inexpensively from clothing you have at home. Below are some guidelines for your basic costume. If you choose to dress as a trades person, you can add additional garments such as aprons, scarves, or hats.
Costume Ideas for Dressing as a Colonial Person:
Shirt
Shift
Breeches
Apron
Kerchief
Make a bonnet
Boys
- Boys should wear breeches (pants) and a loose fitting white button-down shirt. Breeches can be made from old pants cut at the knee and folded into a cuff. Baseball pants are another alternative. (When my son was younger and needed to dress for a Colonial Theme-we simply took dark sweat pant with an elastic band at the ankle. They were easily pulled up under the knee. Barb)
- White soccer socks should meet the cuff of the breeches.
- A vest was also commonly worn over the shirt.
- Boys should also wear shoes and not sneakers to complete their costumes.
Girls
- Girls should wear a long skirt and blouse or a dress that is made from plain or simply printed fabric.
- Girls can also wear aprons and a white mob cap depending on their trade.
- Girls should also wear shoes and not sneakers to complete their costume.
COMMON AREAS
Although American colonists had parks in their communities, they were not like today’s parks where children frolic on manicured playgrounds. Rather, they were similar to the smaller plazas around which many European cities developed.
In colonial America, these centralized parks were referred to as ‘the commons’, because they were held in common by the members of the local community. Unlike their cobble-stoned European counterpart, the common areas of colonial America were comprised of large grassy knolls, often containing a source of natural water.
Cattle often grazed in the common. The common also contained the village meetinghouse, or town hall. Commons were especially popular in the New England colonies. In fact, Boston, Massachusetts still has its original old common at the heart of its modern metropolis.
More great pages: