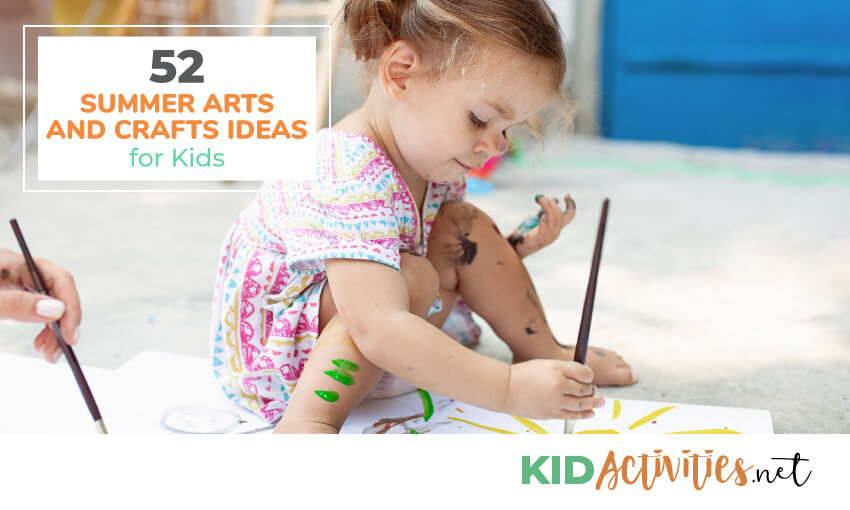
This guide shares dozens of fun summer arts and crafts for preschoolers and children! These warm weather activities for kids range from finger painting through to creating beautiful collages. There is something for kids of all ages.
Kids love Summer. The days are longer and they get to spend more time outside, enjoying the beautiful sunny weather. However, it can sometimes be difficult for parents to find enough summer activities to keep their children busy.
The answer to this problem is simple – Summer Arts and Crafts!
Having your child spend time on arts and crafts will improve their concentration and creativity. It will also keep them extremely busy, so you don’t have to constantly find new activities for them to enjoy.
This article shares many fantastic warm weather arts and crafts projects for children. They are diverse projects that will keep your kids enthralled during the warm summer days.
This article is packed with:
- Warm weather activities for preschoolers
- Warm weather activities for kids
- Outdoor crafts for kids
- Summer art ideas for teachers
- Sunny day crafts ideas
Let’s check them out!
Art craft ideas
Outdoor children painting ideas
Why not have a kids painting party this summer? Here are a few great painting activities to try out.
1. Teach kids to paint with a koosh ball
Hang a long piece of bulletin board paper on your outside fence. Place pans of paint and Koosh balls on the ground. Encourage the children to throw the Koosh balls at the paper.
This makes a great design and is a lot of fun. If possible have the children do this activity in the bathing suits so you can hose them off when they are done.
2. Outdoor painting with kool-aid
Sprinkle unsweetened Kool-Aid on a piece a paper. Have the children move a piece of ice over the Kool-Aid. Watch as the Kool-Aid turns to liquid and makes a yummy smelling picture.
3. Children’s sand box painting
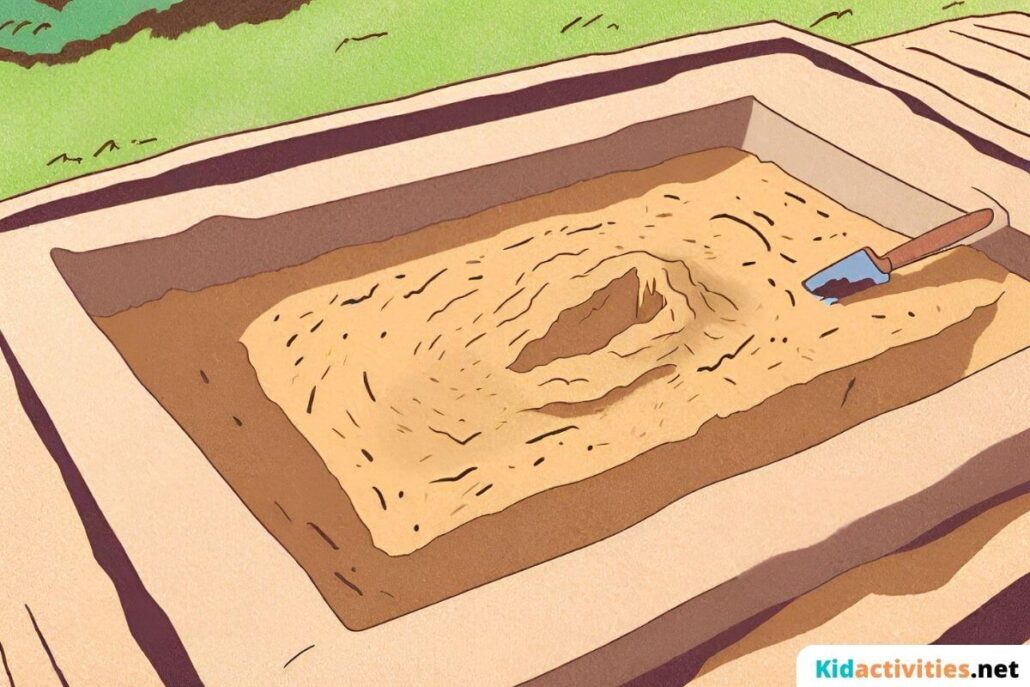
Even if you don’t have a sandbox, this sand-painting craft is guaranteed to give your kids hours of summertime fun.
You need:
Sandbox or large dishpans filled halfway with sand (fill a few pans to share)
Spray bottles filled with water
Food coloring
Small sand shovels
1. Add 20 or more drops of food coloring to spray bottles to make colored water.
2. At the sand area give children several bottles of colored water. As they spray, the sand will change color, creating a wonderful painting.
3. If the kids want to ‘paint’ a new picture, direct them to mix under the top layer with their shovels. Be sure to protect clothing from the food color!
This is one of the best warm weather activities for preschoolers.
Safety note: Most commercially sold play sand is actually powder from quarried quartz – a substance known by OSHA to cause lung disease. You can purchase safe sand from companies like SafeSand.com
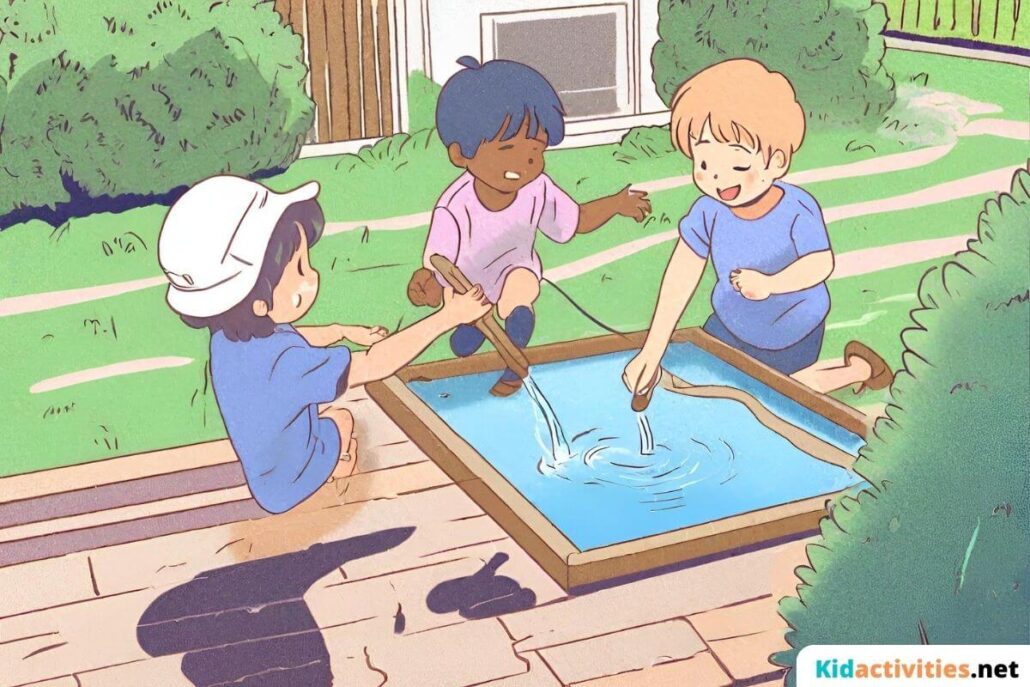
4. Colored water fence painting for kids
Hang a long piece of bulletin board paper on your outside fence. Give the children bottles of colored water and have them squirt the paper.
For young children, this is a lot of fun and a great way to see how secondary colors are made. Example: Spraying blue and yellow water on the paper make a beautiful green design.
5. Golf ball painting
Cut out a large piece of paper and put it in the bottom of a very small plastic pool. Place golf balls dipped in different paint colors on the paper. Together the children can hold the edges of the pool and roll the golf balls around. This makes a great design when you are done.
6. Outdoor painting with grass textures
Have kids paint green designs on white construction paper. While the paint is still wet-have them sprinkle on grass clippings.
7. Outdoor mural painting for kids
Take painting outdoors and transform an old white sheet into a wonderful work of art!
You need: An old solid color bed sheet, Tempera paints, Paint brushes
Squirt bottles, Sponges.
- Start by soaking an old sheet in water and then hanging it on a clothesline or drape it over a fence.
- Get out various tempera paints and applicators – sponges, paintbrushes, squirt bottles – and creating pictures or colorful designs. You can also mute and mix colors with a water-filled spray bottle.
- Whenever you don’t like what you see, just hose down the canvas and start over.
- For art on a smaller scale, try the same techniques with a pillowcase or an old T-shirt.
You can also do this painting a long sheet of role paper attached to a fence or on the ground. (See below)
8. Koosh ball, fly swatter and ‘whatever’ children painting
Hang a long piece of bulletin board paper on your outside fence. Place pans of paint and Koosh balls, blown up balloons and fly swatters on the ground. (Good idea to place all on a plastic drop cloth of some type clean up time is simply picking up the plastic cloth and throwing it away!)
Encourage the children to throw, swat and stamp the paper! If possible have the children do this activity in the bathing suits so you can hose them off when they are done.
This sample is from an outside summer birthday party – it’s also great fun if there is a toddler or two visiting. One two year old – spent most of 2 hours walking back and forth dipping a balloon bottom in the paint and stamping!
9. Kids outdoor water painting
On a hot summer day give your children outdoor paint brushes and buckets of water. Let them paint the sidewalk, walls, etc.
10. Sock splash painting (super fun outdoor painting for children)
Materials:
| Box | Paper |
| Dried beans | Old socks |
| Paint |
Make “bean bags” out of the socks and dried beans. Put the paper in the bottom on the box; dip your sock in the paint and hold above the box, then drop! Splat! The Thinner paint will make a bigger splash
The box acts as a splash guard, no mess!
11. Making prints with fruits & vegetables
Try corn, strawberries, pears, cucumbers, radishes, oranges, carrots, beans, lemon, cauliflower, peppers, avocado, mushroom, apples, shapes carved in a potato
Paper towels for drying fruit and vegetables
Newspapers, cloth or paper for printing.
Cut fruits and vegetables. Dip them in paint and print. That’s it!
12. Bubble gum mart for kids
Is this gross? It’s fun to throw in the unexpected, this could certainly be classified as that!
- Give each participant a piece of bubble gum to chew, a toothpick and an index card.
- Allow them 10 minutes to chew the gum, place their gum on index card and then design something on the index card using only the toothpick as a tool (No Hands – but still have kids wash their hands thoroughly before they start!)
- The person with the best and most creative design is the winner. If you have quite a few players you can have several categories of winners, such as “Most ingenious”, “Most creative,” “Longest”, “Tallest”, and of course the “What is that?” Award
- Need it be added-no more putting it back it the mouth! LOL
13. Outdoor painting with blueberries
Good for any summer day-but great way to celebrate ‘National Blueberry Month’ during July!
- Give children blueberries to look at, touch, smell, and taste. (Good for the young)
- After the children have observed the blueberries add a little water to them and cook them in the microwave for one minute.
- Have children mush them up. Use the blueberry juice to paint a beautiful blue blueberry picture.
Blueberries are also very healthy, so the children can nibble on a few as they paint.
14. Trace my shadow art project
On a sunny day take some chalk outside and have children trace each others and your shadow. When the outline is complete fill the shadow in with facial features and whatever you are wearing.
You can also have the children trace the shadow of their toys and other objects, as this video shows.
15. Squiggle sand & glue art designs for kids
- Give each child a piece of wax paper.
- Have them make squiggles and different designs with the glue. Then sprinkle the glue with colors sand.
- After the glue has dried (overnight) peel the design off of the waxed paper.
- Hang the creations around the room.
16. A piece of beach
Materials:
- Sandbox Sand
- White Glue
- Small Shells.
- Mix sand and glue until sand is syrupy.
- Pour the mixture into a bowl, plate, cup, etc.
- Push shells into the mixture to form a sculpture.
- Let this dry undisturbed; it may take a couple of days.
- When dry–the glue converts the sand to a plaster.
This guide goes into even more detail.
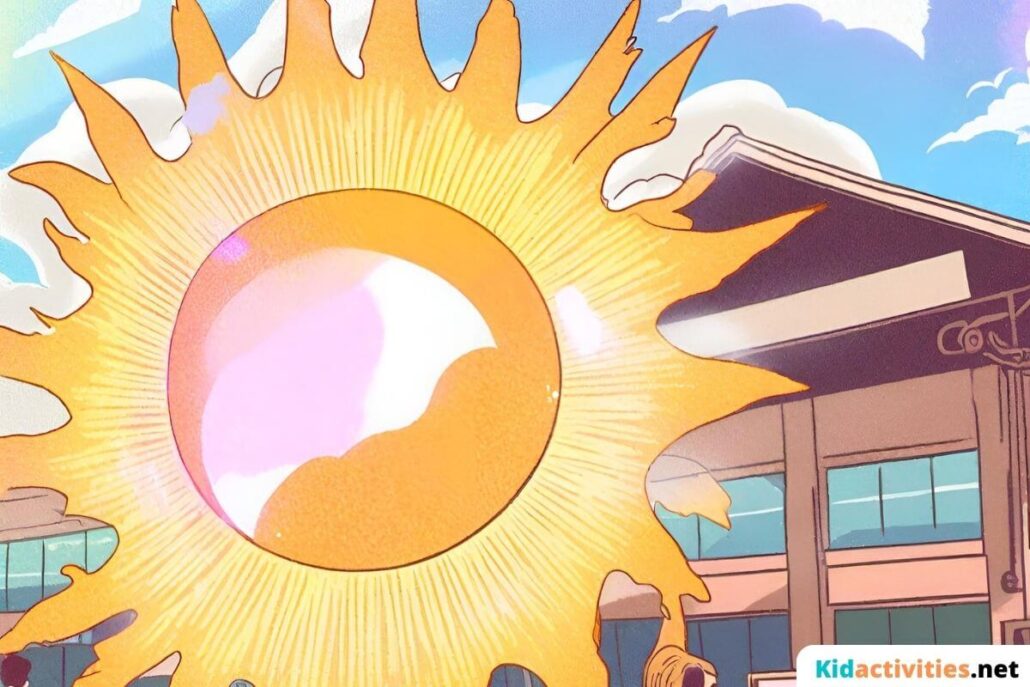
17. Cotton ball clouds
Have children take a large blue piece of construction paper and draw, color, paint a landscape or summer scene. Glue on clumps of white fluffy cotton balls to create cotton clouds in any shape desired. Add a bright shining sun in the sky!
18. Children’s summer collage
Collect different magazines with pictures related to summer. Have the children cut out pictures of what they like about summer. Have them glue their pictures to a bright piece and then tell you what their favorite things about summer are. If they can’t write – write what they say under the collage.
19. Children’s sand art
- Give each child a piece of construction paper, and have them draw a picture or write words with the glue. Make sure that they do not put gobs of glue in any one spot.
- Before the glue dries, with the hand, pour/put sand onto the glue. Let it sit for a few minutes and then shake off the excess sand.
- It should dry flat for about a half an hour depending on how much glue was used.
TIP: This can also be done with colored sand – but for those on a budget – regular sand works just as well.
20. Children’s craft activities – creating natural dyes
You can get color by collecting items from nature, such as grasses, leaves, and berries!
1. Cut a 7″ x 14″ piece of muslin.
2. Place the items on one half of the fabric, then fold the other half over.
3. Have the children pound the items through the muslin with a small hammer or mallet.
This is easy arts and crafts for children that makes a wonderful hanging.
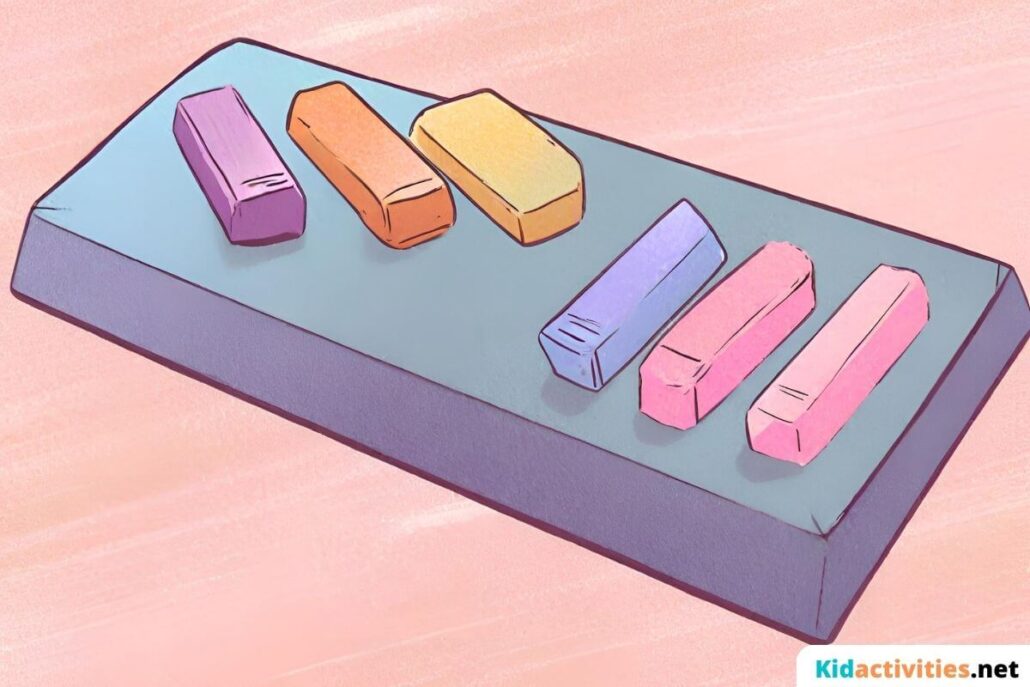
21. Easy summer art project: melted crayon jars
What you need:
- Jar
- Old Crayons in bright colors
- Scissors
- Aluminum foil
- Ribbon
What you do:
- Choose two or three different crayons into small pieces. If you use a large jar, you will need more crayons than if your jar is small. (Three crayons will cover a baby food jar.)
- Tear off a square piece of aluminum foil. Place the foil outside in hot direct sunlight. Sprinkle the crayons on the foil.
- The crayons will melt quickly, so be ready with your jar. Do not wait until the crayons are completely melted or they will blend together to make a muddy color.
- When they have melted, but still have some lumps in them, roll the jar around in the melted crayons to coat it. When you are happy with the design on the jar, take it to a cool place. The crayon will harden and set almost immediately.
- Tie a bow around the neck of the jar
Here are a few melted crayon art projects for inspiration!
22. Melted crayon art (no hot sun)
- Place crayons on foil in 350 oven- not very long-watch them. They melt fairly quickly.
- Move foil off the hot cookie sheet and down to newspaper on the floor and have child roll the jar in it. You might want your child to wear some old gloves to protect fingers. The crayon gets hotter doing it this way.
- You can also try having child sprinkle crayon bits over inverted jar bottom and place both in oven. It will run down the sides nicely.
- This technique looks great on rocks, too. It coats them in a rainbow of wax. Hope these will work for you!
23. Side walk paint kid’s art project
A fun alternative to sidewalk chalk.
- You will need equal portions of water and corn starch. Mix well.
- Add a drop of your favorite food coloring color!
- Paint this wonderful concoction on the sidewalk. Give it a few minutes to dry and you’ll have a wonderful work of ART!
This article has a few examples of sidewalk chalk paint artworks.
24. Easy outdoor kid’s art: nature collage
1. Collect a variety of nature items: Sea shells, dried wheat, grasses, flowers, sand, rocks, pebbles, bark, twigs, seeds, and small branches.
2. Put these out with glue and sanitized foam trays for the children to create.
25. Froot loop sand layer art
Need a Box of Froot Loops Cereal.
- Have children sort the colors.
- Put the different colors into baggies and crush them till powdery.
- Put individual layers in a baby food jar, or clear plastic or glass bottle, as you would colored sand.
TIP: This is good for younger children without the hazard of sand. Older kids may also like as a novelty
26. Outdoor art in the sun with sun clay.
Materials:
- Cooking pot
- Mixing bowl
- Large mixing spoon Measuring cup
- Plastic bag
- plastic trays or paper plates
- 2/3 cup water
- 2 cups salt
- 1/2 cup water
- 1 cup cornstarch
1. To prepare sun clay, place the salt in the pot and add 2/3 cup water.
2. Stir and cook over medium heat for 4-5 minutes, until salt is dissolved. Remove from heat.
3. Gradually mix 1/2 cup water with cornstarch in a separate container. Stir until smooth, then add to the salt mixture.
4. Return to low heat and, while stirring, cook until smooth. The beauty of this clay is that when it hardens in the sun, it doesn’t crumble like play dough.
5. Store in a sealed plastic bag.
27. Activity for above sun clay
If possible, take this project outside. Provide children with a plastic tray or paper plate to work on. Give each child a glob of clay to model. Encourage children to search nearby for natural objects they can use to decorate their sun sculptures. Place the finished products in the sun. Predict how long it will take for the sculptures to dry.
28. Children’s sun print pictures
Sun prints made with special sun print paper and supples can be beautiful but you can also make them using construction paper as the second red and purple photo indicates.
29. Construction paper sun prints
Taped to a sunny window
Cut shapes from paper, and spread re-stickable glue on the back, then stick them to the construction paper.
Tape the paper to a sunny window, facing out, and leave for at least a week (longer for higher contrast), then peel off cutouts.
You can also lay three-dimensional objects (try rickrack, toothpicks, or buttons) flat on a piece of construction paper in a sunny place where they will not be disturbed.
30. Outdoor sun prints with construction paper
- Have children place colored construction paper out in the sun, then have them put various shaped objects on the paper; such as, silverware, flowers, keys, a toothbrush, a box, etc.
- Leave everything out in the sun until the colored paper fades.
When the objects are removed, you should find prints of colored shapes on the paper. Take the paper inside, so it won’t fade more.
31. Kid’s sun prints using paper taped to window
Make leaf print art
Materials: Colored construction paper, leaves gathered from yard, glue stick, masking tape, picture frames.
1. Dab a bit of glue onto the back of a leaf, and attach to a piece of construction paper (we pre-trimmed ours to fit a 5″7″ frame).
2. Tape the paper to a sunny window, with the leaf facing out. Leave up for three to four days, or until you notice that the paper’s color has faded. (The above directions say a week or longer I think that time estimate would be more accurate)
3. Remove from window and gently peel leaf off to reveal the print. Frame and hang.
This version from Parents Magazine, August 2005
Craft Ideas.
Having a party, celebration–or just want to make something pretty? Use one of these simple craft ideas for kids.
32. Make a lei
They aren’t only for a Hawaiian theme.
a. Lei idea
Lay out pre-cut long pieces of string, twine, raffia, or fishing line
long-tube pasta, and plastic or fabric tropical flowers.
The kids can string together the flowers and pasta to make a fun to wear lei necklace.
b. Lei idea: star-studded leis
Need:
- Craft foam
- Sharpened pencil
- Elastic cording
- Red-and-white striped straws or drink stirrers
Time needed: About 1 Hour
1. Cut out craft foam stars and use a sharpened pencil to poke a hole in the middle of each one.
2. String them onto a length of elastic cording, alternating the stars with sections of straw or drink stirrer. Knot and wear.
33. Outdoor crafts for preschoolers: hanging twirls
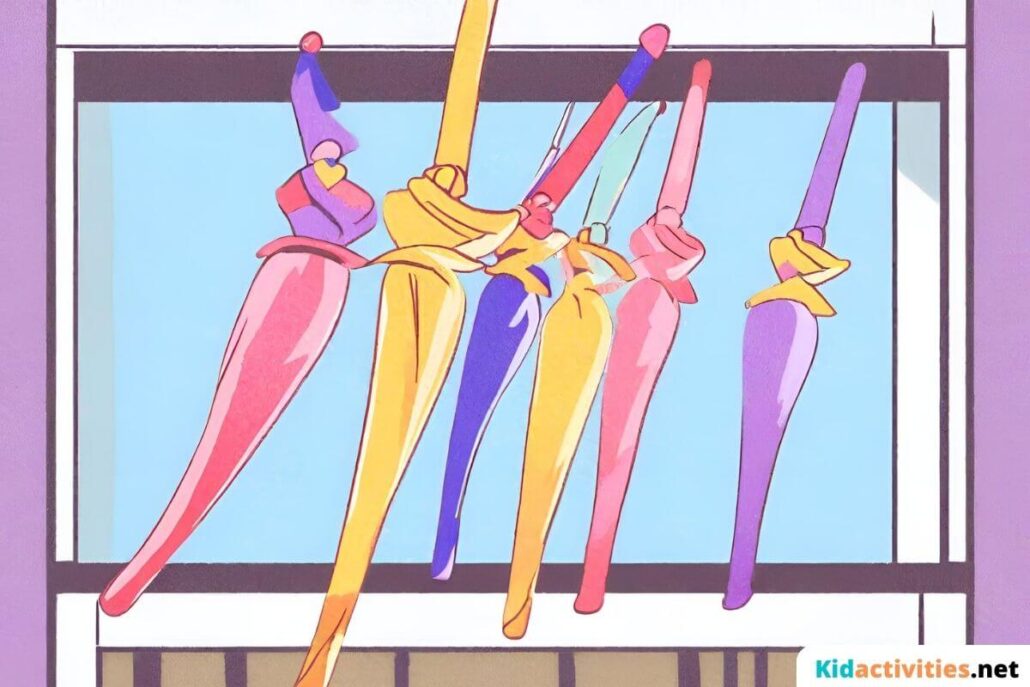
Hang an array of colorful twirlers from a window frame, tree, ceiling or front porch. (I made some and they’re really fun!) See sample photograph on this page of site.
Materials:
Plastic coffee can lids (Lids come in a variety of colors)
Marker
Scissors
String
1. To make one, use a nail to poke a hole in the center of a plastic coffee can lid.
2. With a marker, draw a spiral that starts 3/8 inch from the hole (it keeps going around itself in circular pattern) and gradually extends to the rim then cut along the line with scissors.
3. Knot an end of a piece of string, thread the other end up through the hole in the center, and the twirler is ready to hang up and spin. To spin, grasp each one at the bottom, twirl it around and around until the string is wound tight, let go and enjoy the show.
34. Crafts for kids: inchworm magne
Materials:
5 pompoms
1 wiggle eye
1 craft stick
Glue
Magnet
1. Glue the pompoms to the craft stick.
2. Glue eye to first pompom.
3. You can glue a small piece of red yarn for a mouth if you like.
4. Attach magnet to back.
35. Paper plate aquarium
- Color an underwater scene on the “eating” side of a paper plate.
- Glue goldfish crackers or cut-out pictures from coloring pages to the scene, a couple pieces of plastic plant for seaweed, and using glue and a little sand or soft dirt, make the sea floor.
- Using a second paper plate, cut a circle in the middle.
- Cut a circle of blue plastic wrap 1 inch in diameter larger than your hole in the plate.
- On the “eating” side of this plate, glue the blue plastic wrap so that it covers and overlaps the hole on the plate.
- Glue or staple both plates together with “eating” side toward the inside.
- Punch a hole in the top and string a piece of yarn through the hole to hang your aquarium from the ceiling.
Here are a few example paper plate aquariums to help you get started!
36. Make stepping stones
This is a fun outdoor craft activity for kids of all ages!
Materials:
Cake pans in a shape you would like, sand dough, paint, cooking spray, paint
1. Spray the cake pans with cooking spray – Vaseline also works.
2. Fill it with sand dough. (Sand dough recipes are below)
3. Let dry for 3 days.
4. Children can paint the stepping stones when they come out of the pan. You can also Varathane the stones to weatherproof.
Sand dough recipe #1
1 part white glue
2 parts flour
2 parts sand
2 parts water
Mix together to create a dough. You may need to add water or flour depending on the consistency.
Sand dough recipe #2
Add sand to quick set cement and follow the instructions for mixing the cement. Use this recipe when you have a mold or have created a pattern in the sand.
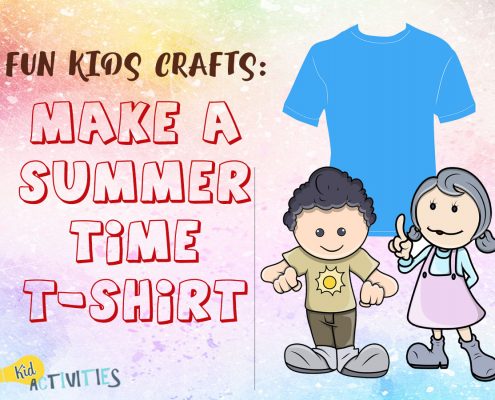
37. Fun kids crafts: Make a summertime t-shirt
Materials:
Items collected on a nature walk
Plastic dish pan
Rubber gloves
Water
Spray bottle
Bleach
A plain, bright-colored cotton t-shirt for each person
1. First gather materials to make the Summer T-Shirt. Take the kids on a nature walk. They are to find natural objects like leaves, flowers and shells of interesting shapes. The color or inner structure will not be seen, only the outline, so the goal is wide variety of silhouettes.
2. The actual “work” on the shirt needs to be outside. Bring all the items to a central, open location.
3. Lay all the shirts flat on the ground. Each person will place the objects they have found on their shirts and anchor them with small stones.
4. Fill the spray bottle with bleach. An adult wearing rubber gloves should do this. Aim the bottle at the shirts and spray each one lightly, covering the entire surface.
5. Let the shirts stand until the color begins to pale. This will not take long only one or two minutes.
6. Remove the objects from the shirts and immediately rinse them out in plain water. The outlines of the objects should be clearly visible.
7. Wash and dry the shirts according the label directions. Wear the shirts all summer long.
IDEA: Variations on the T-shirt project include using cut-out hand prints made by kids, letters and shapes such as hearts, musical notes and geometrics.
CAUTION: This project uses chemicals (bleach) and requires adult supervision. It must be done outdoors and the steps need to be performed in order as directed to avoid accidents or injury.
38. Clever craft ideas for kids – make a sun from old compact disc
Do you have some old and unused CD’s lying around? Use them as a part of this warm weather craft project for kids.
Materials:
2 old CD’s
Tacky glue
Yellow construction paper
String or yarn
Yellow sharpie marker
- Cut triangles with about a 1 ½ inch base out of yellow paper.
- Spread tacky glue onto printed side of CD. Place triangles onto the outer rim of the CD (where the base of the triangle is at the edge, but into the glue).
- Place the end of the string/yarn onto the glue about 3/4 of the way into the glue, let the rest hang out.
- Spread a little glue onto the printed side of the other CD. Now sandwich the CD’s together (printed side/glue sides together).
- Write child’s name on the CD with the yellow sharpie marker. You have a sparkling sun to hang in a sunny window!
39. Easy outdoor craft project for kids – sun catcher
- Cut the inside out of a paper plate.
- Place clear contact paper over the hole (with the covering removed.)
- Have each child stick pieces of bright tissue paper all over their contact paper.
- When the child is finished place another piece of contact paper over the tissue paper. Hang the sun catchers from the ceiling or windows.
Here are a few images of more elaborate sun catchers to give you an idea of what you can create.
40. Simple lid sun catchers
- Punch a hole at the top of different sized clear lids.
- Allow the children to spread glue over the lid and then cover it with bright tissue paper for a stunning sun catcher.
- Or, mix corn syrup and a lot of food coloring; paint the lids with this mixture and let dry for a rainbow sun catcher.
- With both of these sun catchers, thread a ribbon through the hole and hang in front of your windows.
41. Easy crafts for kids – paper plate sun
This is a simple craft made from a paper plate and a child’s hand print cutouts.
Supplies:
A paper plate
Yellow construction paper
Scissors
Glue (or a stapler)
Crayons, paint or markers
Googly eyes (optional)
1. Paint the front side of a paper plate yellow.
2. Trace child’s hand on yellow construction paper about 7 times.
3. Cut out the tracings.
4. Glue or staple the hand print tracings to the backside of the plate – the fingers are the sun’s rays.
5. Color in the sun, drawing a mouth and a nose. Either draw the eyes or glue on googly eyes.
42. Design a crayon covered-rock paper weigh
Makes a nice gift!
Need:
Zip close plastic bag, Wooden or rubber mallet , Smooth, flat rocks about the size of your fist, Aluminum foil or an old pie tin, Felt scraps,
Scissors, White glue
- Choose crayons in three or four light or bright colors. Dark crayons will make the color on the rock look muddy.
- Peel the crayons, put them in the zip-to-close bag, and seal it.
- Place the bag on a hard surface such as a floor or sidewalk. Using the mallet, pound the crayons into small pieces.
- Place the rock in the pie tin or on a sheet of aluminum foil in the hot sun. Sprinkle it with the crayon pieces.
- When the crayon pieces have melted, but before they reach the point that they run off the rock, take the rock out of the sun to cool.
- The crayon will quickly harden and form a colorful and waxy coat over the rock.
- Cut a piece of felt to glue to the bottom of the rock to keep it from scratching the table.
The rock was made by a four year old boy; it was colored after being in the oven for about ten minutes. With this method as Deneal states, place the rock on a sheet of foil (with a hot pad or towel under the foil) before decorating with crayons. The hotter the rock, the more runny the wax will be. (Use supervision with this method.)
43. Basic basket craft for kids
For each child, tie a long piece of yarn to a plastic berry basket. Have children weave the yarn in and out of the basket holes. If desired, they can also weave in item such as ribbon pieces, pipe cleaners or twine.
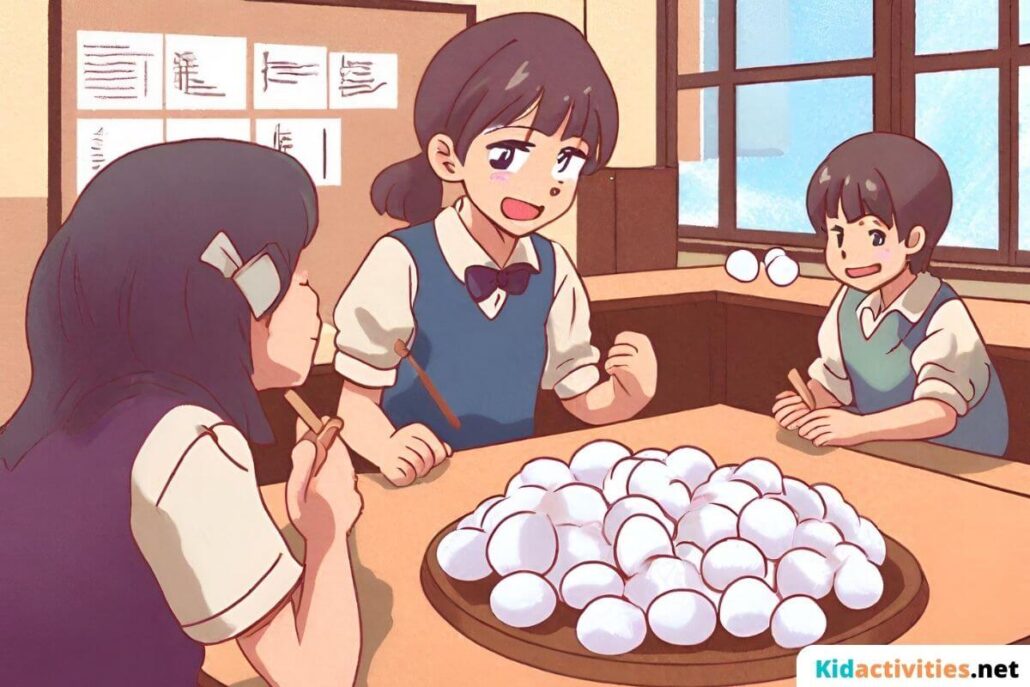
44. Marble bead necklace
Materials:
No-bake modeling clay (Crayola Model Magic Clay good): Red, yellow, blue
Wooden skewers
Clear crafting lace
1. Pinch off small pieces of modeling clay, one pinch from each color. Start with red and yellow and knead the together long enough for them to form a marbled effect.
2. Once you have the desired effect, roll the clay in your hands into a ball.
3. Slide the clay ball on to a wooden skewer, twisting as you go to create the hole in the bead.
4. Repeat this process for as many beads and as many color combinations as you like.
5. Let the beads dry on the skewer; be sure that they are spaced enough apart so that they are not touching each other.
6. Remove from skewer when dry, about 3-4 hours, and thread onto crafting lace. Tie and wear!
Extension Idea:
These beads make cute key chains as well, key chains are available at your local craft supply store.
45. Craft idea for preschoolers – ocean in a bottle
Materials: A clean, empty two-liter plastic bottle with a cap, clear vegetable oil, water, a funnel, blue food coloring, shells and sea creatures (available from craft stores- be sure to use lightweight items that float), one teaspoon of glitter, white craft glue and a hot glue gun (to be used ONLY by staff and supervised by staff at all times).
For one “Ocean in a Bottle”
- Fill bottle halfway with water.
- Add a few drops of blue food coloring and swirl around to mix.
- Add glitter and sea creatures/shells and then fill bottle the rest of the way with vegetable oil using a funnel.
- Make sure that cap and rim are dry and then apply white glue around the rim and seal cap.
- Use a layer of hot glue around the outside edge of the cap for additional protection from leakage.
- Turn the bottle on its side to create a wave in this ocean habitat! From Kids domain website.
46. Ocean treasure in a bottle
Ocean Treasure” – add coins and beads!
TIP: If you have trouble getting the entire label off – you may want to place a label over it writing the “children’s’ names” and “Ocean in a Bottle”.
47. Clever outdoor craft idea – a sit-a-pon for gardening or camping
Remember making these when you were in Brownies or Girl Scouts? Children can make them for family members to kneel on during summer gardening! (Good for Camping too!) Also great for your outdoor ‘Circle Time”. Need:
- 1 thick magazine or catalog.
- Old plastic coated tablecloth
- Large sewing needle
1. Fold your tablecloth in half. Place your magazine or catalog on the tablecloth. You’ll be cutting out 2 squares from this. Cut out a square about 1 1/2-2 inches wider than the magazine. You don’t want too much of an edge because then the magazine will slid around too much. The plastic part of the tablecloth will be the outside covering.
2. Take the 2 plastic squares and the one magazine and make a “sandwich ” putting the magazine in the middle. You can use large straight pins to hold all the “sandwich” pieces in place. Once you have done this, using the hole punch, make openings equally spaced all around the perimeter of the “sandwich “.
3. Thread the sewing needle with the chosen yarn. Make a knot and start sewing through the holes. This will keep the “sandwich” together. After going all away around the perimeter of the rectangle end with a knot.
48. Make a parachute (exciting craft ideas for kids)
1. Cut a piece of tissue paper or garbage bag into a square, about 12 to 14 inches . Decorate the paper or bag with paint and markers. Draw your favorite design or print your name on it.
2. Tape the four corners with masking tape. Hole punch each corner.
3. Cut four pieces of dental floss or thread of equal amounts about 15 to 17 inches. Attach to the four corners and allow the string to hang down.
4. Tie the loose threads together at the bottom leaving approximately 3 1/2 inches to tie your object.
5. Tie a light toy to the parachute. You can use farm animals, dinosaurs or toy soldiers that are available in bulk at discount stores. The heavier the object the faster it drops to the ground. Experiment with the size of your parachute and the object.
6. Throw the parachute in the air and watch a picturesque landing.
49. Make a musical tree
(Great for Summer camp, Day camp, Home or Family Care!)
Here is a fun summer activity. Brainstorm with children things to hang from a tree in the yard that will make sounds when the wind blows.
Suggestions:
Metal cans
Pie plates
Plastic bottles
Jar lids
Metal utensils
Wooden spoons
Etc.
Set out some yarn or string for children to use to hang their objects. If you don’t have a tree, you could use a sturdy object outside. Love this one!
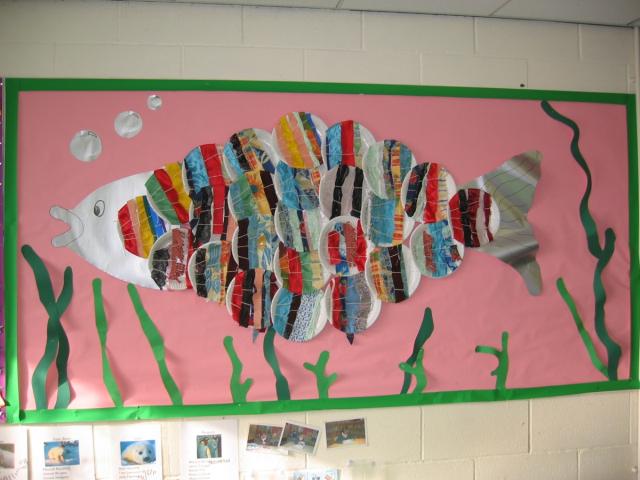
50. Fish weaving display wall
Have children weave strips of fabric, ribbon or yarn on paper plates. Joining the plates together to make the scales of a fish!
51. Liana vine wall art
Make a rainforest liana vine to decorate a room. (Wonderful for summer!) This simple-to-make string makes a great room decoration. It represents a rainforest vine full of leaves, flowers, butterflies, caterpillars, snakes, lizards, and other life. You can drape the colorful string around the classroom, from the ceiling, or over the windows. (Liana is a woody, climbing vine that grows on tree trunks in order to reach sunlight in the rainforest. Rattan, used for making wicker furniture, is made from liana vines.)
Supplies needed:
- Construction paper (many colors)
Crayons or markers
Scissors
Glue, tape, or staples
A long piece of green or brown yarn or string
1. Make some template for the kids to trace.
Example: When you make leaves – make sure to draw a thick stem on the top (your leaf will hang from this stem, which will be folded over). 2. Cut out the leaf.
3. Draw the leaf veins if you wish.
4. Fold the leaf’s stem in half. Attach the leaf to a long string using tape, glue, or staples. Make more leaves and attach them to the string.
Make flowers, butterflies, caterpillars, snakes, and other animals for the vine. A nice way to attach butterflies to the vine is by taping (or stapling) a V-shaped pipe cleaner to the butterfly’s head (as its antennae), and then twisting the pipe cleaner to attach it to the vine.
Draw details on your flowers and animals, and attach them to the string (using tape, glue, staples or pipe cleaners).
Hang your rainforest/summer vine across the room for a colorful decoration.
Adapted from EnchantedLearning
52. Make a seaside scene inside a glass vase or bowl
Use beach sand, shells, small stones, small pieces of driftwood, twigs, the small discarded shell of a crab, etc.,
TIP: Put small glass vases or bowls on your wish list to parents and staff members! I imagine your parents have quite a few vases in their cupboards that they could donate – I get a couple every year with gifts of flowers!
For a ‘variety’ of Warm Weather Fun Ideas see this article as well
