Garden Themed Fun
Let’s talk about kids in the garden. How do you build a child’s interest in gardening? You make it fun!
These gardening activities for preschoolers will not only get your class involved but they will have lots of fun.
Put away the devices, turn off the television, and let’s start planting.
1. CONTAINER PLANTING
Deciding WHERE and WHAT to Plant…
Contain your plants. Many vegetables and flowers grow well in either indoor or outdoor pots. Once your plot or pots are chosen, help children begin researching what to plant. For speedier and more certain results, plant seedlings instead of seeds; however, children will miss out on the excitement of seeing that first sprout peeking through the soil.
- With container gardening, you control the soil and drainage, and you can avoid most garden pests. In 3- to 5-gallon pots, you can grow beans, carrots, peppers, tomatoes, corn, broccoli, cabbage, kale, leeks, and even melons.
- Pots as small as 4- to 6 inches are fine for growing peas (choose shorter peas, ones that grow to about a foot), lettuce, spinach and Swiss chard.
- Choose medium size pots for beets, eggplant and cherry tomatoes. Of course, all of your pots will need plenty of sun and water
2. MAKE A CONTAINED OUTDOOR GARDEN… in a children’s swimming pool!
Here’s a good idea if you can’t dig up a plot for a garden!
1. Get a small swimming pool and be sure to punch holes for drainage.
2. Fill with dirt—plant seeds, or small flowers, water, fertilize and watch the flowers grow!
3. The kids will love to work their “garden”
3. REAP WHAT YOU EAT!
Children often want to plant seeds leftover from fruits (peach pits, apple seeds, watermelon seeds). If your climate is conducive and you have space, try planting some peach pits in a corner of the yard. In about three years, some tasty fruit may appear.
4. GROW SOME EDIBLE PLANTS AND ADD THEM TO YOUR COOKING WITH THE KIDS!
Be sure to ADD your ‘child-grown’ goods to… soups, salads, beverages, and desserts!
DID YOU KNOW IT’S SAFE TO EAT:
Peonies, pansies, nasturtiums, dandelions, daylilies, squash flowers, elderflowers, carnations, violets, marigolds, and sunflowers?
DO NOT EAT:
Wisteria, holly, bird of paradise, hydrangea, oleander, poinsettia or philodendron.
Source: parenthood.com
5. GROWING POPCORN IN A BAGGIE
Instructions: Take a plastic zip-loc baggie, put cotton balls in it and saturate cotton balls with water. Put popcorn kernels into the bag, seal it and tape to a window. Add water as needed and watch the plants grow. Transfer to potting soil later. (It doesn’t take much to get a popcorn kernel going!
My grandson had a kernal laying on its side on the sink–in just a drop of water. In a couple of days, it was sprouting a small leaf and stem! (Barb)
6. MAKE A POTATO HEAD PLANT
1. Cut off both ends of a potato.
2. Stand the potato upright on one of the flat cut surfaces and scoop out a hole in the other end.
3. Carve out a face on one side of the potato.
4. Have the children place two cotton balls in the potato’s scooped-out top.
5. Let them water the cotton balls and sprinkle them with grass or alfalfa seeds.
6. Place in a sunny spot and watch his hair grow.
7. MAKE A LIVE BLOOMING NECKLACE
Materials Needed:
Film Container
Cotton Balls
Yarn
Flower or Vegetable Seeds and Screw Eye Hook
Instructions: This works great with clear containers.
1. Put two-four cotton balls into the container.
2. Tuck in about a few seeds between the cotton balls and the outside of the container, so that you can see them. Large seeds work best. Peas, Cantaloupe, etc.
3. Add a few drops of water, just until cotton balls are damp, but not soaked and not enough to puddle water on bottom of container.
4. Use a screw-eye with a medium-size eye on it and screw it through the center of the lid. Put the lid on the container tightly. 5. Braid three pieces of yarn long enough to go around the child’s neck and slip over the head.
6. Thread yarn through the screw eye and tie in a circle.
Kids like to wear these necklaces and watch the seeds sprout and grow inside the container. If you time this right, you can plant them into starter pots when they get too big for the container, or outside into the garden.
8. PLANT A GARDEN TO ATTRACT BUTTERFLIES! A list of plants that attract adult butterflies:
- Aster
- Blanket Flower
- Day-lily
- Phlox
- Sunflower
- Verbena
- Black-eyed Susan
- Butterfly Bush
- Milkweed
9. PLANT A CIRCLE OF TREES… It’ll take a while to form–but will be wonderful when it does!
In the January issue of Exchange, Rusty Keeler contributed the article, “A Spring Playscape Project: Building a Tree Circle”, which he introduces with… “If you are dreaming of adding nature to your yard, this project may be perfect for you. The Tree Circle is a green gathering area for children made by planting trees in a circle.
- For children… the Tree Circle becomes a magical place for dramatic play, quiet retreat, or lively nature exploration.
- For teachers and parents… it becomes a shady grove for snacks and stories.
- The trees create a sweet spot that changes during the seasons and grows over time. A beautiful addition to a child’s life — and yours too!” You can read the instructions of the tree circle in its entirety. Click here
10. PLANT A RAINBOW
You can grow a blooming rainbow by planting curved rows of different-colored flowers. For the best effect, use plants that have similar heights.
11. GROW THINGS (Horticulture)
- Grow different types of beans in wet cotton and plastic bags; tape the baggies to a window and some in a closet. Observe and photograph (or draw) sprouting once a week. Discuss differences in growth patterns and what plants need to grow. Measure and graph plant heights.
- Plant a garden and eat harvested vegetables.
12. GROW GREEN BEANS
Have each child plant their own green beans. It’s a great way to introduce children to gardening and the connection between food and the earth.
You need…bean seeds, small garden pot (3 inch across) some soil and water. You will also need a place to put the pot where it will get 4-6 hours of sunlight.
Fill the pot with soil; make a small hole using the little finger about 1/4 inch deep–put in the bean– cover over– water. Place the pot in a sunny spot and watch it grow. Be sure the planter has drainage and be sure to place a saucer to catch the excess water… If children are younger, end the activity with reading JACK AND THE BEANSTALK!
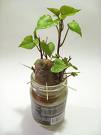 13. SWEET POTATO VINE #1
Need: One healthy sweet potato; 2-litre, clear soda bottle; three toothpicks or wooden skewers, water, clean stones or gravel.
Easy Instructions:
1. Cut the top off your bottle (start cut with a sharp knife, then use scissors).
2. Place stones or gravel at the bottom of the bottle.
3. Suspend your potato, narrow end down, into the bottle. Use toothpicks, punched into potato and resting on sides of bottle, to hold in place.
4. Fill bottle with water so that at least half of your potato is submerged.
5. Your sweet potato vine should show new roots within a week or two. Leafy purple sprouts will appear shortly after. Use a magnifying glass to see tiny root hairs and to examine little sprouts. Ask students to PREDICT what will happen next.
TIP: A sweet potato purchased from a natural foods store or farmers’ market may sprout sooner than one from a supermarket–because it’s less likely to have been sprayed with a sprout inhibitor.
EXTENSION IDEA:
Before you prepare your experiment, ASK students what plants eat. The general answer to this question is “nutrients collected from soil by roots.” But what about plants are grown in water? Students may guess that there are nutrients in what appears to be pure, clear water. Are there enough to support a whole, big plant?
WHAT IS YOUR VINE EATING?
A sweet potato is a root tuber, a fleshy root that stores food for a plant and produces adventitious shoots or shoots growing from unusual positions–in this case, out of the sides of the root.
What’s happening to the potato, itself? Your vine will continue to grow for months if you are careful to replenish water and/or change it when your bottle becomes cloudy.
You may wish to plant your sweet potato outdoors in the spring, after the danger of frost. It may not survive but, on the other hand, you may find a small crop of sweet potatoes in the fall. Dig up the plant and use one of the new potatoes to grow another vine.
14. SWEET POTATO VINE #2
1. Using four toothpicks have children suspend the vegetable on the rim of a jar or mug filled with water.
2. Make sure the bottom half – the pointed end – is underwater.
3. Place in a sunny spot and change or add water as needed.
4. In a few days, roots will form below the water. And, two to three weeks later, leaves and stems will sprout from the top.
5. Continue to grow the plant in water or, after a month or two, pot the sweet potato in a houseplant potting mix.
6. Keep the soil moist.
7. The stems are weak, so help children tie them to strings, wire or a stake.
8. Feed once a month with a balanced water-soluble fertilizer such as 20-20-20. As the vine grows, cut it back a few inches to force the plant to grow bushy. Some are treated with heat to keep them from sprouting on grocery-store shelves, but most grow roots in a matter of days after being placed in water.
GARDENING SCIENCE EXPERIMENTS
15. PLANT GROWTH IN LIGHT VERSUS COMPLETE DARKNESS
Plant two seeds each in their own clean cup with potting soil. Cover one with a black bag or a box over it. Only open it to water it and then re-cover it immediately. Plant the other one and place it near a window or under a grow light.
Ask what the children predict? After 2 weeks—see what happened!
16. SPROUTING SPROUTS
1. Take a small zip-lock bag and using a needle, punch a few holes in the bottom seam of the bags.
2. Get some alfalfa or mung bean seeds and place a teaspoon of seeds in each bag.
3. Zip the bag closed and have children place the bag in a bowl of warm water.
4. Soak the seeds overnight.
5. The next day, take the bag out of the water and let it drain; have it sit in indirect sunlight the rest of the day. For the next few days, have children dunk the bags in water for a few seconds and then drain and put back in indirect light. 6. On the fourth day, have your child set the seeds IN THE SUN.
Have fun watching the sprouts turn green.
7. BE SURE TO USE THE BEANS! When ready eat the sprouts by sprinkling them on top of a green salad, on a sandwich or on top of cream cheese spread on crackers.
17. MIGHTY SEED: Learn about: exothermic reactions- Observe the power of seeds when you try to limit their growth.
Materials:
Clear plastic cup
5 tablespoons of Plaster of Paris
2 or more tablespoons of water, Plastic spoon for mixing, Dropper
3 soybeans
1. Put the plaster of Paris in the plastic cup
2. Add 2 tablespoons of water and mix.
3. Continue to add drops of water until the mixture has the consistency of a very thick milkshake.
4. Push the soybeans into the plaster until they are covered and then smooth the surface.
Now, explore! What do you think will happen to the soybeans? Make regular observations. What happens? Why?
5. The next day add a tablespoon of water to the cup and continue to make observations. What happens? Why? What’s Going On?
- Seeds require moisture and warmth to germinate. In this case, the seed absorbs moisture from the plaster mixture.
- As the seed absorbs water it increases in size and applies pressure to the surrounding plaster. This force, combined with the strength of the germinating sprout, causes the plaster to crack and allows the shoot to grow up through the plaster.
- This strength and ability to grow in adverse conditions allow plants to survive in a wide range of environments.
- You may also notice that when water is mixed with plaster the cup becomes warm. A chemical reaction that gives off heat like this is known as an “exothermic reaction.” Source: cosi.org
18. CARROT TOPS
As the project is written, it is geared to GRADES 6 to 8; however, it can be adapted to ANY grade level.
Question: Can a plant grow from just the top of a carrot?
Research: What kind of root does a carrot have? Why is the root so big? What is needed for a plant to grow?
Hypothesis: Can the carrot top provide what is needed for the plant to grow?
Materials: Shallow container, 4 carrots
1. Cut about half an inch off the end of the carrot that has the leaves. Cut the leaves off close to the base of the carrot.
2. Put the carrots into the container with the cut side down.
3. Add enough water to cover about half the carrot top.
4. Place the container in a well-lighted window.
5. Observe the carrot tops each day for any changes. Remember the changes may start out small and change slowly. Look for new leaves and roots.
6. Use a metric ruler to measure any growth you may observe.
7. Continue your observations for six days and write your report on the sixth day. For younger children—just have fun observing the carrot, while making observations along the way!
TEACHER/CAREGIVER SECTION FOR CARROTS:
POSSIBLE HYPOTHESIS: No growth will occur since the carrot is not living-OR Leaves will grow since even this small part of the plant is still living.
Possible Conclusion: The carrot top should show some new growth each day. The student should discuss the possible reasons for the growth.
Adapted from Judy Schneider
 19. MAKE A TERRARIUM
A terrarium is a sort of living landscape inside an enclosed plastic container or jug.
- To start, put a layer of pebbles or charcoal at the bottom of the container for drainage.
- Cover that with two inches of topsoil.
- Add a few rocks, some twigs or branches, moss,and small plants.
- Moisten the terrarium with water, but don’t overdo it. Cover the opening with a sheet of plastic wrap.
20. SODA BOTTLE GREENHOUSE…
Materials:
2 clear 2-liter bottles (soda)
Sand
Dirt
Seeds
1. Cut one bottle so that the bottom is approximately 4″ high–this creates the bottom and base of the greenhouse.
2. Next, cut the second bottle so it’s about 9″ high this will be the “lid” or top for your house.
3. Place a small amount of potting soil in the bottom of the 4″ base.
4. Add soil and seeds. Water the seeds— then slip the top over it to create a “greenhouse”.
5. Put in sunny place and plants will appear in 2-5 days — depending on the seeds you use.
21. SODA BOTTLE GREENHOUSE #2
1.) Thoroughly wash and dry the clear plastic bottle. A clear juice bottle or 2-liter soda bottle works. With the scissors, cut all the way around the bottle to carefully remove the top one-third of the bottle.
2.) Place about 1 inch of the loose gravel in the bottom of the bottle, then add about 3 inches of potting soil.
3.) Make small holes in the dirt and plant the small plants or seedlings in the soil, just deep enough to cover the roots.
4.) Add a few drops of water in the bottle, but do not soak the soil. As the bottle will be almost an enclosed garden only a little bit of water is necessary.
5.) Gently place the top part of the bottle back in place on top of the planted section. Use the wide clear tape to secure the 2 parts of the bottle together. (You may need an extra pair of hands for this part.) Once the sections are back together and in place, if you desire, you can decorate the bottle with a sticky-backed ribbon to cover the joint where the bottle sections are taped together.
6.) Place the greenhouse in a sunny warm location and water only when necessary. You do not need to keep the lid on the bottle as the air and condensation will give the plants all the nutrition they need to grow into healthy, thriving plants. Source: Source:eHow.com
22. WORM FARM- HOW WORMS WORK IN THE GARDEN!!!
Worms are vitally important for the gardener. Not only do they aerate the soil and improve its condition by breaking down rotting plant waste in the soil, but they will also produce higher quality compost in your compost heap, eating their way through quantities of kitchen waste at the same time.
Directions:
- Cut the top off a plastic soda bottle, tape the edge.
- Pour in 2 inches gravel or stones for drainage (good way to get small rocks out of the yard!)
- Alternate 2 inches of sand, 2 inches of dirt. (VERY lightly spray the dirt with water) Worms ‘breathe’ through their skin, which must be damp for this to happen. Put a few small pieces of banana peel in the middle for worm food.
- Continue with layers till top.
- Add worms. Tape the top back on or cover top with plastic wrap and tape. Either way, put in several air holes. The jar should not be put anywhere too cold.
Tape black construction paper around the bottle, and leave for a day or 2 — try to do this on a Friday. When you take the paper off, you will see the tunnels the worms have made, and the layers will have shifted and mixed.
Make sure you check your bottle ecosystems every day; moisten the soil; add more moistened food to the top layer if necessary. Always ensure the contents of the jar are moist, not too wet and definitely not too dry.
You can also: 1.) Observe your ecosystems and record your observations. 2.) Draw a picture or take a digital photograph of your ecosystems.
Charles Darwin studied worms for 39 years, and concluded that life on earth would not be possible without them. Mainly because they increase soil fertility so efficiently, but also because they reduce quantities of plant waste.
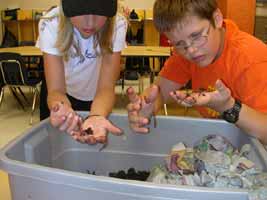 23. WORMS CAN BE FUN… Activity Two
Go to bait and tackle store and buy bait worms. Dump them into two large tubs of dirt and let the children observe them as they dig. The children can use their hands to dig up the worms. If your children a young, have a variety of plastic birds at the table for pretend feeding.
With the children, TAKE THE WORMS OUTSIDE and put them in the garden at the end of the day. Have a box of baby wipes available for handwashing.
24. TURN A PROTECTED SECTION of your home, program or schoolyard into a natural shelter.
In warm weather or cold weather- birds, squirrels, and other small wildlife are in constant search of food, fresh water, and safe shelter. Set up a bird feeder, bird bath and bird house where you and the children will be able to quietly observe. Youth enjoy watching different animals seek the food and water and your birdhouse will be there when needed. Visit Bird Theme
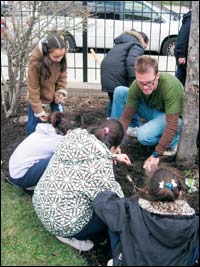 25. PLANT BULBS IN THE FALL
When fall approaches, it’s time to get bulbs in the ground for spring blossoms such as tulips, hyacinths, daffodils, and lilies. When flowers welcome next spring-you’ll be happy that you did!
For the best results:
- Plant before the first frost.
- Dig a trench and place the soil on a plastic sheet.
- Place the bulbs in the trench according to your design, but don’t let them touch. Make sure they are facing the right way up.
- Replace the soil.
- Water thoroughly. You can also add a layer of mulch to keep the bulbs moist.
- Now all you have to do is wait for spring to see healthy green sprouts that will grow into colorful flowers!
 26. GROW YOUR OWN FRESH SALAD!
Grow a selection of salad crops to make a lovely summer salad and introduce children to practical gardening. It will increase their interest in healthy food and help them to understand plant life cycles.
Materials:
A plot of good soil, garden tools, compost or manure, watering can,
Seed Ideas for salad: lettuce, nasturtium, pot marigold, cherry tomato, tomatoes, peas and crystal apple cucumber
1. Help children dig the soil and mix in some compost or manure.
2. Plant seeds following the directions on the seed packets. You don’t have to grow the crops in rows -but can plant in patches, spirals or pots and window-boxes. Be sure children leave enough space to be able to get to the plants for watering, weeding, slug removing and picking!
3. When seeds are planted, water them gently. Seeds MUST be kept moist to germinate.
4. When seeds start to grow, take steps that slugs don’t visit and eat everything. (A slug trap can be made with some beer in a jar – make sure you dig a hole to place the jar in so that it sits at soil level.)
5. Remind kids to keep pulling out the weeds, but not to disturb salad crops. You can give the pea plants some sticks to climb up.
6. Be patient until the salad crops look ready to eat!
RAW PEAS can go in salad – the children just need to take them out of their pods.
The NASTURTIUMS AND MARIGOLDS are advised for two reasons: they encourage pest-eaters to come into gardens… and can also be eaten. The marigold petals and the leaves and flowers of the nasturtium will brighten up any salad.
27. How to grow TOMATO PLANTS (from seeds) with your child
- Around March/April, start by filling a small flowerpot with fresh potting compost.
- Press the soil until it’s firmly packed and then evenly sprinkle a few tomato seeds on the surface of the soil.
- Cover the seeds by putting a little compost into another pot and shaking it gently over the new seeds, like a pepper pot.
- Cover the pot with cling film or a plastic bag and secure it with an elastic band and place it in a warm, light place until the seeds begin to sprout.
- When the seedlings appear they will need to transfer them to their own pots. And around June time, when the weather is warmer, plant them outside in larger pots or in the garden.
- Ensure plants are well-watered and give them a special treat of plant food once a week.
Be sure the children wash their hands after gardening, as well as the produce before they eat it.
28. GARDENING & COMMUNITY SERVICE…
- Improve the school grounds and plant trees or wildflowers.
- Plant produce. Donate the harvest to a local food bank.
- Plant seeds. Sell the flowers or plants and donate the proceeds to a local organization in need.
Form a litter patrol on school or park ground - Put on a play at your school, a fair, or festival about local environmental issues.
GARDENING ARTS AND CRAFTS FOR KIDS
29. ‘BLUEBERRIES FROM THE GARDEN’ PAINTING
Good for any summer day-but great way to celebrate National Blueberry Month during July!
1. Give children blueberries to look at, touch, smell, and taste. (Good for the young)
2. After the children have observed the blueberries add a little water to them and cook them in the microwave for one minute.
3. Have children mush them up. Use the blueberry juice to paint a beautiful blue blueberry picture.
30. MAKE A SIT-A-PON FOR GARDENING …
Remember making these when you were in Brownies or Girl Scouts? Children can make them for family members to kneel on during summer gardening! (Good for Camping too!) Also great for your outdoor ‘Circle Time”. Need:
- 1 thick magazine or catalog.
- Old plastic coated tablecloth
- Yarn
- Large sewing needle
1. Fold your tablecloth in half. Place your magazine or catalog on the tablecloth. You’ll be cutting out 2 squares from this. Cut out a square about 1 1/2-2 inches wider than the magazine. You don’t want too much of an edge because then the magazine will slid around too much. The plastic part of the tablecloth will be the outside covering.
2. Take the 2 plastic squares and the one magazine and make a “sandwich ” putting the magazine in the middle. You can use large straight pins to hold all the “sandwich” pieces in place. Once you have done this, using the hole punch, make openings equally spaced all around the perimeter of the “sandwich “.
3. Thread the sewing needle with the chosen yarn. Make a knot and start sewing through the holes. This will keep the “sandwich” together. After going all away around the perimeter of the rectangle end with a knot.
31. ABOVE AND BELOW VEGGIE GARDEN
Materials: 12″x18″ white paper, sharpie, crayons
Bring in several root vegetables. Discuss the textures and colors.
Ask students to pretend they have a magical camera – the camera is very thin, and you can slide it into the ground. Take a picture, and you can see what is going on below the surface.
Draw a horizon line and below it we draw the vegetables.
Have students do a rubbing on a cement wall with brown crayon– on the bottom half — to show dirt. By a Grade 2 student of Art teacher Michal Austin in Kansas.
32. START WITH A SEED (ART)
1. Glue a watermelon seed, pumpkin, or any kind of seed, onto paper.
2. Paint an imaginary plant with the roots growing FROM the seed UNDERGROUND.
3. Paint the leaves, and flowers or fruit of the plant above the ground level. Match the drawing of the flower/fruit to the kind of seed you have “planted.”
33. GOODY BAGS FOR A ‘GARDEN THEMED’ PARTY
Get some miniature tin or terra-cotta flower pots.
Fill them with flower and insect stickers, butterfly tattoos, a package of sunflower seeds, some gummy worms, and any other little garden theme party favors you come across at the party or discount stores.
Top with a square of plastic wrap or colored cellophane and use a rubber band to secure the wrap to the rim. Paint kids names on the pot…
34. MAKE PLAY DOUGH and make it different colors of the earth! The children can make trees, worms, and flower shapes. (There are more than 40 recipes in the Play Dough Category…even one for fossils and dough that looks like mud!)
35. PLAY DOUGH that LOOKS LIKE MUD!
Bring 3 cups water and 3 tablespoons vegetable oil to a boil.
While the mixture is heating, put 3 cups all purpose flour, 2 tablespoons cream of tartar, and 1 1/2 cups salt into a large bowl. Carefully mix the wet and dry together and knead until smooth.
For the MUD additions, add brown tempera paint (either dry or liquid) and 2 or 3 Tablespoons of coffee grounds. It really looks like dirt!
36. MAKE A DANDELION NECKLACE OR CROWN
Remove dandelions from the lawn. Pick those with long, thick stems.
Attach them by tying one stem in a knot high up near the flower of another dandelion, and so on until reaching the desired length.
TIP: Remind children that their new necklaces/crowns are made of weeds and will wilt in a day or two, but they can always make a fresh one.
37. VEGGIE MONSTER (A snack and craft in one!)
Place a number of small vegetables and fruits on the table. Ask the kids to create a Veggie Monster, using toothpicks to attach the different pieces of fruits and veggies.
Award prizes for the most creative, the prettiest, the funniest, the scariest, and so on.
Be sure to check out the ‘Flower Theme’. There are many ideas and activities that will compliment a ‘Garden Theme’.
GARDEN THEMED GAMES
38. GARDENING RELAY RACE
You’ll Need:
Small children’s watering cans
2 Buckets of water
Small plastic glasses
How to Play:
Divide the kids into two teams and have them form two lines.
Place a bucket of water at the front of each line and an empty watering can about ten feet away.
Give each player an empty plastic glass.
When you say, “Go!” the players at the front of each line must fill their glasses with water by dipping them in their bucket.
They must then run to the empty watering can and pour their glass of water inside, then run back and tag the next team member. The child who is next in line should have their glass filled with water and be ready to run. Continue the race until one team completely fills their watering can. The first team to fill its watering can to the rim with water wins.
39. THE FLOWER GARDEN GAME (This could also be called Zoo, Ocean, Circus, Barnyard or Outer Space. If you are having a different “Theme”–Just change the names to go with the theme…)
Depending on how many children you have–form teams. You can have anywhere from 3 Teams and up!
Teams are in their groups and one end of the gym or field. Players in teams have DESIGNATED NAMES. For Spring Flowers you could use: TULIPS, LILY OF THE VALLEY, PHLOX, VINCA, DAFFODIL, LILACS, and PANSY. FOR Summer Flowers: ROSE, BEGONIA, MARIGOLD, LILY, etc.
Two or three persons are “It” in the middle of the room.
“It” calls out the names of the flower (Example – tulip)
All tulips must run to the garden at the opposite end of the room without being caught.
When “GARDEN” is called, everyone must run to the opposite end.
Penalty for being caught is to run all around the garden (A LAP OF THE GYM) once— and then they can come back in the game!
(Remember to change the “it” people)
40. WHEELBARROW RACE
Partners assume the Wheel Barrow and pusher position.
On the signal, they advance to the turning point where they change positions and return to the starting line.
41. WHEELBARROW RACE WITH BALLS
What You’ll Need:
Two small wheelbarrows (can also use wagons)
Several balls for each wheelbarrow, such as beach balls, soccer balls, or basketballs.
Use masking tape to mark the start and finish lines for the races.
For children under five years old, make the distance fairly short. For children, six to ten, make the race twenty-five feet or more.
1. Divide the kids into two teams and have them form two lines. Place a wheelbarrow (or wagon) filled with a few balls at the front of each line.
2. When you say, “Go!” the players at the front of each line must grab the handles of their wheelbarrows and race to the line you have marked, turn around, and race back.
3. If any balls fall out of their wheelbarrow, they must stop and retrieve them.
4. When they get back to the starting line, the next team member grabs the wheelbarrow and starts running.
Continue the race until every member of both teams has crossed the finish line.
42. THE GARDENER SAYS…
Instead of Simon Says…Play ‘The Gardener Says’…
43. DEAD ANTS ‘IN THE GARDEN’ TAG GAME
A cooperative tag game…
One or two people volunteer to be ant-eaters, the rest start out as ants. By tagging them, ant-eaters attempt to stun all of the ants on the anthill—while the ants struggle to avoid the ant-eaters —and rescue their friends.
Start by creating a boundary for play (i.e., the anthill).
Use landmarks such as trees or cones to create the ant-hill and have everyone step inside.
- The ant‘s must avoid the ant-eater and work together to save their ant friends who have been stunned.
- When an ant is tagged by the ant-eater, the individual sits on the ground and calls for help.
Stunned ants cannot move from the spot, but may wave their arms and legs to alert other ants to their situation. - To make a rescue, four ants must surround a stunned ant—lock their arms in a circle—and escort the individual off the anthill to a location just outside of the play area.
- When all four ants have locked into positions for a rescue, they cannot be targeted by the ant-eater.
- Once an ant has been rescued, he or she returns with the rescuers to the game.
- Play as many rounds as you wish, and switch ant-eaters frequently.
44. ‘SNAKES AND WORMS’ IN THE GARDEN
(You can call this game anything you want. An idea is to use brown and green yarn and call it snakes and worms…)
- Cut two colors of yarn, each about 20 feet long. (If you have a large group playing at the same time–you may need 3 colors of yarn and cut the pieces longer)
- Next cut the long length into many pieces.
- Hide the pieces of yarn outside.
When time to play, carefully explain rules and regulations to children.
Form two teams with one or two kids on each side as captains.
They will tie each yarn piece that is brought to them, to the next yarn piece.
The team with the longest finished yarn string wins!
Idea: This game would also be good for a party–and adapted to the inside.
FUN SNACKS FOR A GARDEN THEME
45. DIRT CUPS…
#1 INDIVIDUAL DIRT CUPS (COOKIES ON TOP)
Canned or Pre-made Chocolate Pudding Mix
Milk (If making pudding)
Oreo Cookies
Gummy Worms
Cool Whip
Cups
Spoons
Zip Lock Bags
- Place Oreo cookies in a zip lock bag; have children break them up by banging the bag. Cover the bottom of cups with crumbled Oreos.
- Combine pudding mix and milk to make your pudding, pour into the cups–leaving 1/2 an inch of space at the top.
- Refrigerate pudding until set. Add crumbled Oreos to the top of each cup and garnish with a gummy worm.
#2 DIRT CUP VERSION ( COOKIES IN PUDDING)
2 cups of cold milk
1 package (4 serving size) JELL-O Instant Pudding (chocolate flavor)
3-1/2 cups (8-ounce container) COOL WHIP whipped topping, thawed
1 package (16 ounces) chocolate sandwich cookies (like OREOS) (crush them into tiny pieces in a plastic bag)
Gummy worms
Measuring cup
Medium mixing bowl
Wire whisk
Rubber scraper or large spoon
Measuring spoons
8-10 paper or plastic cups (8-ounce size)
1. Pour the milk into the mixing bowl and add the pudding mix. Beat with the wire whisk until well blended (about two minutes). Let pudding stand for five minutes.
2. Stir whipped topping and 1/2 of the crushed cookies into the pudding (very gently) with rubber scraper until mixture is all the same color.
3. Place about 1 tablespoon of the remaining crushed cookies into the bottom of each cup.
4. Fill cups about 3/4 full with pudding mixture. Top each cup with the rest of the crushed cookies.
5. Add gummy worms and insects to decorate. Put cups into the refrigerator for about one hour to chill them.
#3 OREO PUDDING WORM CUPS (SAND AND DIRT CUPS)
Ingredients:
4 cups of cold milk
1 package (4-serving size) Jell-O chocolate flavor instant pudding
1 package ( 4-serving size) Jell-O vanilla flavor instant pudding
1 tub (8oz) Cool Whip topping, thawed
18 Oreo chocolate sandwich cookies, finely crushed, divided
8 plastic cups (6-7 oz)
Gummy worms
1. Prepare instant chocolate and vanilla puddings separately, with two cups of cold milk each , as directed on packages. Let stand for five minutes.
2.Gently stir 1/2 cup of cool whip into each bowl of pudding. Sprinkle one tablespoon of Oreo crumbs into bottom of plastic cups. Top each with 1/4 cup of vanilla pudding, 1 tablespoon Oreo crumbs and 1/4 cup chocolate pudding. Sprinkle evenly with remaining Oreo crumbs. Refrigerate at least one hour.
3. Insert one or more gummy worms a into each cup just before serving.
Makes 8 Sand & Dirt Cups.
46. NO BAKE MUD PIE COOKIES #1
2 cups of sugar
2 tablespoons cocoa
1/2 cup milk
1/2 cup butter
1/2 cup peanut butter
2 cups oatmeal
1 teaspoon vanilla flavoring
Mix sugar and cocoa together… Stir in milk. Put the mixture in a pot; add butter. Heat until it comes to a full boil. STIR and cook for about two minutes. Do not let it burn.
Turn off heat and MIX IN the remaining ingredients.
Take spoonfuls of cookie dough and drop onto the waxed paper to cool.
47. NO BAKE MUD PIES #2
2 cups granulated sugar
6 tablespoons cocoa
1/2 cup butter
1/2 milk
1/2 teaspoon vanilla extract
1 cup shredded coconut
3 cups instant oats
1. Combine sugar, cocoa, butter and milk in saucepan.
2. Bring to a boil.
3. Add vanilla extract.
4. Remove from heat and stir in coconut and oats.
5. Drop by teaspoonfuls onto wax paper; chill
Makes 4 1/2 dozen.
Source: recipegoldmine.com
48. MAKE AN ANT FARM… with Peanut Butter, Graham Crackers and Raisins
On a plate spread peanut butter.
In the middle erect a tunnel from the broken graham crackers.
Next, place the raisins on the peanut butter to look like Ants.
Children can eat the raisins and peanut butter with either the graham crackers or pieces of celery.
(You can use canned chocolate frosting if you have peanut allergies in your group)
49. ANT HILL— Make edible ant hills in cups!
Use clear plastic punch cups to see the layers.
1. For the ‘dirt” layer–first put chocolate pudding into the cup.
2. Crush graham crackers in a plastic Ziploc bag and pour the crumbs into the cup for the anthill “sand”.
3. Add chocolate chips or raisins for the “ants”.
50. HAVE KIDS MAKE THEIR OWN MUD (PUDDING) IN A BAG!
You Need:
Boxes of Instant Pudding (1 box for 2 children)
Milk (according to instructions on pudding box)
Ziploc bags (1 for each child)
Measuring cups
1. Pour half a box of pudding into each child’s Ziploc bag.
2. Measure enough milk to make half a box of pudding and allow children to add it to their pudding in the bag.
3. Seal the bag (make sure it’s really sealed!!)
4. Children can squish the bag around with their hands, mixing the pudding with the milk.
5. When all of the pudding is mixed, cut a small hole in the corner of the bag and let the kids suck the pudding out!
51. ANTS IN THE SAND
2 Graham crackers
Chocolate sprinkles
1. Place graham crackers in a plastic sandwich bag and crush with a rolling pin.
2. Add a few chocolate sprinkles to make ants, then seal the bag.
3. Give the bag to the kids to take outside to eat; they can also pour it into a small bowl and eat at the table (Using their fingers, of course.)
Variations:
- Add raisins (Call them beetles)
- Red Hots candy (ladybugs)
- Mini chocolate chips (spider eggs).
- 1 Serving
52. Make a GARDEN CAKE … the basics would be with green frosting and adding some rock candies, chocolate cookie crumbs and small silk flowers to the top of the cake.
53. QUICK GARDEN THEMED SNACKS…
- A FLOWER SNACK: Soften a large package of cream cheese and ¾ pound of shredded American cheese. Mix together. Let each child arrange five round-shaped crackers on a paper plate. Then they can surround the round cheese ball with the crackers to make a flower!
- Serve punch from a NEW clean watering can.
- Eat sunflower, pumpkin or other types of edible seeds.
- Cheetos can be called “worms.”
- Serve Pepperidge Farm Butterfly Cookies and Crackers.
- Cut sandwiches with a flower cookie cutter.
54. EASY ‘WORM IN THE GARDEN’ COOKIES OR CUPCAKES
Frost large round cookie or cupcakes with green frosting. (Tint white frosting with green food coloring) Place a gummy worm on top. Add green M&Ms for a ‘grassy’ look. Image by KidActivities.net
SONGS ABOUT PLANTS…
55. GREEN PLANTS NEED…
Sing to the tune of three Blind Mice
Three main things, three main things,
Green plants need, green plants need.
For plants to grow and plants to thrive,
In order to keep green plants alive,
What does it take for them to survive?
Just three main things.
Plants need sun, plants need sun,
That’s number one, plants need sun.
For plants to grow and plants to thrive,
In order to keep green plants alive,
What does it take for them to survive?
Just three main things.
Plants need air, plants need air,
Be aware, plants need air.
For plants to grow and plants to thrive,
In order to keep green plants alive,
What does it take for them to survive?
Just three main things.
Plants need water, plants need water,
Especially when it’s hotter, plants need water.
For plants to grow and plants to thrive,
In order to keep green plants alive,
What does it take for them to survive?
Just three main things.
56. DO YOU KNOW THE PARTS OF PLANTS?
Sing to Tune: Head, Shoulders, Knees, And Toes
Do you know the parts of plants…
Parts of plants?
Do you know the parts of plants…
Parts of plants?
All kinds of plants that grow and grow and grow.
Do you know the parts of plants…
Parts of plants?
The roots hold the plant in place…
Plant in place.
The roots hold the plant in place…
Plant in place.
The roots store food and water, too.
The roots hold the plant in place,
Plant in place.
The stem move water up the plant…
Up the plant.
The stem move water up the plant,
Up the plant. …
The stem brings water to the leaves.
The stem move water up the plant,
Up the plant.
The leaves soak up the sun…
Soak up the sun.
The leaves soak up the sun…
Soak up the sun.
The sun helps the plant to grow and grow and grow.
The leaves soak up the sun,
Soak up the sun.
The flower grows into a fruit…
Into a fruit.
The flower grows into a fruit…
Into a fruit.
Inside the fruit are little tiny seeds.
The flower grows into a fruit,
Into a fruit
57. FLOWER AND GARDEN JOKES
Why is grass so dangerous?
Because it’s full of blades!
What do you get when you cross poison oak with a four-leaf clover?
A rash of good luck.
Why can’t the flower ride his bike?
Because he lost his petals!
What do trees drink?
Root Beer!
What did the baby Tulip say to its baby-sitter?
”I want my Poppy and my Mum!”
What is the best kind of guy to meet?
A fungi!
What happened to the plant in math class?
It grew square roots!
What do you get when you cross fruit with a necklace?
A food chain!
What kind of flower looks like it just came back from a fight?
A black-eyed Susan!
What do you call a homeless snail?
A slug!
What do you get when you cross a genius with a tree?
Albert Pine-stein!
If April showers bring May flowers, what do May flowers bring?
Pilgrims!
Did you hear about the magic tractor?
It went down the road and turned into a field!
What is a tree’s least favorite month?
SepTEMBER!!!
Why is the letter “A” like a flower?
A bee (B) comes after it!
What flowers grow on faces?
Tulips (Two-lips)!
Some interesting categories that could blend with a ‘Garden Theme’ are:
- Worm Theme
- Flower Theme
- Sunflower Theme
- Bird Theme
- Insects/Bugs (Creepy-Crawlies)
