If you are looking for some fun flower activities for your preschooler, this might be for you. You don’t have to wait for full bloom to get some fun activities involving flowers going. Below are some of our best recommendations for flower games and activities.
Young children are fascinated by nature, along with the countless colors, smells, and textures the natural world contains.
Children also love crafts, so why not combine the two with some flower themed activities and games.
The following activities are perfect for children of all ages, from toddlers through to teenagers. Each activity can be modified to suit the artistic skills of the participants.
Use this article if you are looking for:
- Flower activities for toddlers or a flower theme for toddlers
- Flower games for kids
- Flower games for preschoolers
Let’s check them out!
Flower themed crafts
1. Mexican paper flowers
Colorful, Fun, and Pretty!
Need: Tissue paper in a variety of colors, scissors, and floral wire or colored pipe cleaners.
1. To make the flowers, layer five or six rectangular sheets of the same size tissue paper (the colors can be mixed or not). The smaller the tissue paper sheets, the smaller the flower.
2. Starting at one of the short ends of the paper, fold the paper into one-inch accordion folds – as if making a fan.
3. Next, wrap floral wire or a pipe cleaner tightly around the CENTER of folded tissue paper. Straighten one of the wires for the stem.
4. Gently pull the layers of tissue paper apart, out and up and fluff them to create a lush burst of colorful flower petals.
2) Facial tissue paper flowers
Materials: Facial tissue, Thread, Scissors.
Instructions:
- Pick one tissue and fold it back and forth. It should be like a paper fan or and accordion fold.
- For smaller flowers, cut the folded tissue into two pieces each about 4 inches long. Put the two pieces on top of each other.
- Use a piece of thread and tie it tightly in the middle.
- Separate the layers of the tissue and fluff it into a flower shape.
TIPS:
- If you only have single ply facial tissue, stack two or three tissues on top of each other before starting step one.
- Use colored tissue to make colorful flowers.
- Use water color paint to create coloring; The coloring should be very watery to get blending ; use a paint brush to dab the paint on the edge of the tissue and let the water absorb to spread the color along the petals.
- Use thicker paint to get the more defined colors. Use a paint and dab the paint where you want it.
- If you don’t have watercolor paint, try food coloring. Be careful as it could stain counters or work surfaces.
3) Dryer sheet flowers – flowers crafts for kids
Materials:
Used or new dryer sheets, acrylic craft paints, green pipe cleaners, cologne or essential oil. Vase or jar is optional.
- Take two or three dryer sheets; fold them lengthwise in an in and out accordion style (just like you would for any paper flowers)
- Fold in half and slip the top of the pipe cleaner through, then twist the pipe cleaner tightly. The rest of the pipe cleaner becomes the flower stem.
- Pull the layers up and apart and watch a flower appear.
Optional: Add a few drops of perfume or essential oil if the dryer sheets are used or fragrance-free. - Place a small amount of paint in a clean container/ tray; add some water. Gently brush the top edges of the flower.
- Repeat the painting in different colors.
- Several in a pretty jar or vase (which could be another project) would make a nice gift.
4) Fabric and pipe cleaner flower bouquet
Need:
Large pipe cleaners in assorted colors, glue, scraps of fabric, scissors, florist or jewelry wire, pompons
1. Bend the pipe cleaners into flower petal shapes and twist the ends together leaving about 1″ free.
2. Glue the pipe cleaner petals onto fabric; cut out each petal from the fabric.
3. With wire, wrap together the one inch ends of 5 petals, leaving a length of wrapping wire free to serve as stem.
4. Trim with pompons.
5) Make a button flower bouquet
Materials Needed:
| Card stock paper or stiff paper | Scissors |
| Pipe cleaners | Buttons |
1. Cut out flowers from different colors of paper. Choose buttons that match your flowers.
2. Center a button with the middle of your flower. Poke a pipe cleaner through your flower so that it comes up and through the first hole of your button, then poke it down through the next hole in the button and through your flower.
3. Twist the short end of the pipe cleaner around the long end, directly under the flower and button.
6) Paper cup flowers
1. Give each child two paper baking cups and a sheet of paper; have them flatten their cups and glue them on their paper.
2. Next, give each child two more baking cups that are NOT flattened; glue them on top of the flattened ones. The flowers will resemble daffodils.
3. To complete the flowers, have children use green crayons or markers to draw on grass, stems, and leaves.
7) Tulip cups from construction paper
1. Have children make a tulip from construction paper.
2. Glue the cut-out of the tulip on the top of a tongue depressor.
3. Cut a slit in the bottom of a Styrofoam cup. The slit should be large enough for the tongue depressor to slide through.
4. Pull the tongue depressor down far enough so you cannot see the flower in the “pot”.
5. Talk about how the flowers need sun and water to grow. As you talk about things that plants need, slowly push the tongue depressor up and the tulip will be “growing”.
8) Egg carton flowers – kids flower crafts
You need:
- Egg cartons (cardboard or foam)
- Scissors
- Glue
- Green flexible straws or pipe cleaners
- Colored markers or paint
Cut an individual cup from a carton. Trim the sides of the cup to form petals (the ends can be rounded or pointed). For a finishing touch, use a colored marker to accent the edges of the petals. They look very cool when finished!
9) Make an egg carton tulip

Cut an individual cup from a carton. Trim the sides of the cup to form petals (the ends can be rounded or pointed). For a finishing touch, use a colored marker to accent the edges of the petals.
10) Make an egg carton daffodil
1. Start with 2 cups from egg carton.
2. Prepare one as described for the tulip.
3. Trim the second cup so that the edge is even & the sides are about an inch tall.
4. Fit the short cup into the first & glue in place.
5. Last, make a small slit in the bottom of each flower & insert the end of a straw or pipe cleaner for a stem. Now your flowers can be arranged in a vase.
11) Handprint flowers for preschoolers
- Trace both of the child’s hands onto construction paper and have them cut them out.
- Paint a craft stick green.
- Curl the fingers of each hand onto a pencil forming the petals. Glue one hand to each side of the craft stick with the fingers curled outwards.
- Have the students decorate a white Styrofoam cup using markers or crayons. Stick a small ball of play dough into the bottom of each child’s cup. Stick the stem of the flower into the play dough to keep it upright.
- If you’d like, you can then stuff shredded green paper, Easter grass, dried grass, hay, or excelsior into the cup to cover the play dough.
You can also make a flower from one hand print as shown above. Form a cone shape using the palm of the handprint (making sure fingers curl outwards) Tape the cone together and then tape to straw. Draw leaves on green construction paper, cut out and tape to straw.
12) Flowers from scrunchies and pencils
You need: Pencil, Hair scrunchies, Craft foam leaves, Scissors,
Hole punch, Clay pot, Black beans
Remember those fluffy scrunchies (the material on a elastic band) that so many of us used to make our pony-tails? Collect all you can for this fun spring/summer craft or gift.
1. For each flower, wrap 1 or 2 colorful hair scrunchies around the top of a pencil.
2. Cut out a pair of green craft foam leaves (You can pre-make a template for children to trace)
3. Lightly etch leaf vein lines in the foam with the tip of a toothpick.
4. Using a hole punch, make a hole in the base of each leaf.
5. Put the finished flowers in a clay pot filled with dried black beans.
6. Tape over the pot hole if beans fall through.
13) Flower blossom masks
- To make an inexpensive and colorful blossom mask cut out the center of a paper plate, leaving a hole large enough for the child’s face. If child is young, help cut flower petals from colorful construction or tissue paper.
- Glue the petals around the rim to make a unique flower.
- Attach elastic thread to the back of the plate to finish the mask.
14) Hand printed photo blossom
This is a simple keepsake craft made from a child’s photo, a child’s hand print, and construction paper.
Supplies needed:
A piece of light-colored construction paper (white, pale blue, pale yellow, etc.) for the background
One piece of brightly-colored construction paper – for the flower petals
A photo of the child
Scissors
Glue
Green tempera paint
A brush (or just use your finger)
Pen or pencil
1. Cut a circle around the head of a picture of a child (This will be the center of the flower.
2. Cut a flower shape out of colorful construction paper. Make sure that the flower is a bigger than the round picture of the child, but small enough so that it will fit on the paper.
3. Glue the paper flower towards the top of a piece of paper.
4. Using green tempera paint, draw a stem for your flower.
5. Have child make two green hand prints near the base of the stem these are the flower’s leaves.
6. Glue the picture of the child to the center of the flower.
7. Write the child’s name and the date, on the paper. Parents will love this keepsake of their child!
Make the handprint tulips as shown!
15) Cupcake flowers
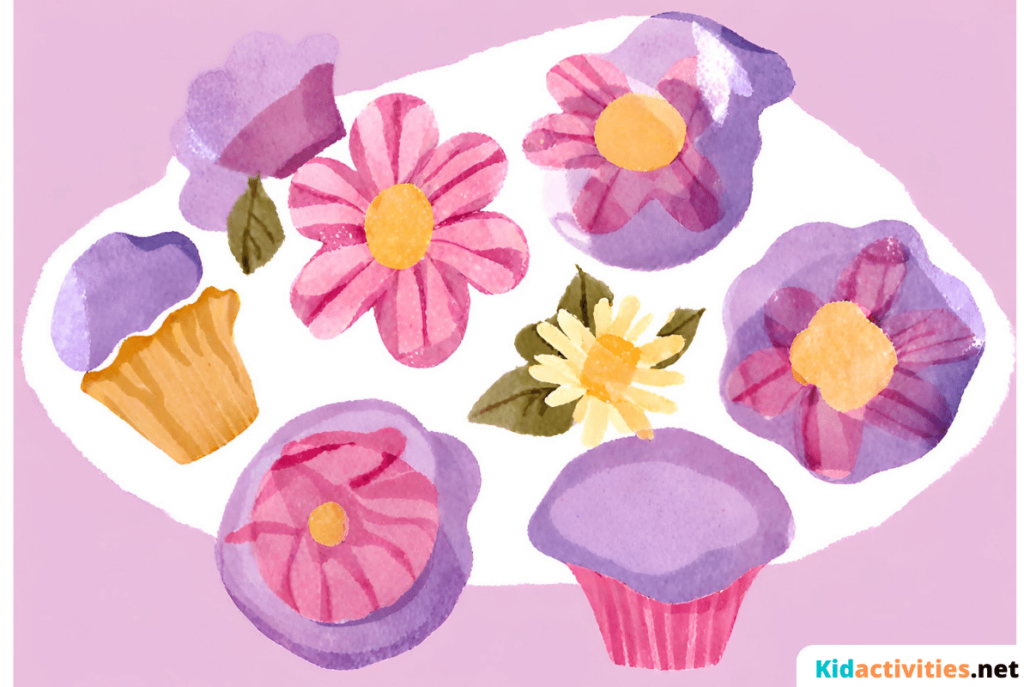
Need:
| Baking cups/Cupcake holders | markers |
| glue | paper |
| cotton ball | cologne |
Directions:
1. Have children make flowers by coloring baking cups with markers and gluing them on construction paper stems and leaves.
2. Spray cotton balls with cologne or air freshener, and have the children glue a fragrant cotton ball to the center of each “blossom.” When the flowers are dry, display them on the wall or a bulletin board and invite visitors to “stop and smell the flowers.”
16) Sunflower seed neckleces
Need:
- Sunflower seeds
- Nylon string
- Thin needle
What to do:
1. Once a sunflower head has gone to seed and started to dry, harvest the seeds to make a pretty necklace.
2. Thread a length of nylon string onto a thin needle and carefully push the seeds onto it, one by one. Push the needle through the fat end of the seed, from edge to edge. watch your fingers.
3. Tie 2 lengths of nylon to the ends of the necklace so that you can tie it around your neck. If you have the clasps from an old necklace, sew these to the ends of the string.
17) Sunflower paper plates
Materials: Paper Plates, Construction Paper, Glue, Yellow Paint, Sunflower Seeds
1. Have children cut out several yellow petals and paste on small paper plate previously painted yellow.
2. Fill the centers with sunflower seeds.
You may also be interested in the ‘sunflower theme’
18) Encased dried or silk flowers
You will need:
Baby Food Jars w/lids (cleaned)
Playdoh or other type of clay
Various straw flowers or fake flowers in small sizes.
- Press a small amount of play dough onto the lids underside.
- Push flowers or other objects into the play dough; you can also put in miniature decorations if desired You can add as much as you want as long as you can still attach the lid back onto the jar.
- You also have the option of adding fake moss filler to the remainder of the exposed play dough.
- Leave the lid exposed to the air overnight so the play dough will dry out.
- In in the morning fasten the lid back on. (The jar stands upside down with the lid at the bottom. It will look like a enclosed vase with flowers.)
19) Flower jars
1. Have children place small amounts of clay in baby food jar lids.
2. Give them small dried or silk flowers to arrange in the clay.
3. Screw the lids to the jars.
4. Put the jar with the lid on the bottom – and tie a ribbon around the necks of the jars. They make nice gifts!
20) Live blooming flower necklace
Materials Needed:
- Film Container
- Cotton Balls
- Yarn
- Flower or Vegetable Seeds
- Screw Eye Hook
Instructions: This works great with the clear containers.
1. Put two-four cotton balls into the container.
2. Tuck in about a few seeds between the cotton balls and the outside of the container, so that you can see them. Large seeds work best. Peas, Cantaloupe, etc.
3. Add a few drops of water, just until cotton balls are damp, but not soaked and not enough to puddle water on bottom of container.
4. Use a screw-eye with a medium size eye on it and screw it through the center of the lid. Put the lid on the container tightly. 5. Braid three pieces of yarn long enough to go around the child’s neck and slip over the head.
6. Thread yarn through the screw eye and tie in a circle.
7. Kids like to wear these necklaces and watch the seeds sprout and grow inside the container. If you time this right, you can plant them into starter pots when they get too big for the container, or outside into the garden.
21) Make a dandelion necklace or crow
Remove dandelions from the lawn. Pick those with long, thick stems.
Attach them by tying one stem in a knot high up near the flower of another dandelion, and so on until reaching the desired length.
TIP: Remind children that their new necklaces/crowns are made of weeds and will wilt in a day or two, but they can always make a fresh one.
22) Cereal flowers
Paper Plate, Green Construction Paper Glue, Green Pipe Cleaners
1. Paste colorful cereals on paper plates in the shape of flowers.
2. Add pipe cleaner stem and leaves cut out of construction paper.
23) Lilacs stems
1. Cut purple and lavender tissue paper into 2-inch squares.
2. Have children make “lilac blossoms” by twisting one tissue square at a time around the eraser end of a pencil.
3. Use cotton swabs to glue the blossoms to craft sticks.
4. It will take 4-5 blossoms per-side to cover top part of “stem”.
Check out our other page for more purple things.
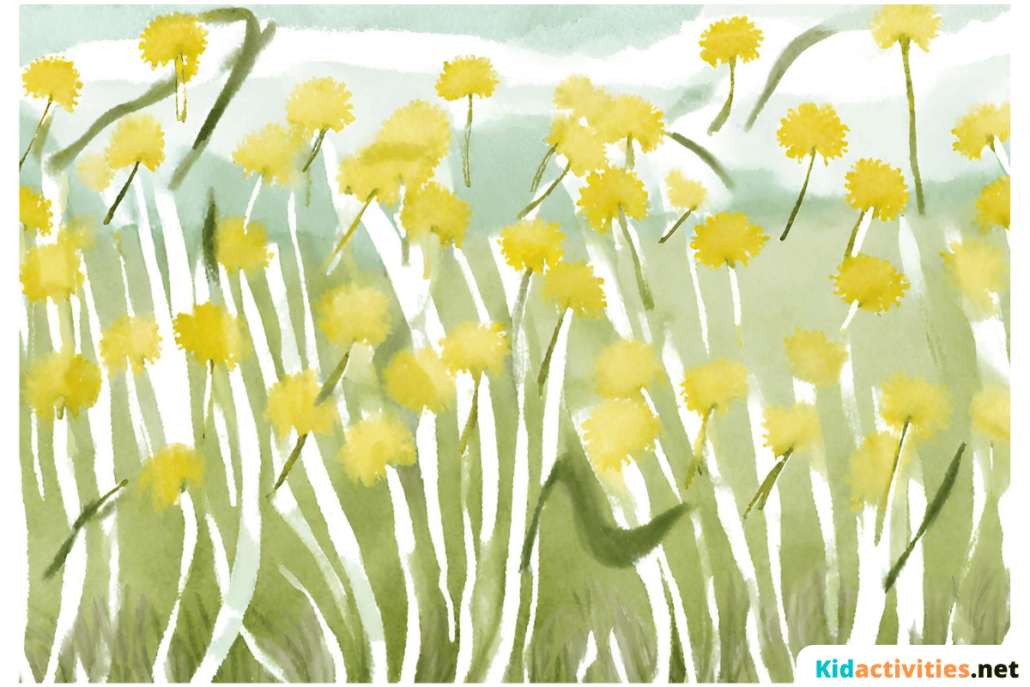
24) Make a field of paper dandelions
What You Need:
- Yellow and Brown Construction Paper
- Glue
- Scissors
- Paint or Markers
1. Cut two yellow circles (one about an inch smaller than the other.
2. Next cut a brown circle (about half the size of the largest yellow circle)
3. Glue the circles from largest to smallest.
4. Use scissors to fringe the yellow circles (causing them to look like dandelions)
5. For added fun, make stems for the flowers the same height as the children. Great on a Wall!
Flower art ideas for kids
25) Three willow art ideas
Willow art with puffed cereal
Need: Any color construction paper, puffed rice cereal, glue, and markers.
1. Draw several branches on drawing or construction paper. Glue on puffed rice cereal for puffy willow blossoms.
2. It would be nice if you could put a couple branches in a vase as a “still life” for the children to use as a guide.
Puffy willow thumb print art
To make puffy Willows you need:
- White tempera paint
- Dark construction paper
- Markers
1. Draw a branch on a piece of dark construction paper.
2. Give children a small container of white paint. Have them dip one finger into the paint and make a print on the branch.
3. Have them repeat this process until her branches resemble white puffy willows.
4. Vary this activity by using light colored construction paper and pink paint to make cherry blossoms.
Puffy willow art (with paint)
Need: Any color construction paper, White Paint, Q-tip, makers.
1. Draw several branches on drawing or construction paper.
2. Paint puffy willow blossoms with a cotton swab and white paint.
3. It would be nice if you could put a couple branches in a vase as a “still life” for the children to use as a guide.
4. When each child has drawn their vase and colored it a typical drawing/painting would be for them to take brown paint and paint the long stems coming out of the vase. Yellow paint would be dotted on for the flowers. They’ll be both colorful and beautiful.
26) Painted foot flowers – flower art for kids
You Need: Paint, Paper
Paint the bottom of the children’s feet and have them put it down on paper. They can then add a stem and leaves and decorate as they choose. Be sure to keep water and rags/paper towel nearby!
27) Paint dandelions using koosh balls
Need: Construction Paper; Green Marker; Miniature Koosh Balls and Yellow liquid tempera Paint
Directions:
Have children draw stems on the paper, then have them dip the mini koosh ball in the paint and lightly press the koosh ball at the top of the stem. They’ll have a field of dandelions!
28) Popcorn cherry blossoms
Put popped popcorn and pink powdered tempera paint in a baggie and shake. It makes great cherry blossoms for an art project! They look real.
29) Puffy popcorn flowers – children’s flower art
Materials: Popped Popcorn, Powder Tempera Paint (any colors), Green Construction Paper, Glue, Cardboard
1. Put handfuls of popped popcorn in plastic bag and add powdered tempera paint to each one.
2. Shake well to distribute paint all over the popcorn.
3. Cut stems and leaves out of green construction paper and glue them to cardboard.
4. Glue on the colored popcorn to make flowers.
30) Painted soda bottle flower prints

Need: Plastic soda bottle, paint, paper, paint brushes.
The children can create their own flower prints by painting with the bottom of soda bottles!
1. Dip the soda bottle into a shallow pan of paint.
2. Press it onto a piece of paper.
3. Make a stem and leaves using a paint brush.
31) Flower leaf press note cards or pictures
Type of Activity: Nature Art
Materials needed:
Old phone book, Collection of colorful leaves, grasses, flowers, herbs,
Craft glue, Plain note cards/postcards/watercolor paper.
1. Take a nature walk on a clear, dry day. Collect any attractive flowers, leaves, grasses, and herbs.
2. Separate each stalk or blossom. Place each one separately between the pages of the phone book, spacing them well apart from each other.
3. Place the phone book in a cool, dry place for a week to ten days. Your leaves will then be totally dry and ready for use.
4. Carefully apply craft glue, just a dab, to the back of the dried leaf or flower.
5. Center it on a note card for a single design or place several as a collage on a sheet of watercolor paper, which can later be framed.
6. Your leaf press can be used over and over again. Flowers can be stored in them for several months.
Did you know?
In Victorian times people planted decorative gardens and often preserved their herbs and flowers in a leaf press. Certain flowers were thought to have specific qualities:
Example:
Rosemary for remembrance. Roses for undying love
- Pink = Friendship
- Red = Passionate Love
- Red and White = Unity
- White = Purity
- Yellow = Zelous
- Lavender for devotion.
- Oak leaves for strength
- Pansy is loving thoughts
- Sunflower for adoration
- Zinia for thought of friends
A notecard that used the fragrant language of flowers conveyed more than words.
32) Queen ann’s lace flower art
Materials: Several stalks of Queen Anne’s Lace, red, yellow and white paint, dark paper.
Pour paint into shallow containers. Have the children dip the Queen Anne’s Lace blossoms into paint and lightly dab them on their papers.
The finished products resemble brilliant fireworks displays.
33) Flower printing
Besides a picture, this also makes very nice wrapping paper.
Materials: Paper, Liquid tempera, Flowers (fresh), Shallow pans (pie
tin or cake pan)
1. Give each child a piece of paper.
2. Make three or four different colors of paint. Put into shallow pans.
3. Let child gently dip a flower into paint.
4. Gently blot flower on paper.
5. Repeat and repeat to see the light effect.
34) Paint a vase of flowers
Go outside and pick a few branches.
1. Put them in a vase of water; have the children paint a still life of the vase and flowers.
2. The arrangement is to be used as a “model’. The children can interpret the vase and flowers anyway they choose.
3. When each child has drawn their vase and colored it a typical drawing/painting would be for them to take brown paint and paint the long stems coming out of the vase.
4. Yellow paint would be dotted on for the flowers. They’ll be both colorful and beautiful.
Flower games for kids
35) The ‘flower garden’ game
(This could also be called Zoo, Ocean, Circus, Barnyard or Outer Space. If you are having a different “Theme” Just change the names to go with the theme.)
Depending how many children you have form teams. You can have anywhere from 3 Teams and up!
Teams are in their groups and one end of the gym or field.
Players in teams have designated names for Spring Flowers: tulips, lily of the valley, phlox, vinca, and daffodil, lilach, pansy
For Summer Flowers: rose, begonia, marigold, lily, etc.
- Two or three persons are “It” in the middle of the room.
- “It” calls out the names of the flower (Example – tulip)
- All tulips must run to the garden at the opposite end of the room without being caught.
- When “garden” is called, everyone must run to the opposite end.
- Penalty for being caught is to run all around the garden (a lap of the gym) once and then they can come back in the game!
- (Remember to change the “it” people)
36) Play stick the bee on the flower
Play this just like “Pin the Tail on the Donkey”.
1. Before the game, draw/paint a simple daisy or other flower on poster board.
2. Make some bees, ladybugs or butterflies with paper or craft foam. Write the children’s names on each BEbeeE and add double stick tape for playing.
Alternative Game: Play put the petal on the flower just like Pin the Tail on the Donkey .
37) Gardening relay race for kids
You’ll Need:
Small children’s watering cans
2 Buckets of water
Small plastic glasses
How to Play:
- Divide the guests into two teams and have them form two lines.
- Place a bucket of water at the front of each line and an empty watering can about ten feet away.
- Give each player an empty plastic glass.
- When you say, “Go!” the players at the front of each line must fill their glasses with water by dipping them in their bucket.
They must then run to the empty watering can and pour their glass of water inside, then run back and tag the next team member. The child who is next in line should have their glass filled with water and be ready to run. Continue the race until one team completely fills their watering can. The first team to fill its watering can to the rim with water wins.
38) Flowerpot toss – flower game for children
Need:
1. Three empty flowerpots
2. Plastic toys or stuffed animals in bug shapes.
3. Another option is to use colored baby socks and fill them with dry beans and tie them closed with a piece of ribbon. Choose red socks as ladybugs, green socks as grasshoppers, and yellow socks as bees.
4. Green construction paper
5. Sidewalk chalk (optional if the game is to be played outdoors)
- Cut a large leaf shape from the green construction paper. It should be
large enough for a child to stand on with both feet. If necessary, cut two
leaves and staple them together at the base. - If playing the game outdoors, use sidewalk chalk to draw a flower shape on the driveway with three stems of differing lengths.
- Place a flowerpot at the top of each stem to represent the flower, and place the paper leaf at the very bottom.
- Have each child take a turn standing on the leaf and tossing the bugs into the flowerpots.
- Award one point for landing in the closest pot, two points or the middle pot, and three points for the farthest pot.
39) Wheel barrow race with balls – garden activities for kids
What You’ll Need:
Two small wheel barrows (can also use wagons)
Several balls for each wheel barrow, such as beach balls, soccer balls, or basketballs.
- Use masking tape to mark the start and finish lines for the races.
- For children under five years old, make the distance fairly short. For children six to ten, make the race twenty-five feet or more.
1. Divide the guests into two teams and have them form two lines. Place a wheel barrow (or wagon) filled with a few balls at the front of each line. (Or a person as in the photograph)
2. When you say, “Go!” the players at the front of each line must grab the handles of their wheel barrows and race to the line you have marked, turn around, and race back.
3. If any balls fall out of their wheel barrow, they must stop and retrieve them.
4. When they get back to the starting line, the next team member grabs the wheel barrow and starts running.
- Continue the race until every member of both teams has crossed the finish line.
40) Flower guessing game
- Tape seed packet pictures to the back of each child.
- You could also just write the names of flowers to tape on the backs.
- Clues are given from the other players to guess which flower they are.
41) Bees in the garden – outdoor garden game for kids
Need:
A Large Piece of White Poster Board
A Black Marker
Any Colored Marker (optional)
Scissors
At Least 3 Plastic Yellow Easter Eggs.
1. Draw a flower shape on the large piece of poster board.
2. If this game is being played by younger children, make sure the center of the flower is about 7″ – 8″ in diameter. If youth are older, make the center smaller (i.e. no smaller than 5″ in diameter).
3. Cut the center out of the flower.
4. Color or paint the flower petals.
5. Attach the flower to a stake or stick that can be placed in the ground.
6. Make the three “bees” by drawing black stripes and antennae on plastic yellow Easter eggs.
To play: Place your flower in the ground, and draw a line about 6 feet in front of it. Line children up behind the line. Let each child try to toss each “bee” through the center of the flower.
Tip: For older children, place a marble or other small object inside each egg to make it harder to throw a straight line.
42) Dirt shoveling relay race for kids
Use a child-safe shovel to carry dirt from a pile to a bucket. First team to fill the bucket wins!
43) Caterpillar in the garden game for kids
1. Divide players into two teams.
2. Line the children up in two columns, one child behind the other, at the start line.
3. Have each child put his or her hands on the waist of the child in front of them, forming a “caterpillar.”
4, When you say, “Wiggle!” each team must run, staying connected, to the finish line.
5. If a team becomes disconnected, they must stop and reconnect before continuing.
6. The first team to the finish line wins.
44) SIMON SAYS KID’S FLOWER GAME
Idea: Instead of “Simon Says” play “the florist (Or Gardener) says”
Have fun with flower jokes for kids
Flower themed snacks
45) Make a flower pot cake
1. Bake enough cake mixes to accommodate number of kids and regular pans.
2. Let cakes cool and cut into approximately two-inch cubes.
3. Purchase a very large terra-cotta pot. Wash it well and dry it. Line the bottom with foil to cover the hole.
4. Fill the pot about half way with cake cubes. Spoon a layer of pudding onto it. Sprinkle with gummy worms.
5. Add the remaining cake cubes. Cover with chocolate whipped cream. 6. Sprinkle with chocolate cookie crumbs or chocolate chips. Add a few more gummy worms on top.
7. Decorate with chocolate flowers on popsicle sticks or lay chocolate or candy flowers on top.
8. Scoop it out for guests with a brand new, washed gardening trough
46) Make a kid’s garden cake
The basics would be with green frosting and adding some rock candies, chocolate cookie crumbs and small silk or frosting flowers. French butter cookies could also be lined up aound the edge of the cake for a fence.
47) A flower themed snack for kids
Soften a large package of cream cheese and ¾ pound of shredded American cheese. Mix together. Let each child arrange five round shaped crackers on a paper plate. Then they can surround the round cheese ball with the crackers to make a flower!
Other garden themed snack ideas!
- Serve punch from a new clean watering can. Make sure the watering cans have narrow spouts and not sprinkle spouts.
- Place chips and dips in baskets and clean flower pots.
- Eat sunflower, pumpkin or other types of edible seeds.
- Make Gelatin jigglers in colorful colors and cut with butterfly and flower shaped cookie cutters.
- Cheetos can be called “worms.”
- Serve Pepperidge Farm Butterfly Cookies and Crackers.
- Cut sandwiches with a flower cookie cutter.
- Cover pretzel sticks with peanut butter and dot them with raisins. They make great “ants on a log.”
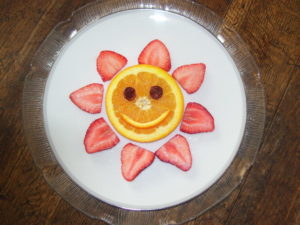
This was made to be the sun but looks like a flower!
Slice some oranges and strawberries! It’s that easy. Kids can build on this healthy snack and add blueberries, banana slices, raisins or dried cranberries for facial features! (Idea and photo by KidActivities)
48) Plant a garden to attract butterflies!
A list of plants that attract adult butterflies:
- Aster
- Blanket Flower
- Day-lily
- Phlox
- Sunflower
- Verbena
- Black-eyed Susan
- Butterfly Bush
- Milkweed
 49) Carnation science project for kids
 49) Carnation science project for kids
Add a little science experiment for your ‘Flower Theme”! It will amaze younger children.
1. Get a white carnation.
2. Leave it out of water to 1 – 2 hours until it starts to wilt a bit.
2. Cut 1″ from the stem.
3. Place carnation in colored water made by adding food coloring to water.
4. Cover 6″ of stem with water. Keep it in the colored water more than 24 hours.
5. Observe what happens to the carnation. The longer it sits in the water the deeper the color!
Some other pages that may interest you are:
- Gardening Theme
- Worm Theme
- Flower Theme
- Sunflower Theme
- Bird Theme
- Insects/Bugs (Creepy-Crawlies)