Fall Games and Activities for Kids
Here is a list of fun fall activities and games for kids including some of the best pumpkin games.
The kids are back in school, the leaves are turning colors, and Halloween is approaching.
These games and activities are a great way to bring in the fall season. They are sure to bring hours of fun and laughter.
Table of Contents
- Fun Fall Game Ideas
- Pumpkin Games for Kids
- Fun Pumpkin Activities
- Fall Party Games for Kids
- Pumpkin Science Projects for Kids
- Pumpkin Crafts for Kids
Fun Fall Game Ideas

1. Pie Eater Tag Game
Good for October to December because of apple and pumpkin pies!
Split the students into two different groups; one is apple pie and the other group is pumpkin pie.
Have one student be the pie eater, who will be standing on the center line. The pie eater can only move from side to side on the center line.
All the students say to the pie eater, “Pie eater, pie eater are you hungry?” The pie eater responds with a ‘yes or no’ answer.
If the answer is no, the pies (students) ask again.
If the answer is yes, then the pies ask again, “What kind of pie would you like?”
The pie eater then says apple or pumpkin and that pie tries to make it to the other side.
If the pie is tagged, then they become a pie eater.
[su_divider style=”dashed” divider_color=”#66d5a0″ size=”6″ margin=”20″]2. Bean Bag Toss
Use a large piece of cardboard or a large, unfolded box…. Cut one or two leaf shapes out of the cardboard. Paint the cardboard orange, red and yellow. When dry have the children throw bean bags through the LEAF SHAPED holes.
Be sure to save for next year!
[su_divider style=”dashed” divider_color=”#66d5a0″ size=”6″ margin=”20″]3. Leaf Blow Game
Have a leaf race! In this, the children blow a leaf across a table with a straw. The first one across is the winner…
[su_divider style=”dashed” divider_color=”#66d5a0″ size=”6″ margin=”20″]4. Harvest Dash (Outiside Game)
Set up a fall relay race with the kids. Fill large containers with sunflower seed bird feed. Have smaller, clear containers at the opposite end.
Kids fill cup with seeds and race to dump it in the empty container.
They sprint back to the start and hand-off the cup to the teammates.
Goal of the race is to be the first team to fill up the small container with the seeds.
As an extra challenge, give the kids an over-sized soup ladle instead of a cup. Don’t worry if the seeds spill; that’s part of the fun! The birds will easily find them later.
Tip: Try a dollar store for inexpensive clear containers. They usually stock plastic ones in apple or pumpkin shapes in the fall. Popcorn or candy corn also can be used in place of seed.
[su_divider style=”dashed” divider_color=”#66d5a0″ size=”6″ margin=”20″]5. Gourd Roll
Have each child take a turn rolling a small, round gourd. Try to find one with lots of bumps for extra craziness! The kid with the longest roll wins. Play on a sloped driveway or a small hill for extra fun.
[su_divider style=”dashed” divider_color=”#66d5a0″ size=”6″ margin=”20″]6. Gourd Bowling
Set up ‘bowling’ using empty two-liter soda bottles. If preferred, the bottles can be weighted with seeds or water. Use a round, bumpy gourd as the ball.
[su_divider style=”dashed” divider_color=”#66d5a0″ size=”6″ margin=”20″]7. Gourd Race
Set up start and turn around lines… (About 10 feet apart) Dived children into equal teams…
At the signal, first players walk from starting line to turn-around line and back to the stating line while holding a spoon with a gourd on it. Child then hands it off to the next in line.
If the gourd falls off the spoon, players must stop and pick up the gourd with the spoon to continue.
Continue until each child has had a turn. With many children—have many lines)
[su_divider style=”dashed” divider_color=”#66d5a0″ size=”6″ margin=”20″]8. Gourd Ring Toss
Assign different point values to different sizes of gourds, pumpkins, or dried Indian corn.
[su_divider style=”dashed” divider_color=”#66d5a0″ size=”6″ margin=”20″]9. Dress a Scarecrow and Run
Stock up on over-sized plaid shirts, goofy pants, floppy hats and any other clothing that a scarecrow might wear. Make piles containing one of each item.
The number of piles is determined either by the number of kids or teams participating.
Line up kids and let the game begin!
The children run to the pile, put on the outfit, and dart back to the starting line.
If doing it as a team game, they then switch the outfit with their teammate–who run out and back.
First team with their last team member dressed as a scarecrow wins.
[su_divider style=”dashed” divider_color=”#66d5a0″ size=”6″ margin=”20″]10. Candy Corn Relay Race
Designate a starting line and a finish line.
Set out a bowl full of candy corn for each player at the starting line and an empty bowl at the finish line.
The players must use a large spoon to scoop candy corn out of the full bowl and then carry it to the empty bowl and fill it.
They cannot spill any candy corn or use their hands!
If any candy corn falls off the spoon, they must immediately pick it up and bring it back to the back to the starting line bowl and start over with that scoopful.
[su_divider style=”dashed” divider_color=”#66d5a0″ size=”6″ margin=”20″]11. Pass the Corn Game (Ages 4 – 10)
Divide the children into two teams (or as many as you need) and have them form two lines. You will need a cob of dried Indian corn for each team.
- At the signal “go”, the corncob is to be passed from child to child. The catch is that they can use any part of their bodies, except their hands.
- If the corn touches the ground at any time, it must go back to the beginning of the line again.
- Whichever team manages to get the corn to the end of the line first wins the game.
- The corn can also be used in a relay, with the kids putting the corn between their knees, and racing “crab” style”.
12. Leaf, Leaf, Pinecone
The Leaf, Leaf, Pinecone is a version of the classic “Duck, Duck, Goose” with a nature-friendly twist.
This game is best played outdoors, but you can also gather pinecones and play game inside on a rainy day.
Whoever is “it” must not only touch the heads of the other players, saying, “Leaf, leaf, leaf,” but must also drop a fresh pinecone in the lap of the child they choose before running back around the circle without being tagged.
The person trying to tag “it” can touch “it” with a hand above the waist or with the pinecone below the waist. For Thanksgiving play “Turkey, Turkey, Stuffing”!
Instead of Simon Says, play the Scarecrow Says or the Witch Says, The Turkey Says, etc.
[su_divider style=”dashed” divider_color=”#66d5a0″ size=”6″ margin=”20″]13. Apple-Apple Pumpkin Game
Just like duck-duck-goose—Play Apple, Apple, Pumpkin! Same game with fall flair.
“Musical Hats” …Play “Musical Pilgrim Hats” in November
[su_divider style=”dashed” divider_color=”#66d5a0″ size=”6″ margin=”20″]14. Three Legged Sack Races
Add an autumn touch by creating an obstacle course using pumpkins, corn stalks and bales of hay.
[su_divider style=”dashed” divider_color=”#66d5a0″ size=”6″ margin=”20″]15. Fall Themed BINGO
Use candy corn as game pieces.
In October play “Put the Wart on the Witch” or Put the “Nose on the Pumpkin”. In November play “Pin the WATTLE on the Turkey” instead of Pin the Tail on the Donkey.
[su_divider style=”dashed” divider_color=”#66d5a0″ size=”6″ margin=”20″]16. Parachute Leaf Toss (For younger children)
Take a sheet, or a parachute. Gather real leaves, fabric leaves, or paper leaves. Place them in the middle of the sheet.
Gather around the sheet and have the children lift the sheet slowly and then quickly to see how all the leaves “float.”
[su_divider style=”dashed” divider_color=”#66d5a0″ size=”6″ margin=”20″]17. Turkey in the Straw
Fill a wading pool with straw and hide a small picture of a turkey in it for groups to dig through to see who can find it first.
[su_divider style=”dashed” divider_color=”#66d5a0″ size=”6″ margin=”20″]18. The Squirrel Game
Let the kids pretend they are squirrels gathering nuts for the winter.
Give each a small paper bag, then toss out several unshelled nuts onto the floor and let the kids race to see who can collect the most.
Older and younger children should be separated for this game. Another way to play this game, (if you have a way to corral a large quantity of leaves) is to hide nuts beneath a large pile of leaves and give the kids a set amount of time to find as many nuts as they can.
[su_divider style=”dashed” divider_color=”#66d5a0″ size=”6″ margin=”20″]19. Picking Apples
A regular sucker pull can become “Apple Picking.” Make a large apple tree with lots of red apples out of construction paper; then connect the tree to peg board.
Mark the tips of the handles on only a few caramel apple suckers then poke them through the peg board holes; poke several unmarked suckers around the marked suckers; then let the kids pick an apple.
Have prizes ready for those who get the marked suckers, but everyone gets to keep the sucker they pulled.
[su_divider style=”dashed” divider_color=”#66d5a0″ size=”6″ margin=”20″]Pumpkin Games for Kids
20. Pumpkin and Foot Race
Set up starting and finish lines and have the children race to see who can get their smallish pumpkin over the finish line. Only feet can be used to push pumpkins along.
There can be no kicking; if any kicking is observed, that child goes back to their starting line. This would also be a good team relay race.
[su_divider style=”dashed” divider_color=”#66d5a0″ size=”6″ margin=”20″]21. Pumpkin Rolling
Divide children into two or more teams.
Have a start line and turnaround line, 20 ft apart.
The first child in each line rolls a pumpkin from the start line, to the turn-around line and back.
The next person does the same, etc. The first team to have everyone play wins!
[su_divider style=”dashed” divider_color=”#66d5a0″ size=”6″ margin=”20″]22. Pumpkin & Broom Race
(Can be played outdoors or played in gym class!)
This is a simple race but since pumpkins are not smooth balls and refuse to roll in straight lines, you’ll need plenty of room!
You need medium pumpkins and sturdy sticks (or brooms); Use one pumpkin and stick/broom for each team.
The racers line up on the starting line with the pumpkins turned on their sides.
On the signal, the racers use the stick to roll the pumpkins to the finish line.
Younger players may want to use their hands instead of the stick.
If you want to play this as teams, make it a relay race.
When playing inside use smaller pumpkins.
[su_divider style=”dashed” divider_color=”#66d5a0″ size=”6″ margin=”20″]23. Pass the Pumpkin Relay
Line up into 2 teams.
The first person passes the pumpkin OVER his/her head to the next person in line.
The next person passes the pumpkin UNDER his/her legs to the next person, and so on.
When you get to the end of the line the last person runs up to the front and starts it all over again.
Whoever has the first person that was in line at the beginning of the game— in the back of the line WINS.
[su_divider style=”dashed” divider_color=”#66d5a0″ size=”6″ margin=”20″]24. Find the Pumpkin
Supplies:
- Ten pieces of white paper
- Five pieces of yellow paper
- Five pieces of orange paper
- A crayon
- Scissors
Directions:
- Draw ten white pumpkins, five yellow pumpkins, and five orange pumpkins. (Or adjust the numbers to reflect the number of your group)
- Cut out all the pumpkins.
- Decorate each pumpkin with a funny face.
- Write the “number 1” on the backs of the white pumpkins.
- Write the “number 5” on the backs of the yellow pumpkins.
- Write the “number 10” on the backs of the orange pumpkins.
- Hide all of the pumpkins.
- Kids try to find as many pumpkins as they can before the leader says “Stop!”
Players add up the numbers on their collected pumpkins. The player with the most points wins! This can also be played in teams.
[su_divider style=”dashed” divider_color=”#66d5a0″ size=”6″ margin=”20″]25. Pumpkin Bowling
Supplies:
- 3 small pumpkins
- 30 empty 2 liter clear soda bottles (less if your group is smaller!)
- a bag of gravel or pebbles placed in bottom of bottles
Ask parents to save empty, clean 2 liter soda bottles for your game.
Add about a cup of sand or pebbles in each bottle so they will stand without falling over.
Divide kids into several teams of 3-8 kids each…line up and take turn at bowling!
The small pumpkins are the bowling balls. If it’s for a party- consider prizes.
The kids that get a Strike receive another turn to bowl a strike. If they bowl another strike, they receive a prize. When using prizes BE SURE EVERYONE GETS SOMETHING for playing!
[su_divider style=”dashed” divider_color=”#66d5a0″ size=”6″ margin=”20″]26. Pumpkin Hunt
While the kids are out of the room – hide paper or small gourd pumpkins around the room. Challenge kids to find them all! When they have found all pumpkins you can serve a special snack or give each child a ‘goodie’.
[su_divider style=”dashed” divider_color=”#66d5a0″ size=”6″ margin=”20″]27. Pumpkin Bocce Ball
Object of Game: Roll a pumpkin closest to the big pumpkin. You need a large pumpkin. Also purchase several miniature or round sugar pumpkins.
Instructions: Place the big pumpkin several feet away. Give each player a small pumpkin. Each player rolls (No tossing or throwing) their pumpkin and tries to be the closest to the big pumpkin. The player closest wins …
Check out a list of the best bocce ball sets.
[su_divider style=”dashed” divider_color=”#66d5a0″ size=”6″ margin=”20″]28. Throw Pennies in the Pumpkin
Carve out a pumpkin (Do NOT make it a Jack-O-Lantern); line the inside with plastic or aluminum foil. Make the top opening large. Option is to use small plastic pumpkins which are quicker and not messy!
Instructions:
- Place the pumpkins a couple feet away.
- Give each player about ten pennies…and try to get them in!
- Each time one gets in–a point is earned… (You could also use a plastic Halloween pumpkin container)
29. Pumpkin Race
(Like the above Pumpkin Race– but using sticks instead of brooms)
Can be played in a yard, garage or even inside using small pumpkins!
This is a simple race but since pumpkins are not smooth balls and refuse to roll in nice straight lines, you will need plenty of room!
You need two large pumpkins and two sturdy sticks.
The racers, line up on the starting line with the pumpkins turned on their sides.
On the signal, the racers use the stick to roll the pumpkins to the finish line.
Younger players may want to use their hands instead of the stick.
If you want to play this as teams, make it a relay race.
[su_divider style=”dashed” divider_color=”#66d5a0″ size=”6″ margin=”20″]30. Challenge the Kids
How many words can the kids come up with letters in the word ‘PUMPKIN’ ? This can be an individual challenge, or two or three kids teamed together.
(Nip, pup, ink, pink, mink, in, pin, kin, pun, nun, pump, up, nip, )
[su_divider style=”dashed” divider_color=”#66d5a0″ size=”6″ margin=”20″]31. Win the Pumpkin
Place children in a circle.
Start some music and pass a mini pumpkin from one person to another.
When the music stops-the person holding the pumpkin is out.
The last one left keeps the pumpkin!
[su_divider style=”dashed” divider_color=”#66d5a0″ size=”6″ margin=”20″]32. Ring the Pumpkin
Line up three large pumpkins with stems, to form a ring toss.
Use embroidery hoops or make hoops with rope and duct tape.
Mark a throwing line on the floor and take turns trying to ring a pumpkin stem.
Variation: Try to ring an entire large pumpkin with a hula hoop!
[su_divider style=”dashed” divider_color=”#66d5a0″ size=”6″ margin=”20″]Fun Pumpkin Activities
33. Pumpkin Head
Do you have Mr. Potato Head game pieces???! The kids can have some Fall fun using them with small pumpkins!
Using a smallish to medium sized pumpkin, poke some holes where the eyes, nose and mouth would be (include hat and ears). Have the children decorate “Mr. Pumpkin Head” using Mr. Potato Head pieces.
[su_divider style=”dashed” divider_color=”#66d5a0″ size=”6″ margin=”20″]34. Magic Pumpkin Seeds
Materials:
- Pumpkin seeds
- Small paper bag
- Small pumpkins
Show the children a small bag of pumpkin seeds and explain that you believe these are magic pumpkin seeds.
Play this game on the playground (or your yard) where the kids toss the seeds onto the ground. Have them make up a few magic words, if they want.
The next day, before children go outside–gather the seeds and put small pumpkins in their place.
Take the children outside and delight them with the ‘magical’ pumpkins that have grown.
If you have enough pumpkins, the children can take the pumpkins home and/or first decorate and paint them to add to theme of your space.
Idea adapted from preschoolrainbow.org
[su_divider style=”dashed” divider_color=”#66d5a0″ size=”6″ margin=”20″]35. Traditional Pumpkin Games with a Twist
Instead of Simon Says, play ‘THE PUMPKIN SAYS…’
2. Instead of Duck-Duck-Goose—‘Play APPLE-APPLE-PUMPKIN’
Play ‘PASS THE PUMPKIN’ like Hot Potato. Use a tiny pumpkin…
Instead of playing Pin the tail on the Donkey—PLAY ‘PUT THE STEM ON THE PUMPKIN’
Fall Party Games for Kids

36. Oating Pumpkins
Number the bottom of the small gourds that look like miniature pumpkins and float them in water for the children to choose one for small prizes.
[su_divider style=”dashed” divider_color=”#66d5a0″ size=”6″ margin=”20″]37. Pumpkin Seed Toss
Number and line up 5 small baskets or containers; have children stand 3 feet (or farther depending on ages) in front of the first container and toss seeds into them in sequence. Small prizes can be given for each container seeds get in.
[su_divider style=”dashed” divider_color=”#66d5a0″ size=”6″ margin=”20″]38. Pumpkin Walk
This is like a regular cake walk except instead of numbers, place pictures of several fall items on the floor for the children to walk; call out the names of the items instead of numbers.
Award the child that lands on the picture of a pumpkin—a small/miniature pumpkin! Use fall themed music such as “Turkey In The Straw” or “Jimmy Cracked Corn“.
[su_divider style=”dashed” divider_color=”#66d5a0″ size=”6″ margin=”20″]39. Pumpkin Seed Spitting Contest
40. Floating Pumpkins
Number the bottom of the small gourds that look like miniature pumpkins and float them in water for the children to choose one for small prizes.
Here is a list of fun fall activities and games for kids. The kids are back in school, the leaves are turning colors, and Halloween is approaching.
These games and activities are a great way to bring in the fall season. They are sure to bring hours of fun and laughter.
[su_divider style=”dashed” divider_color=”#66d5a0″ size=”6″ margin=”20″]Pumpkin Science Projects for Kids
41. Guess the Pumpkins Weight
Need:
- Large pumpkin
- Bathroom or science class scale
- Slips of paper
Have children write their estimates of the pumpkin’s weight on a slip of paper. Kids write their names on the paper, fold them, and place in a box.
At the end of the time-frame, weigh the pumpkin and award a prize or the pumpkin to the child with the closest guess.
Check out more fun paper games.
[su_divider style=”dashed” divider_color=”#66d5a0″ size=”6″ margin=”20″]42. Growing in a Pumpkin
Start this about two weeks before Halloween
Materials:
- 1 small pumpkin for each child or experiement
- Paint
- Cotton Batting
- Mustard, Watercress or birdseed
- Water
Cut the top off the pumpkin and and clean out the seeds.
Paint a face on the pumpkin. (If it is Halloween project–if it is for Fall/Autumn, leave natural)
Fill the pumpkin with cotton and spray with water.
Sprinkle the seeds on the batting.
Keep the batting moist, and seeds will sprout in about 2 weeks or sooner….just in time for Halloween!
[su_divider style=”dashed” divider_color=”#66d5a0″ size=”6″ margin=”20″]43. Left-over Pumpkin Seeds
You can quickly make pumpkin seeds in your microwave. The shells are edible — and a good source of fiber. You can also use this method with other seeds such as acorn squash and butternut squash.
Ingredients:
- 1 cup pumpkin seeds
- 1 Tbsp. Olive oil or butter
- Salt
- Seasoned salt
- Garlic /onion powder or other seasonings to your choice.
Instructions: Rinse pumpkin seeds. Remove all the pulp. Drain the seeds and discard the pulp. Spread out on paper towel on a cookie sheet and dry them over-night. Place butter or Olive Oil l in a microwave-safe, baking dish.
Microwave on high about 7 to 8 minutes or until seeds are toasted a light golden color. Be sure to stir every 2 minutes as they are cooking. When done, sprinkle with your choice of seasonings. Coat evenly. Cool them before eating or storing. They can be stored in an airtight container at room temperature up to 3 months or refrigerate up to 1 year.
If you like your toasted pumpkin seeds extra-salty, soak them overnight in a solution of 1/4 cup salt to 2 cups of water. Dry an additional day, and follow the above directions.
[su_divider style=”dashed” divider_color=”#66d5a0″ size=”6″ margin=”20″]44. Does a Pumpkin Sink or Float?
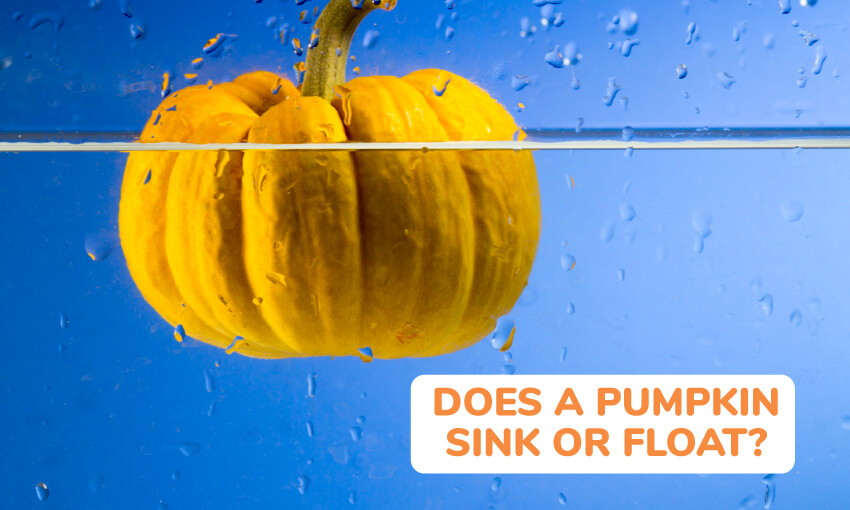
Fill a large clear storage container or aquarium with water. (If the weather is warm, you can do it outside).
Have children make predictions of what will happen and graph the predictions. Do the experiments to determine if they were right or not.
Make it interesting and get a few pumpkin sizes.
You may hear predictions that the smaller pumpkins will float and the large will sink. (Pumpkins float)
Talk about why they float… If older kids know the answers… have them run the activity. The pumpkin (and watermelon) will float because its mass is less than the mass of water it displaces.
This is due primarily because the inside of the pumpkin and melon are hollow. It is mostly air, which has a much lower mass than water.
[su_divider style=”dashed” divider_color=”#66d5a0″ size=”6″ margin=”20″]45. Pumpkin Experiment
Prepare the experiment by cutting two pie pumpkins in half. (This will give you four halves.)
Place each pumpkin half in a plastic bag that is mostly closed (the environment needs to be moist, yet allow some fresh air to enter).
Set one bag in a sunny spot, one in a shady spot, one in the refrigerator, and one in a location of the students’ choosing.
Ask kids to predict which pumpkin will grow the most mold over the course of the experiment.
Set aside time each day for students to examine the pumpkin halves and record their observations.
Then ask students: Where is the best place to keep a jack-o-lantern in order to keep it from spoiling?
After doing the above—here is a TIP FOR KEEPING THOSE CARVED-OUT PUMPKINS FRESH!
Some say that coating the inside of the emptied/carved pumpkin with petroleum jelly (Vaseline) should help preserve and keep the pumpkin from shriveling/getting moldy.
Trying various methods myself–the pumpkins that stayed freshest the longest were those sprayed with “Clorox Cleanup” (or a mixture of bleach and water).
Spray the bleach and water inside of the pumpkin daily. Killing off mold spores with a bleach solution helps preserve the pumpkin.
If your pumpkin starts to look as if it needs rehydration– (wilting or caving in)– fill a large container with cold water and 2 or 3 tablespoons of bleach. Good results should be achieved when soaked overnight.
Pumpkins kept outdoors in very cool weather should last a week without any treatment…
Cooking and making playdough is also science. Liquid that turn to a solid is science. See the Pumpkin playdough recipes in the below ‘Arts and Crafts’ section of this page.
[su_divider style=”dashed” divider_color=”#66d5a0″ size=”6″ margin=”20″]Pumpkin Crafts for Kids
46. Pumpkin Seed Mosaic Art
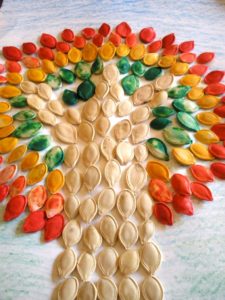 From Our Little Nature Nest comes this wonderful pumpkin seed mosaic art! Jenn from the site explains it best! She says…”You can use any large seeds like those from a pie pumpkin, or hard squash that you may have from cooking this fall.
Dying them is simple. All you need is dried pumpkin seeds, food coloring, and vinegar. Place 1/4 to 1/2 cup water in small cups. Add a TBS of vinegar, and several drops of food coloring to the cups.
Allow the dried seeds to soak in the colored water for 2 to 4 hours, then remove them from the water & allow them to dry over night. You then have a colorful, natural, free, craft item.
You can make mosaics or necklaces with them. Some will dye a solid color & others will be speckled. Use a nice heavy paper like poster board or card stock to glue the mosaics to.”
[su_divider style=”dashed” divider_color=”#66d5a0″ size=”6″ margin=”20″]47. Pumpkin Pie Playdough
Ingredients:
- 5 1/2 cups flour
- 2 cups salt
- 8 teaspoons cream of tartar
- 3/4 cup oil
- 1 (1 1/12 ounces) container pumpkin pie spice
- Orange food coloring (2 parts yellow, 1 part red)
- 4 cups water
Instructions: Combine dry ingredients in a non-stick pan.
Add oil, water, food coloring and stir until smooth.
Cook and stir over medium heat until all lumps disappear.
Knead the dough on a floured surface until it’s smooth.
Store in an airtight container.
Dough will keep in a plastic bag for about a week…and it smells wonderful!
Image source: Pepperpaints
[su_divider style=”dashed” divider_color=”#66d5a0″ size=”6″ margin=”20″]48. No Cook Pumpkin Pie Playdough
Ingredients:
- 2 cups flour
- 1 cup salt
- 2 tbsp. pumpkin pie spice
- 2 tbsp. vegetable oil
- 1 cup water
Mix together and knead until smooth
[su_divider style=”dashed” divider_color=”#66d5a0″ size=”6″ margin=”20″]49. Autumn Smelling ‘Pumpkin Votive’
Cut the top off of a small pumpkin.
Clean and carve the pumpkin.
Sprinkle pumpkin pie spice on the inside of the lid and cut a small hole in the top to make a chimney.
Light a votive candle and set inside. Replace the lid.
Results are a pumpkin pie scented votive!
[su_divider style=”dashed” divider_color=”#66d5a0″ size=”6″ margin=”20″]50. Paper Bag Pumpkins
Directions:
- Starting with a lunch size paper bag– crumble-up some paper and stuff the lunch bag.
- Tie the top with string leaving about 2 inches of space at top.
- Paint the bottom portion with orange tempera paint and the top brown (for the stem).
Copy a leaf pattern on green paper, felt or foam — cut it out–glue or staple it to base of stem.
Optional but nice: Wrap green or brown pipe cleaners around the pumpkin stem for vines. (Give the pipe cleaner vine a curly look by spiraling it around a pencil and then twisting it onto the stem. You can make a jack-o-lantern by painting or drawing a face on your orange paper bag.
Tip:
I prefer to make these by first painting the paper bag orange. Have the kids open the bag and place it on their hand (like a puppet) They will be able to then paint all sides.
Leave the top 1- to 2-inches of the bag brown.
While you are waiting for the paint to dry, cut a couple of leaf shapes out of green felt, craft foam, or construction paper…and proceed from there. (Barb)
Images: Thanks to About.com (image with pipe cleaner vines) and Kaboose
[su_divider style=”dashed” divider_color=”#66d5a0″ size=”6″ margin=”20″]51. Real Pumpkin Stamping
Buy several small, real pumpkins.
Cut them in half.
Have children dip the pumpkin halves into paint to make prints.
WHEN YOU’RE COLORING AND CUTTING OUT PUMPKIN ART…To give it some texture…
Peel the paper wrapping off an orange Crayon.
Place a textured item such as plastic bubble wrap or a dish mat UNDER a large piece of white construction paper.
Rub with the side of the crayon over the entire paper to create a pumpkin’s bumpy surface. Continue with your project.
[su_divider style=”dashed” divider_color=”#66d5a0″ size=”6″ margin=”20″]52. Autumn Pumpkin Ball
Materials:
- 6″ Styrofoam Ball
- 18″ Square of Fall Fabric
- 2 Green Pipe Cleaners
- 2′ Raffia
- Rubber Band
- Scissors
Use a serrated knife to slice the end off a Styrofoam ball so it will stand flat without rolling.
Wrap the ball with fabric, gathering the ends at the top of the ball. Secure fabric with a rubber band.
Twist two pipe cleaners together. Wrap it around the rubber banded fabric and twist to keep in place.
Twirl ends around a pencil. Finish off the pumpkin with a raffia bow.
Would be cute grouped together in a bowl on a tray…and…each one only takes about 10 minutes to make! Source: Cindy of Pittsburg PA.
[su_divider style=”dashed” divider_color=”#66d5a0″ size=”6″ margin=”20″]53. Make a Pumpkin Paper Chain
Take a strip of orange construction paper about 3 inches wide
fold into an accordion about 3 inches square.
When all folded– cut the shape of a pumpkin leaving the side with the fold NOT cut.
When you open you will have a chain of pumpkins.
[su_divider style=”dashed” divider_color=”#66d5a0″ size=”6″ margin=”20″]54. Start with a Pumpkin Seed (art)
Put out photographs of pumpkin patches at various stages. The children can use this as a guide in their art work! Have the kids then…
- Glue a pumpkin seed onto paper. (This will be ‘underground’)
- Paint an imaginary plant with the roots growing FROM the seed UNDERGROUND.
- Paint the leaves, and flowers/fruit of the plant above the ground level.
To go along with the art project!
[su_divider style=”dashed” divider_color=”#66d5a0″ size=”6″ margin=”20″]55. Growing Steps of a Pumpkin
- Leafy vines grow from pumpkin seeds.
- Yellow-orange flowers bloom on the pumpkin vine, then wither.
- The flowers’ ovaries (at the base of the flower) swell and become tiny green pumpkins.
- The pumpkins grow larger and change color…
- In four months after planting, they’re ready to harvest.
56. Pumpkin Patch Field Trip
Can you take your kids on a field trip pumpkin patch?
Read books about ‘Growing Pumpkins’ and ‘Pumpkin Patches’ before the trip.
Have children each pick out a pumpkin to take back. (If budgets are tight-have parents pay for their child’s pumpkin).
While at the patch–observe how the pumpkin are growing on the vine. Look at variations in color, size, shape, quality and weight!
Children can take their pumpkins home–or decorate them with you. Put out paint, yarn for hair, google eyes, and other decorating materials. How creative can they get?!
[su_divider style=”dashed” divider_color=”#66d5a0″ size=”6″ margin=”20″]57. Pumpkin Sucker Bouquet (centerpiece)
This is a party snack and craft in one…wonderful for a dessert table!
I purchased a Styrofom pumpkin and simply inserted the sucker sticks into the pumpkin. Result is an extremely quick and cute sucker-holder decoration!
This version will take you from early October through November–it’s a nice ‘Autumn’ piece. Using a black ‘sharpie,’ a Jack-O-Lantern face could also be painted on it for Halloween! (Image by KidActivities.net)
Yikes! There are so many easy Pumpkin Snacks and Recipes, that they are now in their own category! Be sure to visit it to complete your theme…(There is also a link at page bottom and top)
[su_divider style=”dashed” divider_color=”#66d5a0″ size=”6″ margin=”20″]58. Pumpkin Decorating Ideas
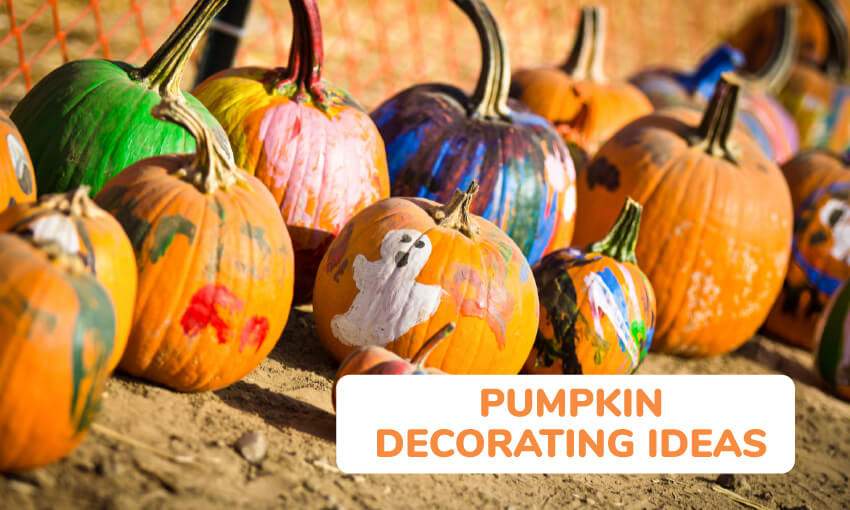
They’d be wonderful the entire Autumn season–from September to November! MANY other ideas on Autumn Decorating Page…
[su_divider style=”dashed” divider_color=”#66d5a0″ size=”6″ margin=”20″]59. Your Address – The Pumpkin Way
Select one pumpkin per house number and cut a hole in the top of each.
Clean pumpkins out–saving the tops–wipe exteriors dry.
Center paper stencil number (these are 5 inches tall) on the first pumpkin and adhere with painter’s tape.
With a marker, trace the stencil outline, then carefully carve just outside the line with a small handsaw or heavy-duty craft knife. Repeat for each number.
Arrange a few tea lights inside each pumpkin, then line up or stack in proper order.Replace top on the highest pumpkin.Illuminate tea lights using a long-handled lighter through the holes.
Source: sunset.com
THE FAST WAY…You wouldn’t be able to insert tea lights–but a similar effect could be achieved by painting on the numbers!
[su_divider style=”dashed” divider_color=”#66d5a0″ size=”6″ margin=”20″]60. Pumpkin Container Centerpieces
Thoroughly clean/carve out a small to medium-sized, round pumpkin. Line the interior with tin foil or saran wrap.
Place a block of florist’s foam inside the scooped pumpkin; place an assortment of harvest-themed artificial berries and flowers, available at arts and crafts stores, into the foam block.
Abundantly fill the foam block so that you cannot see the opening of the pumpkin.
This makes a festive Fall and Thanksgiving centerpiece! As you see, it also makes a nice candle holder.
[su_divider style=”dashed” divider_color=”#66d5a0″ size=”6″ margin=”20″]61. Pumpkin Topiary
Materials:
- 4-inch terra-cotta pot
- Styrofoam piece to fit in pot
- Wooden dowel or small tree branch
- Miniature pumpkin
- Hot-glue gun and hot-glue sticks
- Dried beans or peas
- Raffia
- Use hot glue to secure the Styrofoam into the pot.
Make the “tree.” Sharpen the end of the dowel or branch (trimming it to size if necessary). Push it into the bottom of the pumpkin. Push the other end of the dowel into the Styrofoam. Hot-glue the dowel to secure if necessary.
Add the finishing touches. Spread dried beans or peas over the top of the Styrofoam, gluing if desired. Using raffia, tie a bow around the dowel just below the pumpkin.
TIPS: you can replace the miniature pumpkins with small gourds. If you want your topiary to last for more than two weeks, use artificial vegetables or fruits.
[su_divider style=”dashed” divider_color=”#66d5a0″ size=”6″ margin=”20″]