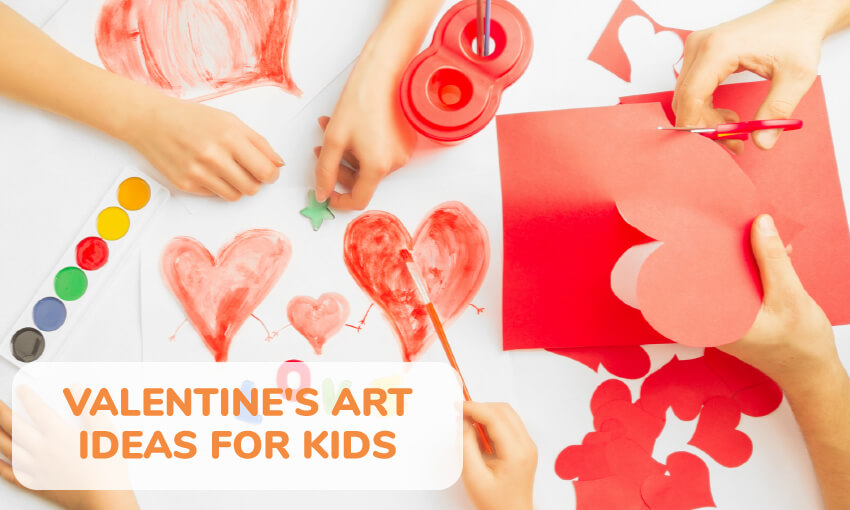
Looking for some great Valentine’s Day art and craft ideas? Look no further. Here you will find a large collection of activities that will engage kids creative mind.
On this beautiful day for couples, we can also keep our students active and turn it into a learning experience.
1. Valentine story book
♥ Cut out heart shaped paper to have each child finish the sentence “Love is_________.”
♥ Kids illustrate this at the top of the paper.
♥ Bind all of the pages into a book. Parents love reading these!
2. Valentine marble painting
♥ Use a heart candy box bottom; cut paper to fit inside the box. Or, cut paper into the shape of a heart. Put the ‘heart shaped paper’ into a box
not much bigger than the paper.
♥ Dip marbles into pink and red paint. Drop the marbles into the box and have children twist and turn the box. You can also do this using the traditional method of box painting. Put a small plop of paint in each corner of the box.
Place something ’round (such as a marble/golf ball) and roll it around until the desired effect is achieved.
Optional: Sprinkle glitter over wet paint, pretty when complete.
3. Valentine gift soap
You’ll need one bar of Ivory soap; 1/4 cup water; 2 drops of food coloring; and a good kitchen grater and essential oils if wanted.
♥ Have youth finely grate the soap into a big bowl.
♥ Add water.
♥ Shape the soap into balls and dry overnight.
♥ Wrap in netting and tie up with a pretty ribbon.
If you want your soaps scented, you can add a few drops of essential oil or soap scent. Most craft stores carry this.
I read that you can also pack soap mixture into cookie cutters-and then dry overnight but I’ve never done this.
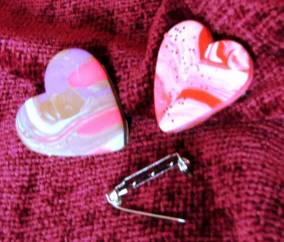
4. Valentine ‘play dough’ pin (These are also nice made with purchased wooden hearts!)
Materials:
| Store bought Play Dough | Heart shape cookie cutter |
| Pin backs | Hot Glue or Strong Glue |
| Sand Paper |
This project is actually quite simple. Believe or not, the heart shape is ‘plain-old store bought play dough’ that has had colors mixed.
(This naturally happens as children play with it and then put it away just make sure it’s white, pink, purple, and red play dough!)
What to do:
- Roll out dough
- Cut shapes with cookie cutter. Finished pin from ‘top to bottom point’ is 1 1/4 inches long. Larger cookie-cutters would make a pin too ‘heavy’. Place shapes on wire rack to dry and harden.
- When dry, sand any rough edges.
- The heart may be sealed with clear nail polish or a protective coating of a clear surface finish. Repeat as necessary to achieve the level of desired gloss.
- Glue on pin backing.
Note: A few pinches of glitter was added into the play dough for one of the pins. This part is optional.
5. ‘Band -aid’ valentine cards
♥ Kids will get a kick out of these silly valentines. Cut out medium sized red hearts. Write “I’m Stuck on You” on each heart.
♥ Set out band aids and have children stick a band aid on each valentine!
6. ‘Blotto art’ heart card – I ♥ U
Materials:
- Paper
- Tempera paint
- Paintbrushes
- Containers for water Materials:
- Paper
- Tempera paint
- Paintbrushes
- Containers for water
1. Fold paper in half.
2. Paint half a heart on one side of the paper.
3. Close the paper and blot. (That’s the ‘blotto art’)
4. Repeat the process if necessary (outlining the heart) until the paper is full of color.
Extension idea: Turn the ‘blotto art into cards! Put out a variety of supplies and challenge the children’s creativity. As shown in this sample, ‘R’ made a ‘stamp’ out of a valentine eraser (see the above ‘tooth pick in the heart eraser shape) and made heart designs on the cover after dipping the stamp into tempera paint.
On the inside of the card a google-eye is glued to the upper left corner (with added eye lashes). It is followed by the ‘blotto heart” and then a ‘U’. (I love you!) ‘R’ completed the card by spraying a fine mist of hair spray (Aqua-net) onto the card and sprinkled glitter. This kept the glitter on the card.
A ‘glue glitter’ design was added across the blotto heart. (Image by KidActivities.net)
Check out our other fun Valentine’s Day activity ideas.
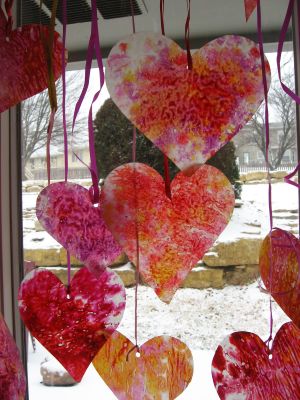
7. Sparkling hearts
Cut heart shapes out of card-stock or construction paper. Paint with shades of red and pink.
Sprinkle salt on the hearts while paint is still wet.
Hearts will sparkle when dry.
Make some Valentine yarn dolls
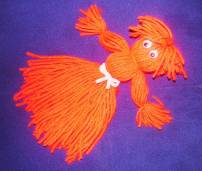
Visit the Yarn Doll page for instructions.
8. Valentine collage
- Start with a large sheet of paper or construction paper.
- Take old magazines and the advertisements from papers. Look for anything Valentine’s Day related, such as hearts, flowers, and candies.
- Have child create a Valentine Collage with these magazine cutouts. Use markers, crayons and stickers to further decorate it.
- Hang the finished collages for a Valentine’s Day display.
9. Heart rubbings
Materials: Heart-shaped paper doilies or sandpaper, Scissors, White paper, Crayon
1. Cut out a heart shape from the sandpaper or use the heart-shaped doily.
2. Tape the heart to the table, with the tape on the back side of the heart.
3. Place a piece of white paper over the heart and rub a crayon (with the wrapper removed) sideways over the shape.
10. The Valentine giving bag
♥ Invite children to brainstorm special things they can do for the recipient of their gift such as give a hug, tell a funny joke, sing a song, take out the garbage, vacuum a room, put away the dishes, etc.
♥ Write their responses on 3″X6″ strips of paper. Help the children wrap the strips tightly around a pencil to create scrolls.
♥ Decorate a plain paper bag with festive Valentine craft items, drawings, stickers and glitter glue.
♥ After the bag is dry put the scrolls inside the bag. Fold down the top of the bag-punch two holes and thread ribbon through the holes. Tie and create a bow.
11. Valentine shaving cream art
You Need: Non-menthol shaving cream, Red food coloring, Paintbrush,
White paper, Smock or old shirts.
1. Add a drop of red food coloring to a baseball-sized pile of shaving cream.
2. Mix this with a paint brush. Wear cover over clothing as the food coloring will stain clothes and hands.
3. Paint with the shaving cream on white paper.
12. Valentine butterflies
Materials:
TP tube or paper towel tube cut to desired height (Paint the tubes before decorating)
Paper heart doilies or construction paper hearts
Google eyes (for butterfly #2 ) – black marker for simple version)
Pipe Cleaner
Pom-poms
Decorations as desired
Kid Activities believes that children’s projects are best when they are open-ended. For this activity a variety of supplies were put out. (Crafters had a visual sample-but were told to create their own version.) Two samples are shown here:
1. Both ‘Valentine Butterflies’ are similar but ‘R’ added a head and double wings. The wings have been cut out from the center of Valentine Doilies-however-construction paper hearts can also be used.
The wings are glued over each other onto the back of the paper tube.
2. The pom-pom head sits on top of the tube and a full length ‘pipe cleaner antenna’ fold into the tube. (It’s size and thickness holds it in place) The mouth and nose are made from ‘bits’ cut out of foam. Small ‘stick on’ foam hearts decorate the wings.
The more simple version for a ‘younger child’ uses one set of wings. In place of a pom-pom head eyes and mouth are drawn on with a black permanent marker.
13. Felt heart pillows
Need: Two 8″ squares of red or pink felt
8″ cardboard heart templates to use as pattern
Pencil
Scissors
Safety pin
Glue
Fabric paint
Polyester fiberfill
- Use the cardboard heart template to trace two hearts onto the felt. Cut out hearts and place one on top of the other.
- Put a safety pin through the middle of the hearts to hold them in place while gluing.
- Glue the two pieces of felt together along the edge leaving a 3″ opening.
- Use fabric paint to add a child’s name to the top of each pillow; let dry.
- Stuff the heart with fiberfill and glue pillow shut.
14. Valentine’s wreath
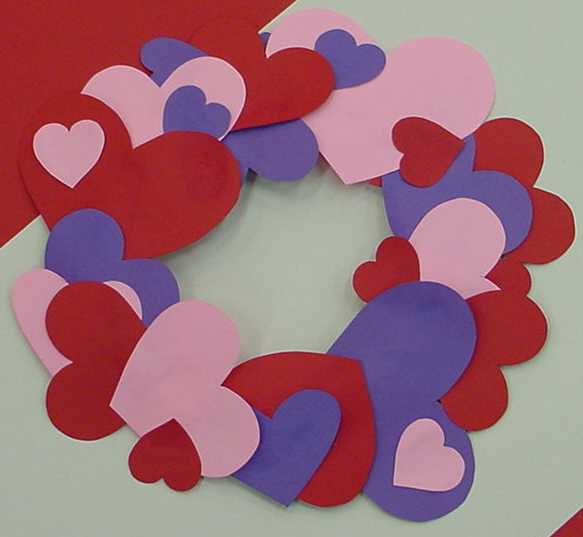
Materials: Construction paper, Scissors, Paper plates, Glue, Yarn or ribbon.
1. Cut out different sized hearts from red, purple and pink paper; you’ll need many for each wreath.
2. Cut the middle out of a paper plate and glue the hearts all around the plate.
3. Make a bow with some yarn or ribbon or tie some string to the back and hang. Photo by Miss Susan-Kansas City Public Library
14.5 Love bugs
Need: Clip-on clothes pins, red paint, pink construction paper, black paper.
1. Have children color their clothes pin red.
2. Pre-cut small pink construction paper hearts and have kids draw faces on them
3. Glue black paper antennae on the heart faces
4. Next glue the heart faces on the top “clip-end” part of the clothespin.
Give children two larger pink paper heart shapes to decorate with crayons, markers, glitter, etc.
Have them then glue two of the hearts together to make “wings” from their clothespin body.
The heart points will be touching each other on the inside and the fullness of hearts will be on the “wing ends”.
15. Stained glass hearts
Make stained glass hearts by placing red, pink and white crayon shavings between two pieces of wax paper.
Cover the top with newspaper and press a warm (lowest setting) iron to melt the crayon chips. Allow to cool completely.
Using cardboard, tag board, or empty cereal boxes, make heart shape templates for the children to trace. Tape these over the waxed paper and trace the templates. Cut out the shape hole, punch ,attach string, ribbon or fish line! This wonderful example is from Skip to my Lou! Be sure to make a bunch!
16. Valentine cupcakes paper flowers
Materials needed: Cupcake papers, pipe cleaners, green construction paper
Take a cupcake paper and pinch the bottom of it.
Take a pipe cleaner and wrap it around the pinched area.
Cut some leaves out of green paper and add them to the pipe cleaner.
Put some play dough in a baby food jar and have the children place
the flowers in the jar (like in a vase)
When the play dough dries flowers should stand nicely.
You can also decorate some tissue paper to cover the outside of the jar.
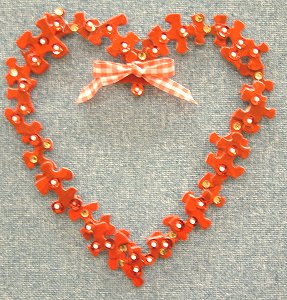
17. Jigsaw puzzle heart
Materials:
- 22 pieces of an old jigsaw puzzle
- Red acrylic paint
- Tacky glue
- Modge Podge glue & sealer, glossy finish
- Sequins, red and gold
- Small pearl beads
- Ribbon for bow
- Paintbrush
- Fishing line
1. Paint the jigsaw puzzle pieces red and let them dry. Painting both sides is optional. If you want to hang the heart in a window, it would be best to paint both sides.
2. Lay them out in a heart shape. When laying out the shape, place one piece under the next overlapping the top piece each time.
3. With tacky glue, glue the pieces to one another and let dry.
4. After the heart has dried, put a coat of Modge Podge all over it and let dry. This will make the heart very shiny.
5. Glue sequins and pearls all around to decorate. Let them dry thoroughly.
6. Tie on a bow with ribbon as shown in the sample. Source: Ms. Brenda-Kansas City Library
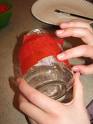
18. Sharing kisses gift
1. Take a small terra cotta pot; have children sponge paint with red and white paint.
2. When dry add Hershey kisses.
3. Make and glue a large red construction paper heart to a Tongue depressor size Popsicle stick.
4. Put a message on it and then insert it in the center of kisses.
5. If it’s a gift wrap it with red or pink cellophane and add a pretty bow just below the heart.
19. Heart art
Make some heart shaped templates. These can be used to trace in whole and parts to make some wonderful art such as this! Sample from a student of Shannon Stewart former art teacher at Stetson Hills School in Phoenix
Have any post Christmas candy canes? Hot glue two candy canes together at the tips. They make a perfectly shaped heart!
20. Valentine candy canes
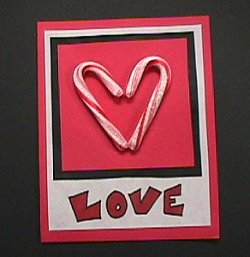
Put out construction paper, paper doilies, the candy canes, markers, ribbons, etc. Next, challenge the children to use their imagination in creating cards! If you have small photos of the children, you could glue these in the center of the hearts. This card has been made by Ms. Jane at the Kansas City Public Library.
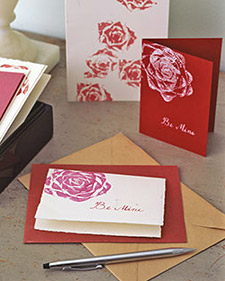
21. Chalk and salt Valentine cards
Need: Salt, Sidewalk Chalk, Clear glue, Colored paper, Markers
♥ Put salt in small separate containers (one for each color)
♥ Rub the individual, different colors of chalk into each salt container to get the desired shades.
♥ Have children write their messages on the cards before they decorate them.
♥ Next, have children make designs on the paper by first making designs with glue on the cards; they then put the colored chalk or sand over the glue designs.
♥ Dry for half a day.
22. Valentine spaghetti art
1. Cook spaghetti noodles, drain and cool.
2. Fill a gallon Ziplock bag one quarter of the way with water.
3. Add red food coloring to the water.
4. Add cooked spaghetti and mix around in the Ziplock bag until noodles change color. Drain.
5. Children can take one noodle at a time, dip it in glue and place it on a piece of paper in the shape of a heart.Submitted by Cassie/Michigan
23. Easy to make lollipop roses
Materials:
| Wrapped heart shaped lollipops/suckers | Green chenille stems/pipe cleaners |
| Scissors |
1. Starting at the top of the sucker stick, tightly wrap a chenille stem in a coil around it.
2. Cut off remaining pieces of chenille- about 3 inches.
3. Twist the small piece of the chenille around the stem where you want the flower leaves to be.
4. Shape the leaves and twist to secure.
5. If you want to add a name tape or note, cut a piece of paper and make a hole with a hole punch.
6. Secure the note onto the smaller piece of chenille before twisting into the leaf shape
24. Make a heart puzzle
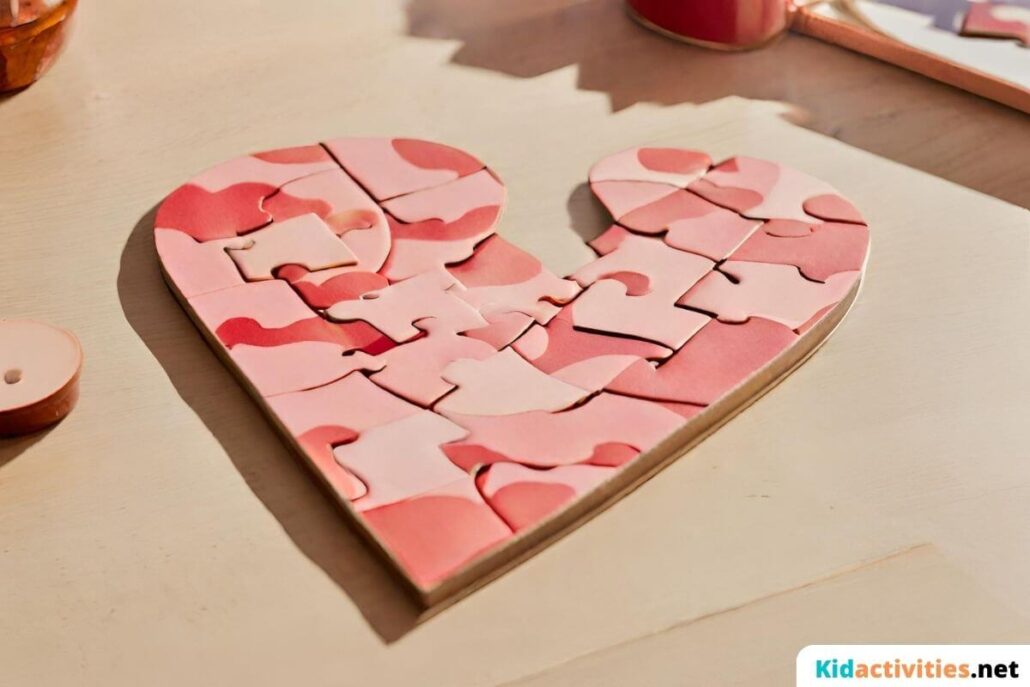
Draw a very large heart out of cardboard or card stock paper. Laminate it and cut into pieces to put back together as a puzzle. Save pieces in plastic baggie marked with the title of the heart.
Pro tip – Add small magnetic ‘strips’ to the back of each puzzle piece. This makes is easier for the children to put and keep it together. Small magnetic wipe off boards and refrigerators work well for this
25. You’ve got mail (Submitted by Tasha/California)
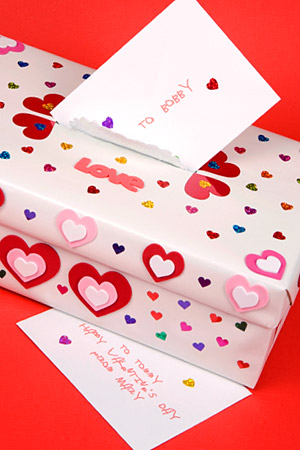
Create a ‘group’ mailbox.
♥ Starting around mid-January, have children begin to write letters to each other in the classroom or program. (The staff also has a mailbox.)
♥ Students then Mail their letters. On Valentine’s Day, students mail each other their Valentine’s as well.
TIP: To make your mailboxes you can use shoeboxes, coffee cans, tissue boxes, paper bags, cereal boxes anything. The kids can then decorate them up with paint, glitter, pompoms, doilies, lace, felt, wrapping paper and anything else that is available.
Have a “make a Valentine heart” by tearing paper contest! Craft and Game in one!
♥ Have each participant hold a piece of valentine colored construction paper in your hands behind their back.
♥ They tear the paper into a heart shape without looking at what they are doing.
♥ Who’s created the most “heart-looking” heart shape!?
Check out the Valentine jokes page Fun as jokes but also wonderful for making cards. Put the ‘Question’ on the card cover and the ‘Answer’ on the inside. Illustrate and decorate as each joke indicates!
26. Doily crowns (For younger children)
♥ Give each child a heart doily.
♥ Have children decorate them with markers or heart stickers.
♥ Next glue the doily in the center of a 2″x 20″ strip of red paper.
♥ Wrap each child’s strip around his/her head and tape it in place to make a crown.
27. Wrapped candy necklace
Materials: Plastic wrap, Individually wrapped candies, Ribbon
Time needed: Under 1 Hour
1. Begin by laying out three feet of plastic wrap, cutting it in half lengthwise. Place candies or groups of candies every three inches.
2. Roll the plastic over and tie bows between each candy using six-inch strips of ribbon.
3. Tie the two ends of the plastic wrap together and cover the knot with another ribbon.
Wear now and eat later.
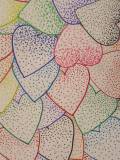
28. Cabbage prints
We’ve all done stamp art using cut fruits and vegetables, where we dip the veggies in paint and print. That’s it. Look at the wonderful creations that can be make with cut cabbage. This sample is made using stamp pads. Wonderful for Valentine’s Day.
NOTE: We didn’t try it but has been told that celery used the same way works as well.
29. Make some liquid starch red paint
1/4 cup liquid laundry starch
2 drops food coloring
or 1 tsp. tempera paint
♥ Mix ingredients until blended
30. Votive candles
Materials:
Baby food jars or jam jars
Scraps of tissue paper
Diluted paste or glue
Votive candles
♥ Clean the jars well and let dry. You can use small jars but check the size of the votive candle to make sure it will fit.
♥ Have the children brush glue onto the jar and place different colors of tissue paper over the glue, overlapping so the entire jar is covered on the outside.
♥ When brushing the tissue with glue be sure to do so gently so it doesn’t tear. If it tears, remove or leave wrinkled.
♥ The glue will appear to be white but will dry clear and when a candle is lit inside will give off a pretty color and design.
Great for gift time. ♥ Valentine’s Day: Use pink & red.
31. Large ‘paper clip’ & ‘Valentine ribbon’ bookmarks
Simply take a large paper clip and tie a group of three or four ribbon lengths to the top of the clip. (The amount depends on the width of the ribbon.) The clips are great to mark book pages as well as clip envelopes and folders. (For other bookmark making ideas visit the Book Mark Craft page)
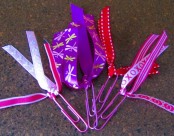
32. Four Valentine heart chains
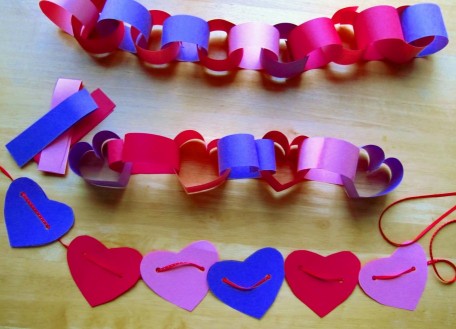
a. Ribbon and hearts (On bottom of image)
♥ Make a heart garland for Valentine’s Day.
♥ Cut heart shapes out of red , pink, and purple construction paper or craft foam.
♥ Use a hole-punch to make a hole in each side of the heart.
♥ Use ribbon or yarn to tie all the heart together into a garland. Hang from ceiling or down a wall.
b. Paper chains (Top of image)
Paper chains looped from the ceiling are always festive. Depending on the age of the children, after the paper strips are cut, they can be attached using glue sticks, scotch tape or staples. (Staples are the fastest) Of course use pink, read, and purple construction paper.
c. Pipe cleaner attached hearts (Not pictured)
All you need are pipe cleaners in Valentine colors of your choice.
Make circles from an entire pipe cleaner. Take a half of pipe cleaner and connect the circles together. As you connect the large circles, bend them into a heart shape that’s it.
d. Heart shaped paper chain (Middle chain in image)
♥ Cut strips just as you would for a paper chain. Fold each strip in half. (See folded strips to left of heart chain garland)
♥ Take the two ‘top strips’ that are not folded and touching them together fold them down into a heart-top. Staple this to complete the shape.
♥ Connect hearts by taking two ‘open strip tops’ and fold them down over the previously made heart . Staple this at the bottom of the strips to make another heart shape. Continue until you achieve a chain of paper hearts.
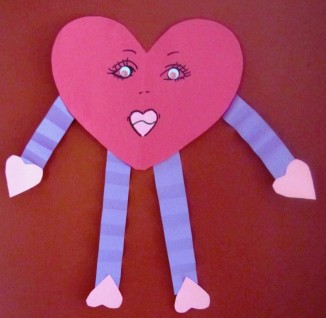
33. Ms.Valentine
Materials:
Constructions paper (Valentine colors of your choice
Scissors
Markers (Black and optional red)
Optional
Large foam heart shape and google eyes.
Start by showing children how to make a ‘perfect heart’ using a sheet of construction paper.
1. Fold a sheet of construction paper in half. Draw half a heart on the one side. Leaving the paper folded, follow and cut the half-heart line. Open the sheet of paper and you have a perfect heart. This is the face/body.
2. With the remaining sheets of construction paper cut out two long strips for the legs and two slightly shorter strips for the arms. Fold the long strips back and forth accordion style. Glue or tape these to the body.
3. Using a smaller heart template, have children cut out four matching hearts two are the hands and two are the feet. Allow kids to place these any way they would like. (Points of heart shapes facing up or down on the arms/legs)
4. Mouth: We used a large foam heart-shape for the mouth. A curvy line was added in the center to separate the lips and a marker traced the shape for detail. If you don’t have larger sized foam hearts draw and color in big red lips or smile! Still very cute.
5. Eyes: Eyes were first drawn using a black marker. A google eye was placed in the center of each eye. Add a couple little dots for the nose and complete as desired.
34. Our class has heart – A large dimensional Valentine display)
1. Make 2 huge hearts: have each child write/print their name on one of the hearts. Continue to decorate as desired.
2. Leaving an opening, staple the edges of the two heart together.
3. Stuff the heart with recycled paper.
4. When complete, staple the opening shut.
5. Optional: Attach streamers of pink, white and red to the bottom.
♥ Hang the heart with a sign above that says: Our Class has Heart.
35. ‘Wall of love’ display board. Use it many ways.

For Valentine’s Day, the staff at Colchester Institute Library (UK) put together this “Wall of Lurve” (You can call it Wall of ‘Love’ ‘Friendship’, or ‘______’.)
For Valentine’s day the library staff provided a display for students and staff to write messages. Around 150 pink hearts were displayed on the Wall at the entrance to the library.
This is something that could easily be adapted to a class or after-school program! Kids could write friendship messages about teachers, friends, places, things, food, etc. Kids love writing on walls so it could be a hit!
This is also a great idea for February’s 100th day of school or National Friendship Month. The hearts could also be filled with Acts of Kindness for February’s Kindness Week.
36. Valentine place mats
1. Give each child two pre-cut place mat size ovals cut out of clear self-stick paper.
2. Remove the backing from one of the oval sheets
3. Have each child place hearts cut from red, pink, white, etc. tissue paper or construction paper
Last. sprinkle on glitter. Complete by removing the backing from the second oval and carefully placing the sticky-side down on the decorated oval.
37. Lacing Valentine hearts (For Pre-K-and K)
Materials:
The front of old greeting cards, yarn, tape, hole punch.
1. Punch holes around the edges of cards about half inch to one inch apart.
2. Cut yarn for approximated lengths for lacing.
3. Tape one end of a piece of yarn to the back of each card.
4. Children then lace yarn through then holes in the cards.
5. When they finish, trim the remaining yarn ends and tape them to the back of the card. (lacing will be easier if you dip one end of yarn into wax or glue or wrap it with tape to make a “needle”.
6. This can be done with any Holiday such as Easter for Easter cards, Christmas, etc.
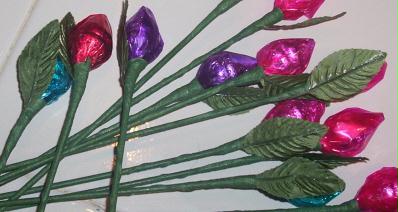
38. Hershey’s kisses Flower Bouquet
Materials:
| 6″ lengths of 12 gauge floral wire | Silk flower leaves |
| Green floral tape | Clear cellophane |
| Glue, Scissors | Ribbon |
| Hershey Kisses Milk Chocolates |
1. For each candy rose, spread glue on the bottom of one foil-wrapped chocolate.
2. Firmly press the bottom of another chocolate to it.
3. Insert florist wire into one pointed end of the double chocolates, twisting cellophane, continuing down the full length of wire with tape.
4. Add 1 or 2 artificial leaves, if desired, securing leaves in place with florist tape.
You can also make them by taking two Hershey kisses, first insert a pipe cleaner or wire into one. Next attach kisses together at flat end with tape or glue; wrap them with red saran wrap. Take 2 wire leaves and attach them to the pipe cleaner with florist tape. ‘Kiss Rose kits’ are also sold at Oriental Trading.
39. Valentine ‘kindness tree’

This wonderful display was created by Katja Van Elbe at a week long “Conscious Discipline Institute” work shop. (Sorry the work shop ink was disabled)
To replicate this idea, after making the tree shape of trunk and branches add a heart for every kindness act noted. This idea is nice any time of the year, but works especially well in the month of February.
40. Window heart
Coffee filters, Paintbrush, Red tempera paints, and water.
Water down red tempera paint in a container.
Cut a heart shape out of the coffee filter.
Then take the paintbrush and paint the coffee filter with the watered down paint.
Painting only parts of it will give a tie dyed affect. When it is dry hang them in a window.
41. Pencil mice heart Valentine
Materials:
- Heavy construction paper
- Pipe cleaners
- Decorated Pencils
- Hole punch
- Black Marker or Pen
Directions:
From red, pink or purple paper, cut out several hearts approximately
4 inches across. On each, draw a nose and eyes.
Punch four holes above the mouse’s nose.
Thread a short length of pipe cleaner through the top two holes
and another through the bottom two. Lastly, slip a pencil down
behind the whiskers, from the backside of the heart.
42. Valentine tree
Arm, hand & finger painting. Messy but fun. This is a given. Keep lots of water and paper towel nearby.
Paint each child’s arm brown and hand and fingers green. Have them put it on construction paper to make a tree. Placing the green hand a few times on the paper makes a nice tree. After, dip fingers in red paint to make hearts on the tree. A finger print going to the left and again to the right makes a nice heart. Optional: Foam hearts can also be added to the tree.
Messy but the kids will love it.
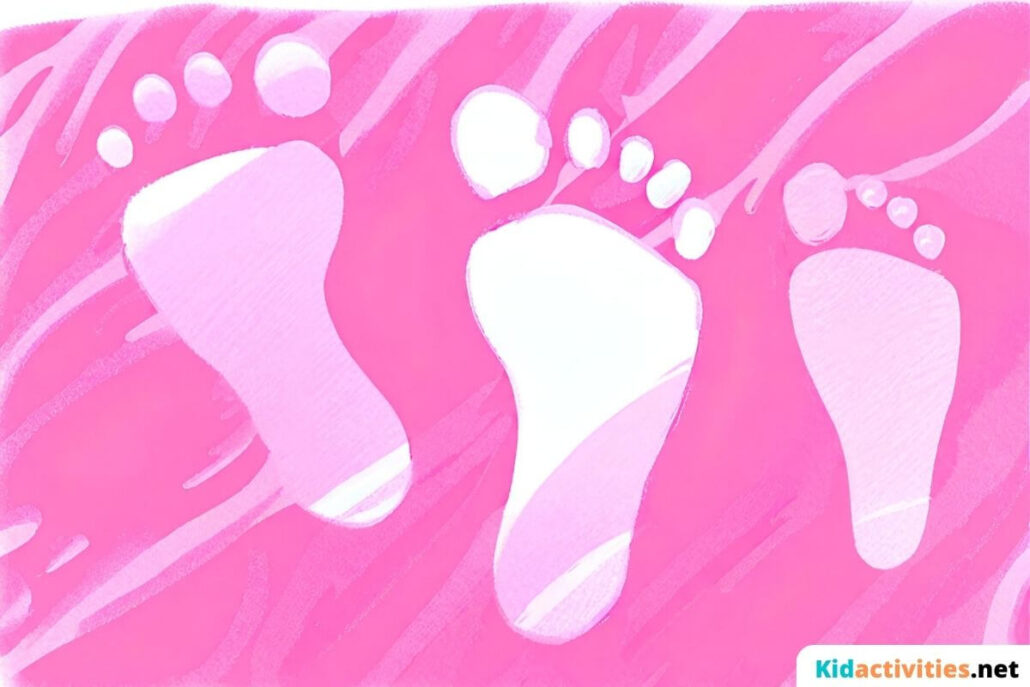
43. Footprint heart craft
What you need:
- paint
- paper plates
- bucket of water
- white papers
- chair
- towel
What to do:
So, this can be messy but very fun activity for kids. Put the white papers on the ground, with the paper plate next to it filled with the pink paint.
Have each kid step carefully in the plate, so his feet is soaked in paint, now carefully step on the white paper to make your print, and place the chair with bucket of water next to it so the kids can quickly sit and place their feet inside the water to clean the paint.
You will also find some wonderful craft/gift ideas that work for Valentine’s Day in:
•How about a Teddy Bear and other Bears Theme?! Teddy Bears are wonderful around Valentine’s Day.
