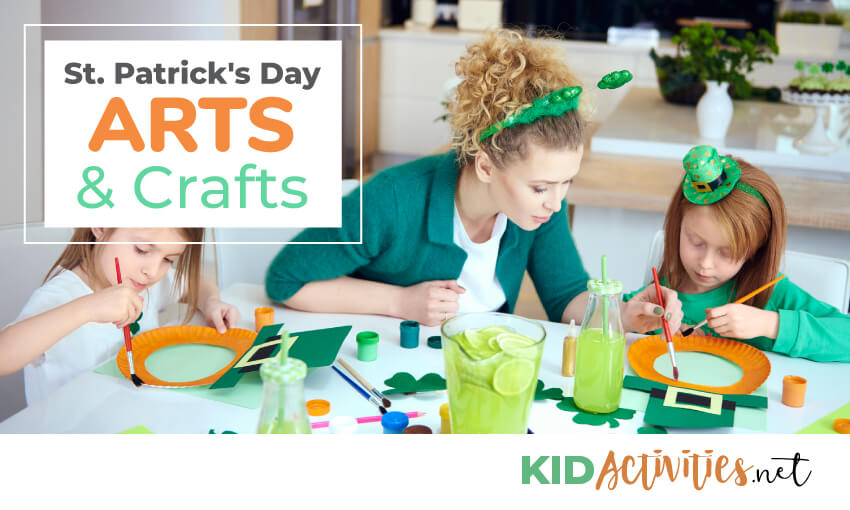
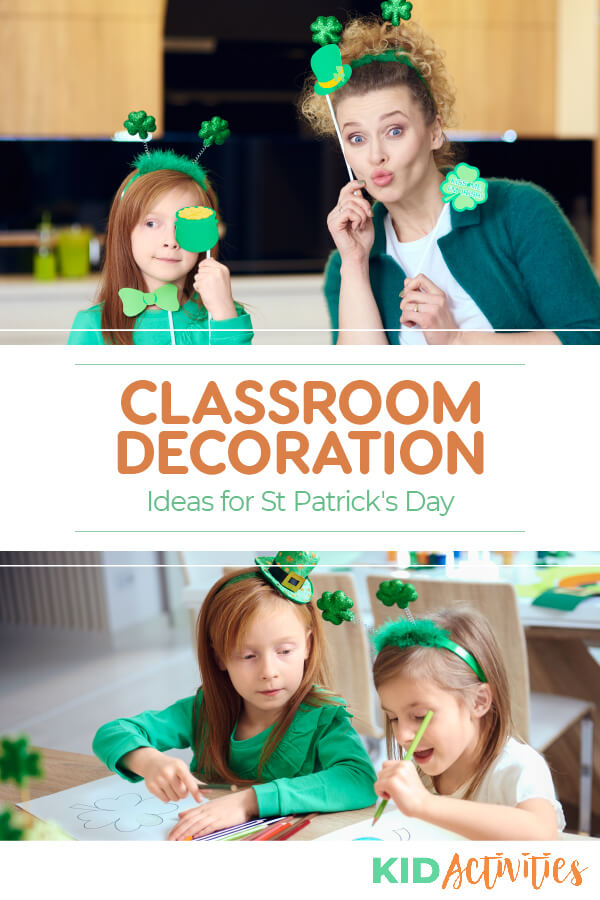
St. Patrick’s Day is always a fun and exciting time for the kids. Below you will find a list of my favorite St Patrick’s Day arts and crafts for preschool and elementary age students. You can also make a few of the below and use them as decorations for St Patrick’s Day.
St. Patrick’s Day Crafts for Kids
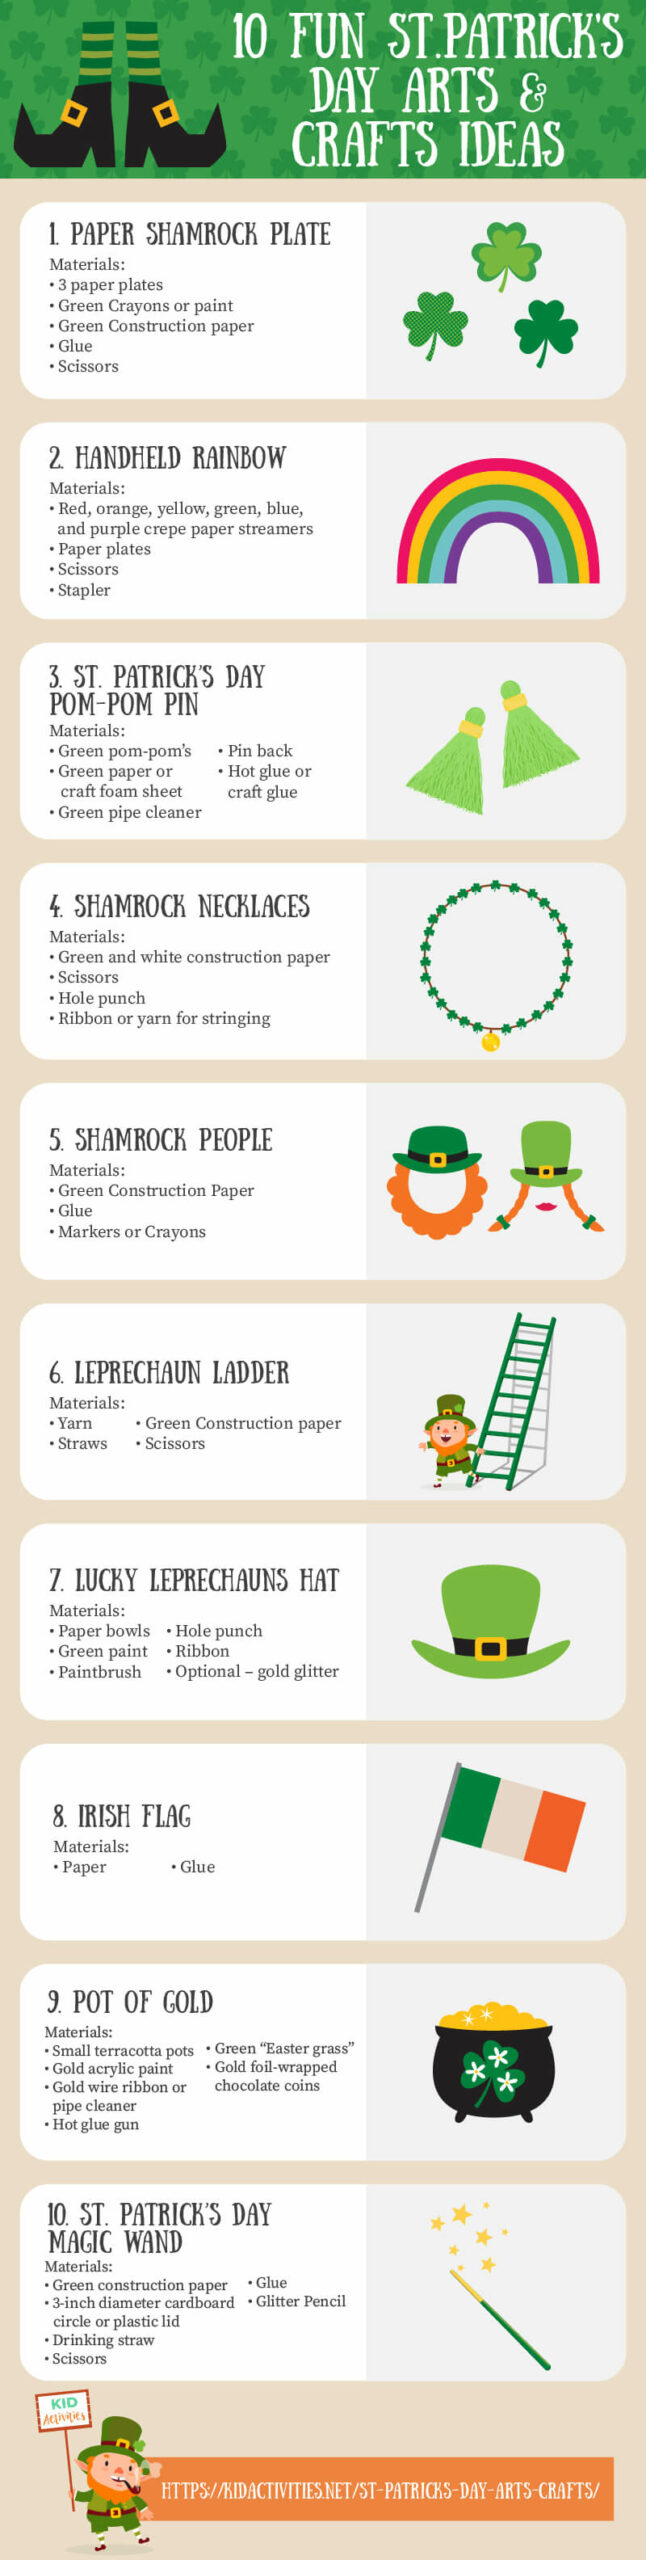
1. Paper Shamrock Plate
I love this paper plate craft idea. Not only is it fun to make, but it’s budget-friendly.
Materials:
✓ 3 paper plates
✓ Green Crayons or paint
✓ Green Construction paper
✓ Glue
✓ Scissors
Instructions
- Color or paint all three paper plates green
- Cut a stem from green construction paper.
- Glue the three paper plates together in a triangle type shape.
- Glue the stem at the bottom.
2. Handheld Rainbow
Materials:
✓ Red, orange, yellow, green, blue, and purple crepe paper streamers
✓ Paper plates
✓ Scissors
✓ Stapler
Instructions
- Cut the center out of a paper plate.
- Cut long pieces of red, orange, yellow, green, blue, and purple crepe paper streamers. Each streamer should be about two to three feet long.
- Staple a rainbow of streamers onto the paper plate.
You now have a Rainbow Streamer to help you celebrate St. Patrick’s Day.
3. Green Collage
Instructions
- Cut out shamrock shapes
- Put a box of green collage materials such as yarn, fabric, ribbon, buttons, glitter, pom poms, etc.
- Add green coloring to glue and have kids decorate to make a St. Patrick’s Day collage.
4. St. Patrick’s Day Pom-Pom Pin
Materials:
✓ Green pom-pom’s
✓ Green paper or craft foam sheet
✓ Green pipe cleaner
✓ Pin back and either hot glue or craft glue
Instructions
- Cut a circle from the green paper; make sure it’s large enough to hold all three pom-poms in a “Shamrock shape cluster”.
- Glue the pom-poms to the paper, to form a cluster.
- Next cut the green pipe cleaner into thirds. (Each pin will use 1/3 of a pipe cleaner.)
- Push the pipe cleaner through the paper or craft foam (this is done at the bottom of the pom-pom shamrock cluster)
- Twist the pipe cleaner to make it look like shamrock stem–The twisted shape will look like an upside-down “V” at the bottom of the shamrock…
- Attach the pin to the back of the shamrock.
5. Leprechauns with Hair
Instructions
- Cut the bottom off of a potato so it will stand/sit straight.
- Cut the top of the potato off and hollow it out about one inch deep.
- Have the children paint the potatoes green and decorate them making a face — use beads, pipe cleaners, other paint colors, etc.
- Finish by filling the hollowed out top of the potato with soil and grass seeds.
- Water them and give lots of sun.
As below…Do this a couple of weeks before St. Paddy’s Day with the anticipation of the leprechaun’s growing green hair!
6. Hand Shaped Rainbow
This is a great display board group project.
Instructions
- Using colored construction paper of yellow, orange, red, blue, green and purple trace THE CHILDREN’S HANDS.
- Make about 10 handprints of each of the colors of the rainbow.
- Put the children’s names on the hand-prints; form the hands into a large, curved rainbow shape. (All the reds in one curved arch of the rainbow…all the yellows to form a curve, etc.
7. Froot-Loop and Shamrock Necklace
This is one of my favorite shamrock crafts. Using a rainbow picture as an example, have children follow the pattern using fruit loops and string to make necklaces. Put a foam or felt shamrock in the center …
8. Smooth as Glass Shamrock
Instructions
- Make a few templates of shamrocks for the kid to trace.
- Cut them out and have kids trace the template on the tagboard. Cut them out.
- Next, take light Karo syrup and pour a small amount in the center of the shamrock; add a few drops of green food coloring.
- Have kids mix/combine the syrup and food coloring until the two have blended.
- Let dry and admire the finish!
9. Make a Leprechaun Face Sand Art Jar
Materials:
✓ Glass baby food jar
✓ Green pom-pom
✓ Green construction paper – formed in a cone shape for a hat and also ears cut into points
✓ Googly eyes
✓ Green, white, orange and yellow sand
✓ Curling ribbon (green and white) or a feather to decorate the top of the hat and orange yarn for hair
Instructions
- Fill the baby jar with layers of the colored sand.
- Glue on eyes, pom-pom for nose, ears, and hair.
- Put the top on the jar and close tightly.
- Put the cone-shaped hat on with streamers coming out of the top. Cute!!!
10. Shamrock Necklaces (Great for Young Kids)
Materials:
✓ Green and white construction paper
✓ Scissors
✓ Hole punch
✓ Ribbon or yarn for stringing
Instructions
- Cut several sizes of shamrocks from green and white construction paper. Punch a hole in the top of each shamrock.
- Give children a length of a ribbon or yarn with masking tape wrapped on each end; show them how to string the shamrocks, alternating colors, to make a Saint Patrick’s Day necklace.
11. Marble Painting Shamrocks
Instructions
- Cut out a large clover shape on white construction paper.
- Place it in a pan, shallow box or deep box lid.
- Put several spots of paint in each corner about the size of a half-dollar. Dark green, light green, gold and yellow all work …alone or together.
- Put a marble in the center of the Shamrock and have the children tilt the pan so the marble goes through the paint spots and across the paper. A golf ball also works well.
- If you want, sprinkle with gold powder when complete.
12. A Blarney Stone
Instructions
- Gather rocks before St. Patrick’s Day. Look for rocks that are the size of a slice of bread.
- Paint the rocks green and adds glitter with a lot on the top! This is the Blarney Stone.
- When the rocks go home–put each one into a large zip lock bag with the child’s name on it… (so the glitter doesn’t get in book bags)
- These can be used as paperweights, door stops, etc.
13. Magic Leprechaun Sunglasses
This is one of those easy crafts for kids. Take green tagboard and cut it into shamrock-shaped glasses. Put green cellophane to cover the eye openings.
14. Leprechaun Binoculars
Take 2 toilet paper rolls and staple them together. Paint them green. If you have a parade–use them to look for leprechauns–if no parade—look anyway!!
15. Paper Shamrocks Made from Coffee Filters
Another budget-friendly St. Patrick’s Day craft.
Instructions
- Precut shamrock shape out of coffee filters.
- Mix water and yellow food coloring and place mixture in a baby food jar. Do the same with the blue.
- Have the children use eyedroppers to drip colors on the filter shape. The colors will run together and make beautiful shamrocks.
Submitted by Jenny in Michigan
16. Shining Shamrocks
This makes for a great St. Patrick’s Day decoration.
Instructions
- Cut Shamrock shapes out of tagboard or heavy construction paper.
- Paint them green and sprinkle salt on them while still wet.
- The salt will make the shamrocks shine and sparkle when they dry.
- You could make really nice St. Patrick’s Day mobiles–with them or hang from the ceiling or in windows.
17. Shamrock People
Materials:
✓ Green Construction Paper
✓ Glue
✓ Markers or Crayons
Tip: My favorite way of working with any craft that incorporates shapes is to make templates for the kids to trace and cut.
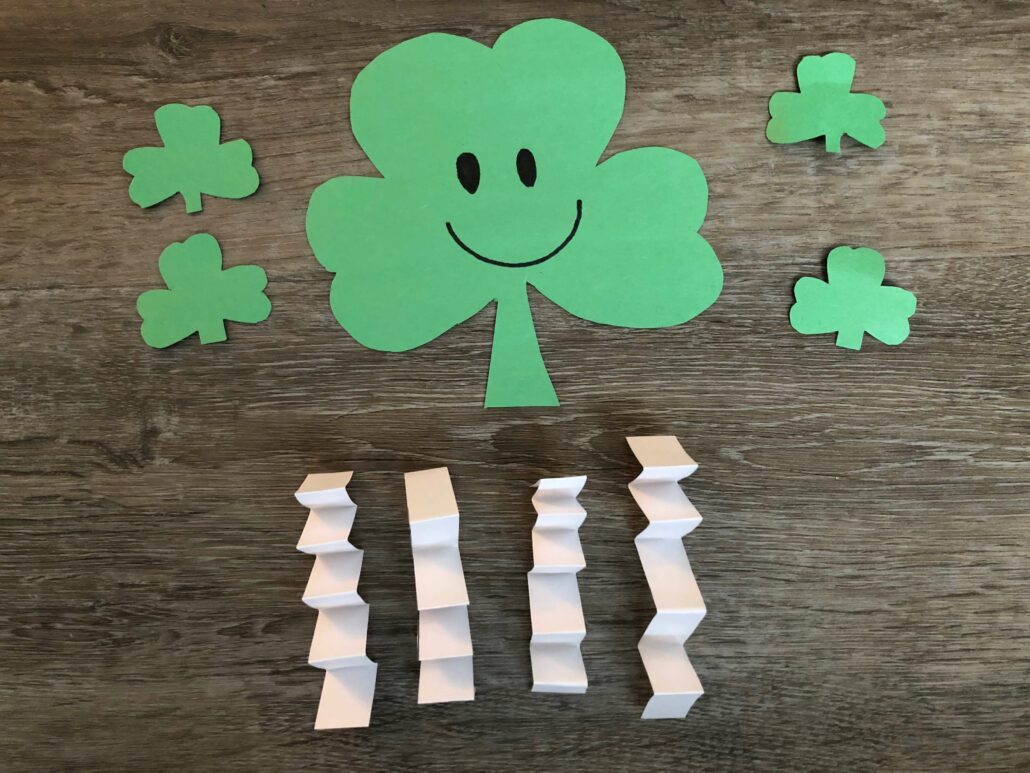
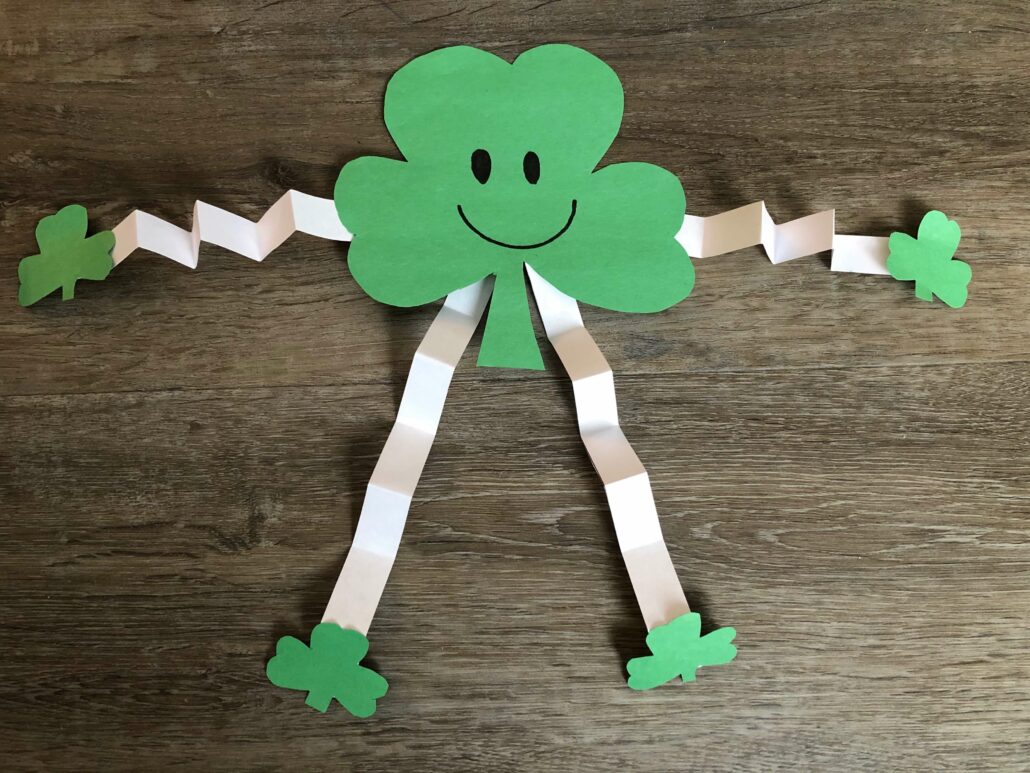
Instructions
- Make templates of shamrocks for the children to trace–or PRE-MAKE shamrocks for the younger. With older children, have them draw and cut-out their own shamrocks.
- With the green construction paper, create the shamrock shapes.
- Draw FACES on the LARGE shamrocks.
- ADD accordion-folded arms and legs (either from a white paper or the green construction) …
- Cut smaller shamrocks for the hands and feet and glue them to the ends of accordion arms and legs.
- These could be nice to hang from the ceiling, on the bulletin board for decorations–or glue to a straw or large tongue depressor stick for a puppet.
18. Leprechaun Ladder
Materials:
✓ Yarn
✓ Straws
✓ Green Construction paper
✓ Scissors.
Instructions
- Cut about ten 3-inch wide Shamrocks out for each child. Cut Straws into 2-inch pieces.
- String the Straws and the shamrocks. One Straw, One Shamrock, One Straw, One Shamrock, One Straw, One Shamrock, etc….
- When it is done tie a knot in the yarn on both sides.
- HANG IT FROM THE CEILING. You can make them as long or short as you wish.
Tip: A good idea is to put tape on one end of the string so it does not come apart while stringing. Tape the second end to the table so the objects don’t come off the other side.
19. Lucky Leprechauns Hat
Materials:
✓ Paper bowls
✓ Green paint
✓ Paintbrush
✓ Hole punch
✓ Ribbon
✓ Optional – gold glitter
Instructions
- Have children paint the backside of a paper bowl with the green paint.
- When bowls are dry, punch one hole on each side of the rim of the bowl.
- Lace ribbon through the hole so you can tie the hat on. Great for St. Patrick’s Day party.
(OPTIONAL) While the paint is wet on the hats, sprinkle gold glitter on them.
20. Rice Shamrocks
Materials:
✓ Oak-tag or heavy white paper
✓ Rice
✓ Green food coloring
✓ Brushes
✓ Glue
✓ Glue containers
✓ Paper towels or pie tins
✓ Shamrock patterns
Instructions
- Prepare rice a day ahead of the project.
- Place rice in a small amount of water to which green food coloring has been added.
- Let it soak until the desired shade of green had been reached.
- Drain off the water and let the rice dry on paper towels or in pie tins overnight.
- Make shamrock templates.
- Trace and cut out the shamrock shapes.
- Have the children brush diluted glue on their shamrocks and sprinkle green rice over the glue. (A drop or two of alcohol in a few drops food coloring will darkly color any kind of pasta: macaroni, etc. (See dying pasta recipe in the “Paint Recipe Thread”.)
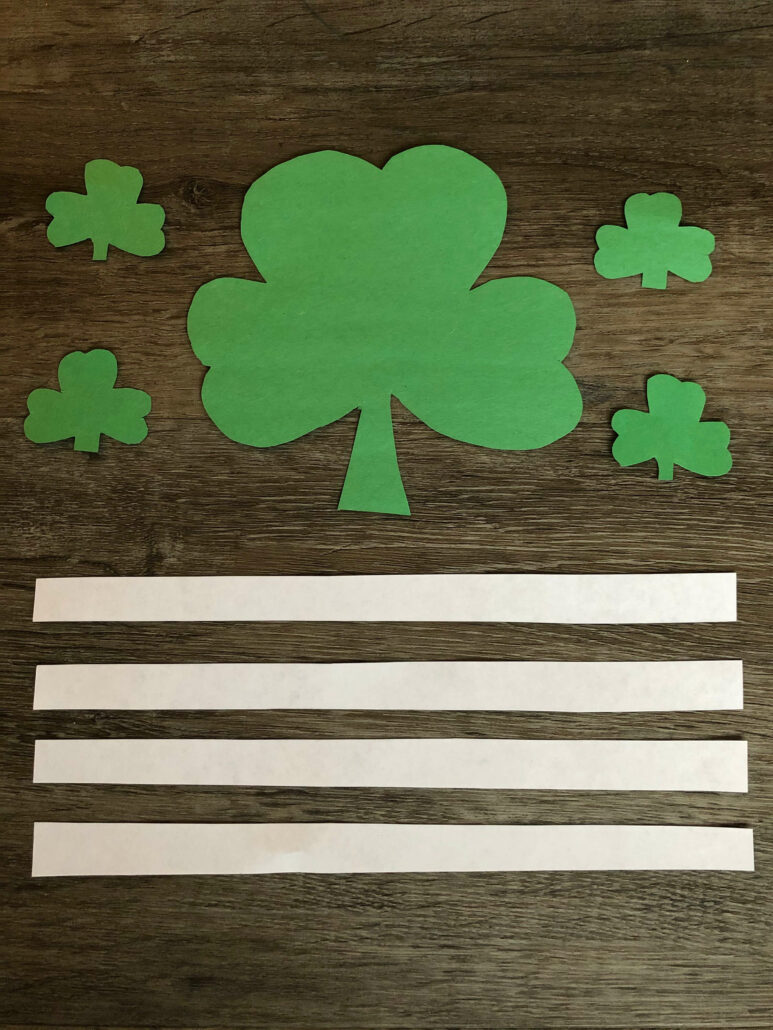
21. Irish Flag
Materials:
✓ Paper
✓ Glue
Instructions
- To make the flag–use a full sheet of white construction paper, have children glue 3 pieces of paper that have been cut to fit the white paper.
- Starting from the left side of the white paper–in vertical stripes glue on 1/3 of green construction paper, 1/3 of white paper & 1/3 of orange paper.
22. Pot of Gold
Materials:
✓ Small terracotta pots
✓ Gold acrylic paint
✓ Gold wire ribbon or pipe cleaner
✓ Hot glue gun
✓ Green “Easter grass”
✓ Gold foil-wrapped chocolate coins
- Using a paintbrush or sponge, paint the inside and outside of the pot with the gold paint.
- After the paint is completely dry, cut a strip of gold wire ribbon or pipe cleaner–long enough to make a handle.
- Attach each end of the ribbon/pipe cleaner to the top sides of the gold pot with the hot glue gun. Fill with green grass and gold coins.
- Children can add rainbows, shamrocks, etc., to the outside of the pot with paint pens.
23. St. Patrick’s Day Magic Wand
Materials:
✓ Green construction paper
✓ 3-inch diameter cardboard circle or plastic lid
✓ Drinking straw
✓ Scissors
✓ Glue
✓ Glitter Pencil
Instructions
- Draw 3 circles on the green construction paper by tracing around the lid or cardboard circle.
- Cut out the circles.
- Glue together a section of the circles’ edges to form a clover shape. Dab glue onto the shamrock and sprinkle on glitter.
- Glue the straw onto the back of the middle circle to form a handle. Let the glue dry.
24. Green Pistachio Finger Paint
You can use green pistachio instant pudding to fingerprint on a large piece of paper. When it is dry, you can cut it out in the shape of a large shamrock and glue a colored picture of a leprechaun in the middle.
25. Leprechaun Mushroom
Materials:
✓ 1/4 sheet of blue construction paper
✓ 1/4 potato
✓ 1/2 straw
✓ A building block (Lego)
✓ Several small paper circles
✓ Red, white and green tempera paints
✓ Glitter
✓ Glue
Instructions
- To print the top of the mushroom, dip the flat end of the potato in red paint and press on the paper.
- Next -print a white stalk under the mushroom using the building block.
- Print green grass around the bottom of the mushroom using the side of the straw. Allow drying.
- Glue on the white paper circles to make spots on the mushroom.
- Spread glue around the mushroom cap and sprinkle with glitter. Allow drying.
- Using face paint…celebrate St. Patrick’s Day by painting a shamrock or rainbow on the cheeks of the children! 🙂
Conclusion
We hope you have found the perfect St Patrick’s Day arts and crafts to make with the kids.
Complete Menu for St. Patrick’s Day Activities…
- St Patrick’s Day Game Ideas
- St Patrick’s Day Snack Ideas
- St Patrick’s Day Jokes
- Rainbows and St. Paddy’s Day go together! Check out our Rainbow Theme page
