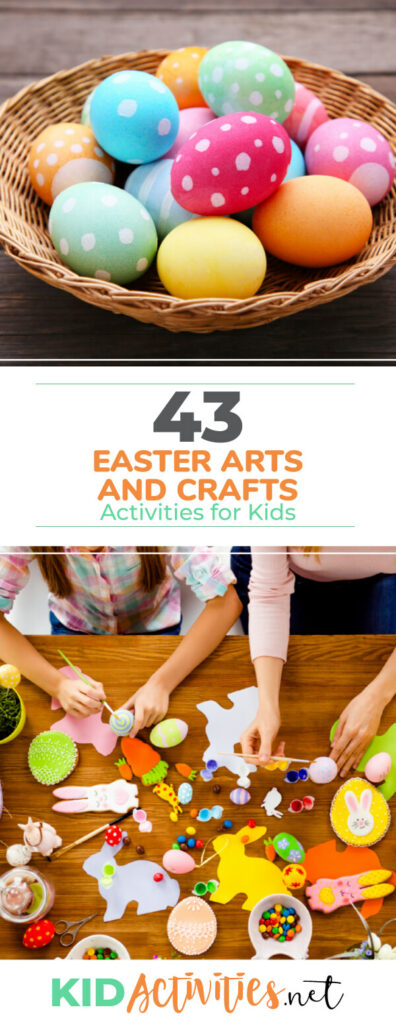
Easter Arts and Crafts for Kids
Here you will find a collection of some of our best easter arts and crafts ideas for kids. These are great for celebrating Easter in the classroom or even doing some arts and crafts projects at home.
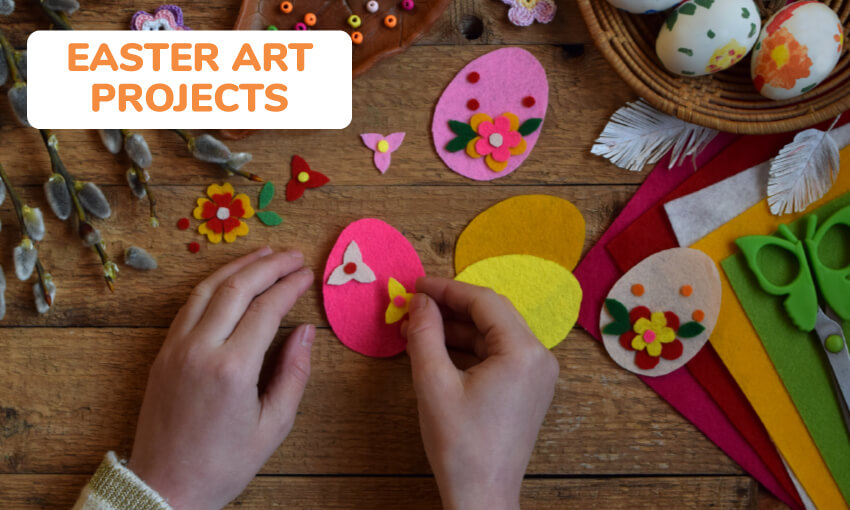
Easter Art Projects
1. Jelly bean painting
Materials: Jellybeans, paint, paper, tape, a box
Directions: Place a piece of paper in a box. Take the tape and roll a piece over on itself; place it on the back of the paper to keep the paper secure in the box…
Add small amounts of paint in each corner. Place a few jellybeans in the box and have the children move the box so that the jellybeans will roll through the paint and create an abstract design “work of art…”
___________________
2. Glossy egg decoration
Trace an ‘Egg pattern template’ onto white construction paper; have children cut them out. In four separate bowls divide a can of condensed milk; add a few drops of food coloring in each bowl–One color per bowl. Paint the eggs with the condensed milk paint. Let them dry.
When art is dry the eggs will have a glossy appearance. Use the eggs to decorate the room.
3. An after-Easter egg shell collage
Ask all you know to save the dyed shells from the Easter eggs! When Easter is over, you’ll have the most important material for this project!
Need: Egg shells, Glue, paper, and water-color paint.
Glue shells onto a piece of paper. When the glue dries, paint over it with water colors…
Make wrapping people and more…
4. Paper #1
Place Easter shaped cookie cutters in paint.
Cover a blank piece of paper with the cookie cutter shapes.
Is is it an art project or wrapping paper? Your choice!
5. Paper #2
Mix a variety of food coloring with water in a spray bottles.
With the variety of colors, Spray water on a large sheet of paper.
There are several ways the dried paper can be used.
- Wrapping paper.
- Trace egg shaped templates to make decorations or cards.
- Background on an Easter or Spring time display board.
6. Footprint Easter card
Make a print of each child’s foot using yellow paint. With an orange marker, add an orange beak where the BALL OF THE FOOT is… Add brown stick feet where the toes are . Glue onto a piece of folded 8 1/2 x 11 paper or construction paper. Write “Happy Easter” on the front–with a message or poem on the inside.
7. Painting with Peeps
1. Cut out large “chick shapes” from white paper. Put tempera paint (white, yellow, orange, black) in containers and then use REAL candy “Peeps” to apply the paint—in a sponge like effect.
2. The head makes a good grip for the bottom when the chick’s bottom is dipped in paint…
3. Extra fun! Have “Peeps” as a treat too! If you’re concerned about younger children taking a bite during the painting, you can use vanilla pudding with food coloring to paint!
8. Color an Easter egg or make Easter art
- Put a sheet of wax paper in the bottom of a good size box. Add a few spoonfuls of various colors of paint (child’s choice of color)
- Place hard-boiled egg(s) in box and roll–the same way as in marble painting. It’s a fun way to color eggs… and…
the paint results on the wax paper look like a stained glass picture! You can frame the wax paper in construction paper and hang it in a window.
9. Cracked egg shell Easter card
- Colored pieces of egg shells
- Pink Construction paper
- White cardstock or construction paper
- Glue
- Pencil
- Scissors
- Markers, crayons, and colored pencils
1. Draw the shape of an egg on the colored construction paper.
2. Put a coating of glue on the construction paper egg.
3. Glue pieces of crushed egg shells on the paper, keeping the colored side up and let it dry.
4. Take the construction paper and cut a piece of it twice the width of the egg and slightly taller than the egg.
5. Fold up the paper in half and paste the mosaic egg on front of it.
Write an Easter message on the card.
10. Paint a bunny face
- Children love to have their faces painted.
- Here’s an easy way to turn children into Peter Cottontail’s helper: Draw an upside-down triangle on the child’s nose with the brush from brown or black liquid eyeliner or face-paint. Fill in completely. Rub a circle of rouge on each cheek. Paint three whiskers with the eyeliner or paint on each side of the face, starting from the nose and extending across the cheek.
- Allow to dry.
- This bunny face comes off in a flash using makeup remover pads or soap and water.
11. Tie Die Easter eggs
Materials: Paint or Washable Markers, Coffee Filters, Spray Bottles
1. Cut coffee filters in the shape of Easter eggs and give each child a spray bottle with different colors of water in them.
2. Have the children spray the coffee filter until it’s completely soaked. Dry…
3. You can also have children decorate egg shaped filters with markers and spray with regular water.
12. Thumb Print Easter Basket
Materials: Picture of an Easter Basket, Paint, and children’s thumbs.
Draw or down-load a simple picture of an empty Easter basket. Put a variety of paints in shallow dishes and let the kids dip there thumbs and make Easter eggs in the basket!
Easter Crafts for Kids
13. Bunny in the Grass Pot
Items Needed:
Grass seed, potting soil, pot or cup, wide craft stick, white paint, markers, pink felt, misc. craft items such as fishing line (whiskers) pipe cleaners, pom poms, press on eyes, or googly eyes.
1. Have children place the potting soil in the pot, and sprinkle with grass seed.
2. Place a little more soil to cover; water the soil.
3. Next have the children paint their craft sticks white; when they are dry, decorate them like bunnies. Cut the felt into ears, put on eyes, nose, and whiskers.
4. Insert the stick into the grass pot and place it in a sunny window.
5. In a few days your bunny will be sitting in the grass.
14. Secret Message Easter Eggs
A surprise Easter Gift!
- Secret Message Easter Eggs are easy, different and lots of fun for children and adults alike. Start with one blown egg to learn how. After having a clean, blown-out egg, brush with a thin coating of craft glue. Sprinkle with clear, silver, gold or colored glitter and allow the egg to dry.
- Cut out a 2-inch-by-2-inch square of airmail or tracing paper. Write a small fortune, note, poem or promise to perform a certain task or chore on the paper and roll up tightly. Slip into the larger hole at the bottom of the egg. Cover the hole with a sparkly sequin, sticker or bead. The recipient cracks the egg to discover the message.
- Can’t bear to crack your creation? When you insert the message, leave a little bit of it exposed so it can be pulled out without destroying the egg.
15. Easter egg sun catchers
Materials:
Clear contact paper
Pastel-colored tissue paper
Scissors
1. Cut out two small, rectangular pieces of contact paper.
2. Have children tear the tissue paper into small bits.
3. Peel off the backing of one of the pieces of contact paper. Have children stick pieces of tissue paper to it.
4. When it is filled, cover it with the second piece of contact paper.
5. Smooth it out, and then cut it into the shape of an egg. (Make a template pattern of an egg to trace) Hang them in the window…
You can make sun catchers to fit any theme you like: Hearts for Valentine’s Day, flowers for spring, etc.
16. Rabbit Bag
Need: White paper bag, tape, ribbon, wiggle eyes, and a pom pom
Directions:
- Take a paper bag (Preferably white).
- Tape the bag closed– about one third of the way up.
- To make bunny ears, cut a slit down the middle of the bag to where you have it taped.
- Round the corners of the ears and poke 2 holes near the top of EACH ear. These are to put ribbon through to make the “inner ear”.
- Decorate with 2 large pom poms for the cheeks and one for the nose. Use 2 large wiggle eyes. Use string or ribbon for the whiskers.
17. Bunny or chick jars
Try this craft from Making Friends It can be adaptd to just about any animal or holday theme!
1. Remove the label from a clean baby food jar. Fill the jar with pompoms to match your animal’s face. Put the lid on and turn it upside down.
2. Glue on wiggle eyes.
3. Cut ears (or beak) out of foam and glue in place.
4. Add pompoms if desired.
5. For whiskers, cut pieces of craft lace and glue one end under pompom nose.
6. Cut a strip of craft foam 1/4″ wide and glue around edge of lid. Original idea from Lisa Anniston, Alabama
RABBIT MASK
Materials:
Paper plate,
Pink or black paper(a small quantity for the nose and ears)
Cardboard
Cotton balls
1. To make the ears, cut out oval shapes from the cardboard.
2. Next, cut out the nose from the colored paper. You can also cut triangles of pink paper to make the inside of the bunny’s ear.
3. Cut two holes in the paper plate for eyes.
4. Paste on the ears,(you can put straws behind the ears to make them stay upright) eyes and nose.
5. Cover the face with glue cotton balls–to make the bunny look soft.
Bunny mask is now complete!
18. Rabbit Ears
Materials: Constructions paper and straws
- Make rabbit-ear template shapes.
- Have the children trace and cut them out of construction paper…(if children are young, pre-cut for them)
- Glue them to a paper head band.
- Add straws to the back of the ears so they will stay upright.
19. Lunch bag bird nest
1. Take a small brown lunch sack and roll it from the top all the way down to make a perfect birds nest.
2. Have children collect twigs, grass, etc. from the outside and put in their nests. OR…
3. You can put in Easter grass and jelly beans with a pipe cleaner handle to use it as a small Easter basket.
20. Mini Easter Baskets
Materials:
Margarine container
Hole punch
Pipe cleaners
Glue
Fabric, and ribbon (Other decorations as desired)
Easter grass and goodies
Directions: Wash and dry a margarine container.
1. Punch a hole on both sides of container – near the top.
2. Wrap 2 pipe cleaners around each other and insert each end into a hole and twist the ends together for the handle.
3. Decorate the “basket” as desired.
4. Glue fabric, tissue paper, or wrapping paper and ribbon to outside of container.
5. Decorate the handle with ribbon and a bow. Add some Easter grass and fill the basket with treats!
21. Berry container basket
Make a Easter basket from a plastic BERRY container…Weave pretty colored ribbon or yarn through the open spaces around the container and glue the ends together.
- Use pipe cleaners or heavy cardboard for the handles.
- Have the children put an egg that they colored themselves into the basket–along with some Easter grass and jelly beans.
22. Baby Food Jar Bunny
You’ll Need: Baby food jar, glue, cotton balls, Wiggly Eyes, one big pom-pom, one small pom-pom, white or pink pipe cleaner,
Acrylic paint – white or pink
1. Paint the jar lid with acrylic paint and let it dry while you make the rest of the bunny.
2. Cover the baby food jar with cotton balls.
3. On the cotton-ball covered jar-attach the eyes, small pom pom for the nose and the big one for the tail.
4. Shape the pipe cleaner into bunny ears and hot glue the ears to the lid.
5.Place one last piece of cotton in between the ears.
6. For a small gift or party favor, fill the jar with jelly beans.
23. Paper Easter Bunnies
Materials:
1 large white paper plate, 1 small white paper plate, white or pink construction paper, google eyes, 3 pink chenille stems, red or pink marker, 2 or 3 cotton balls, white glue, stapler
1. Staple the plates together, the small one as the head and the larger as the body.
2. Cut two large oval shaped ears from the construction paper.
3. Staple or glue them to the back of the small paper plate. Glue on the eyes and a small pink triangle makes the nose.
4. Cut the chenille stems in half and glue three to either side of the nose for whiskers.
5. Use the marker to draw on a mouth.
6. Attach two or three cotton balls to the back of the bunny to make a tail.
7. The children make want to add a hair bow or bow tie to dress up their bunny!
TIP: chenille stems can be difficult to secure with white glue, you can use a hole punch to insert the whiskers…
24. Coffee Filter Egg
Need: Coffee Filter, Food Coloring, Straws
- Cut the coffee filter into an oval, egg shape.
- Measure about 1/4 cup of water into a container. Add a few drops of food coloring at a time into the water until you get the desired color.
- Repeat this for as many different colors you want.
- Once your colors are mixed, you can use the straw to add colors to your egg shape.
Dip a straw into the desired color. Cover the end of your straw with your finger so the colored water stays in it. Move the straw to your filter and hold it over the area you want colored. Remove your finger from the end of the straw and the colored water will run onto the egg! Repeat this for as many colors as you want to use.
When finished – dry the eggs…
Two Easter Hats
25. Bonnet #1
You’ll need: Poster Board, Tissue paper and other decorative items (buttons, lace, ribbon etc.)
1. Cut a large circle from the poster board-about 18 inches in diameter.
2. Cut another hole in the middle of the circle, big enough to fit around
the child’s head. It should look like a donut.
3. Next… Using craft glue or a glue gun, add decorations to the rim of the hat.
4. Use a hole punch to add the ribbon tie.
26. Bonnet #2
You’ll need: Paper plate, ribbon, hole punch, glue, supplies to decorate the hat such as lace, bows, ribbons, beads, costume jewelry, pipe cleaners, feathers, felt, crayons, poster paint
1. Make two holes in the rim of the plate before decorating. The holes should be opposite one another.
2. Lace 10″ pieces of ribbon into the holes. When tied, these will secure the hat.
3. Now have fun decorating the hats…
27. Easter Egg Doll
Materials :
Blown out egg shell,(Direction Here) Paint, Paper cupcake liners, Wide ribbon, Cardboard tube, Tape or glue, Scissors
Paint the face of the doll in the in the blown out eggshell.
1. Fold the paper muffin cup in half — to make the Easter bonnet for the doll.
2. Use the ribbon to tie the bonnet properly on the Easter egg face. You can also use glue or tape to attach the ribbon or yarn, to set the bonnet in its right position.
3. To make the body, take about 4 to 5 muffin cups and cut their centers.
4. Take the cardboard tube and use glue to place the cups upside down on it. To make the tiered skirt of the doll, let the muffin cups overlap the last one.
5. Glue the egg doll face on the topside of the cardboard tube to complete the Easter egg doll.
28. Easter placemats
Although one can shop for Easter placemats, self-made and personalized placemats can create an ambiance of warmth and hospitality.
Materials :
- Cardboard/Card-stock paper or construction paper
- Glue
- Contact paper
- Easter cards
- Photos
- Pictures
1. Take parts of Easter cards, photos or pictures and cut them into different shapes.
2. Using glue, paste the cut out pictures on the cardboard to create a collage.
3. Laminate the collage using contact paper.
4. Write an Easter greeting message to lend a personal touch to the placemat.
You could also make something like the above place mat at First Palette.
29. Giant Balloon Egg
- Inflate and tie a small balloon for each child.
- Make a thin glue and water mixture, and have the children “paint” sections of the balloon and then lay squares of tissue paper down flat onto the glue.
- The tissue should overlap and cover the entire balloon. Let it dry on wax paper, or hang to dry from the knotted end of the balloon over newspaper.
- When the balloon is completely dry, use scissors to cut a small slit in the balloon neck. The balloon will deflate, leaving a beautiful, hollow tissue paper “egg”.
- For a gift, these may be filled with lightweight candies, and then sealed with one more square of tissue.
30. Decorated Eggs
Need: Legg’s eggs, a plastic Easter egg, or small blown up balloon; Masking tape, Glue, Brushes, and Colored tissue paper.
Directions: Put tape around the seam of Legg’s eggs or plastic egg.
1. Brush slightly watered-down glue all over the egg.
2. Place different colored tissue paper pieces onto the glue.
3. Have children dip their fingers into some glue to sure all paper edges are down.
Snacks
31. Chicken Easter Feed
Make a bowl of Chicken Feed by tossing together crisp, crunchy shoestring potatoes, salted corn nuts, shelled sunflower seeds and pistachios, dried blueberries and unsweetened coconut flakes for a crunchy, nutty treat.
(Leave out whatever you don’t like)
32. Easter Basket Cupcakes
1. Prepare cupcakes and frost with cream cheese frosting, white or yellow colored frosting.
2. Create green Easter “grass” by placing shredded coconut and a few drops of liquid green food coloring in a re-sealable plastic bag.
3. Mix the food coloring into the coconut until it is evenly distributed and the coconut is green.
4. Sprinkle the coconut over the iced cupcakes.
5. Insert one end of a red licorice whip into the cupcake, then bend and insert the other end of the licorice into the opposite side of the cupcake to form a basket handle.
6. Top cupcake with a few jelly bean “eggs” and they’re ready to serve.
33. Easter Chick Cupcakes
Make or purchase white frosted cucakes…Place coconut in resealable food-storage plastic bag. Add about 8 drops yellow liquid food color; seal bag and shake to mix. Frost cupcakes with white frosting. Top with yellow coconut. For eyes, add brown baking bits. Cut orange gumdrops to resemble beaks; place on cupcakes. Source: Betty Crocker.com
34. Pebbles Cereal Easter Nests
Makes 12 nests
Ingredients:
2 tablespoons butter
3 cups miniature marshmallows
4 cups Post Fruity Pebbles or Trix cereal
Coconut flakes
Assorted candies
- Microwave butter in large microwavable bowl on high for 30 seconds or until melted. Add marshmallows; toss to coat. Microwave 1-1/2 minutes, stirring after 45 seconds.
- Add cereal; toss lightly to coat well.
- Press firmly into lightly greased muffin pans to form 12 nest; cool.
- Fill nest with coconut (you can tint coconut, if desired) and candies.
- Note: lightly spray your hands with no stick cooking spray to prevent cereal mixture from sticking and to make it easy to press the mixture into muffin pans.
35. Edible Bunny Salad
#1 Ingredients:
Pear halves
Raisins
Miniature marshmallows or cottage cheese
Lettuce
Apple slices or Almonds
- Place a lettuce leaf on a plate.
- Put the pear half on lettuce for the body.
- Insert raisins for the eyes and nose.
- The ears are made from apples slices or almonds;a miniature marshmallow or cottage cheese become the bushy tail.
Source: amazingmoms.com
36. Easter Bunny Salad #2
Lettuce
Cottage cheese
1 can of pear halves
Celery stick
Raisins
1 Red Grapes
1. Place leaves of lettuce on a salad plate.
2. Use Ice cream scoop and place cottage cheese on top of the lettuce.
3. Use 1 canned pear half and place on top of cottage cheese.
4. Use thin slices of celery for whiskers.
5. Place the raisins where the eyes should be.
6. Use a grape for the nose.
7. Cut the remaining pear in half to create the ears.
37. Easter Bird’s Nest (Butterscotch)
1/3c. butterscotch morsels
1c.chow-mein noodles
Candy robin’s eggs
1. Melt butterscotch morsels in a medium microwave safe bowl.
2. Add chow-mein noodles to melted morsels and mix.
3. Shape into a circle on wax paper. Use a large spoon to make indention in center.
4. Let nests harden and then add jelly beans or chocolate eggs.
38. Chocolate Birds Nest
Make the above version, but instead of butterscotch chips, use chocolate chips! (Image by KidActivities.net)
39. Nest Snack Idea
Melt 1/2 cup of butter in a saucepan. Add 1 cup of brown sugar. Boil and stir for one minute. Add a 3 oz. can of chow mein noodles. Put the mixture in 12 paper baking cups in a muffin tin. Use your thumb to press noodles into the nest while still warm. DO NOT BAKE. Give children jelly bean eggs to put in their nests.
40. Coconut Macaroon Nests
Ingredients:
- 16 ounces shredded coconut
- 1 can (14 oz.) sweetened condensed milk
- 2 teaspoons vanilla extract
- Jelly beans or candy Robin Eggs
Directions:
Mix first three ingredients together. Drop by teaspoonfuls onto generously greased baking sheets. Bake at 350° for 8 minutes. Cool coconut macaroons slightly; remove to rack. Once cooled, place candy Robin Eggs or jelly beans on top of coconut ‘nests’. This makes about 4 dozen coconut macaroons.
Tip: Parchment paper or a well greased pan works best to put on the cookie tray. Then make very small roughly round balls and place on the tray. Press your thumb in the middle to make the “nest”. These spread out in the oven, so don’t press too hard or make them too big.
Cooking time is dependent on the size of your “nests”. Bigger nests requite more time in the oven.
Annie at “No Fuss” recommends about that tablespoon size will fit 3 mini egg candies…or one large Cadbury egg.
Watch in the oven with the light on till coconut tips are barely golden. ♥ This idea and photo is courtey of No Fuss Fabulous!
41. Peanut Butter Rice Krispy Bunny Cake
This recipe is from Jif Peanut Butter. The kids will love this for Easter!
Ingredients:
- 6 tablespoons butter or margarine
- 2-10oz packages of marshmallows
- 2 cups creamy peanut butter
- 10 cups crisp rice cereal
- Non-stick cooking spray
- Jelly beans, licorice gum drops, or decorative candy
- Glaze (optional)
- 1/2 cup butter or margarine
- 1/2 cup brown sugar, packed
- 2 tablespoons milk
- 1 teaspoon vanilla
- 2 1/2 cups sifted powder sugar
- Makes 16 servings.
1. In large saucepan, melt butter over low heat. Add marshmallows. Stir until completely melted and remove from heat.
2. Stir in peanut butter and mix well to incorporate.
3. Add rice crisp cereal and stir until well coated.
4. Press into two 9-inch pans, well coated with cooking spray and allow to cool.
5. Cut ears and bow tie from one cake. This is done by cutting two football shaped ears from the top and bottom of one cake layer, leaving a bow tie-shaped piece in the middle.
6. Position two ears at top of whole round cake and place bow tie under face.
7. Apply optional glaze, if desired. Decorate with jelly beans, marshmallows, licorice, and gum drops or any of your favorite cake decorations.
42. Raw Egg on Toast
Ingredients for one serving…
1 slice poundcake
1/2 peach
Reddi-Whip topping
Directions:
Put slice of pound cake on plate.
Place peach half on top– round side up.
Add whip cream around peach and serve.
It looks like a raw egg on toast!
43. The Easter Bunny’s Carrot
This snack only takes two steps:
1. First take Wilton’s Disposable 12 inch Decorating Bags (or something simiar) and fill them with whole wheat gold fish or your favorite orange colored cheese crackers.
2. Gather the top and tie with green ric-rac, ribbon, or yarn.
These crackers are much more nutritious than jellybeans, but the effect is just as cute! This is idea is great as a gift to take home or to make up ahead and serve then at your program Spring/Easter celebration! Photo and idea is thanks to No Fuss Fabulous!
43. Peep Nest Pancakes
Make pancakes…
In the center of the pancakes make a nest shape with whipped cream.
Place a marshmallow chicken peep, jelly eggs or melon balls in the middle of the nest.
When these were served, KidActivities poured a little warm syrup on the pancake before putting on the nest of whipped cream. Optional ‘sprinkles’ were also added. All thought they were not only fun but tasted great! ( Image by KidActivities.net)
Click here for complete Easter Themed Art, Crafts, Snacks, Games, Jokes, Easter Egg Ideas and more…