Christmas Games and Activities
Below you will find a collection of Christmas games and activities for children. These are great for kids Christmas parties or for school activity ideas. We even has some PE Christmas games! These game ideas are a great way to bring in the Christmas holiday and have some fun!
Table of Contents
- Christmas Games for Children
- Christmas Activities for Kids
- Christmas Songs for Kids
- Outdoor Christmas Crafts & Decoration Ideas
Christmas Games for Children
1. SANTA’S REINDEERS (Christmas PE Games)
Create flashcards with reindeer names.
The common names given for Santa’s reindeer in modern culture are: Dasher, Dancer, Prancer, Vixen, Comet, Cupid, Donner/Donder, Blitzen, and Rudolph.
Eight of these names are taken more or less directly from Clement C. Moore’s “A Visit From St. Nicholas,” Rudolf was not part of the original reindeer but came later from the song – Rudolf the red nose reindeer…
Players stand side by side on a line called the NORTH POLE.
The children can select the name of a reindeer for themselves.
One person is Santa.
Santa stands in the middle of the play area facing the reindeer.
Santa calls the name of a reindeer (example -“Dasher”).
All reindeer by that name gallop to the other end of the play area .
Santa tries to tag them.
All players tagged stay in the middle to help Santa.(If there is a large amount of chileren, Santa can have one of two of his/her elves assist.
2. SANTA TRIP (Good for line transitions)
Players sit in a circle. The first player says,
“On Christmas Eve I’m traveling with Santa and I’m going to take (something starting with A )”.
The next player repeats the first object and adds an object beginning with B continue the game through the alphabet.
If there are more players than 26 letters…start again at “A”.
3. INSIDE ‘SNOWBALL’ TOSS GAME
Materials:
Poster board, crayons, paint or markers, large marshmallows, plastic wrap, tape for tossing line.
1. Draw a VERY LARGE Christmas tree on the poster board; decorate and color the tree.
Glue or staple the poster board to a piece of cardboard and cut 4 round circle holes of various sizes in the tree. You’ll throw the snowball through these holes.
2. To make the snowballs, wrap 3-5 marshmallows in plastic wrap and tie or tape it to hold it together.
Prop the tree up and mark a line on the floor at the desired distance from the tree.
Younger players may need a closer line.
3. Playing the Game: Players take turns standing behind the line and try to toss the “snowballs” through a hole on the tree board.
Keep score by counting the snowballs successfully tossed through a hole or by assigning a point value to each hole.
The smaller the hole, the more points earned.
For a party-a prize could be awarded to all who participate!
How many words can you spell with the letters in CHRISTMAS?
Example: Sam, am, stir, mass, mist, rat, ram, tar, car, cat, this, his, mat, at, as, sit, etc.
4. ESTIMATIONS: Not just fun but MATH and Science too!
GUESS THE NUMBER OF ROUND PEPPERMINT CANDIES (or candy canes) IN THE JAR …
Have the kids write their name on a piece of paper along with their guess…Put the guesses in a closed envelope. Depending on what is being guessed–you can award prizes or the jar itself! In case of a tie–have two prizes–or enough in the jar for two. The winning child can also open the jar and share with the group! (I like that one the best!) –I did this at our family Christmas Eve gathering last year-with adults and children both guessing! (Barb)
***PLAY ‘CHRISTMAS CHECKERS’ & ‘TIC TAC TOE’ using round Green and Red Peppermint wrapped Candy!***
5. GIVE THE OLD ‘HOT AND COLD’ GAME A HOLIDAY SPIN!
1. Hide a Christmas (or Holiday of your choice) item.
2. Have a child to try to find the item.
3. When they get close to the item they are getting hotter.
4. When they get farther away from the item they are cold. The farther they get away the colder they get. The closer they get the hotter they get…
6. CHRISTMAS MEMORY GAME
Supplies: 18 items in box (Adjust to the age of children)
Version #1: Show the items in the box to the children. Remove one or more items out of the box (without children seeing you). Have the children guess what items are missing.
Version #2: For older children –put items on large tray or cookie sheet. Cover. Remove cover for 20-30 seconds and then remove tray from room. Children are to write down as many items that they can remember from the tray before you yell, “STOP”. Most correct answers wins!
7. THE NIGHT BEFORE CHRISTMAS GAME
Age Level: Pre-K through grade 6
“The Night before Christmas” is a little like “Musical Chairs.”
Put chairs in a circle.
Give each child playing the name of some part of Santa Claus’ outfit-such as sleigh, reindeer, etc.—Or something story related.(House, mouse, window, etc.
Each item can have one or more playing with the same word-such as there can be two sleighs, etc.
1. The facilitator reads the well-known story, “The Night Before Christmas.”
2. As the ‘chosen words from the story’ are read, the players having that word, rises… turns around in a circle… and sits down again.
3. When the reader mentions Santa or Santa Claus.—ALL change places, and children try to secure a seat.
The one left out. continues reading the story, and so on, until completed.
8. WHAT’S THAT SONG? #1
Play Christmas songs from a CD.
Who can recognize the title the quickest?
9. WHAT’S THAT SONG? #2
A drawing/guessing game for 4th grade or older
Supplies:
Black board and chalk or Dry Erase board and markers.
Slips of paper with a different Christmas song written on each one. A Christmas themed container or a stocking
Timer
1. Divide the group into teams.
2. The player up draws a slip of paper from the stocking, reads it silently and hands to facilitator.
3. The player must then draw clues as to what their song is–and try to get their team to say the name of the song.
4. If the playing team guesses correctly, before the timer runs out, they get two points.
5. If the playing team cannot guess correctly, before the timer runs out, the opposing team may take one guess.
6.If the opposing team guesses correctly they get a point and the playing team loses a point. Most points wins.
10. CHRISTMAS WHO AM I?
Make tags with names of Christmas characters and words:
Kris Kringle, Santa, Mrs. Claus, Scrooge, Tiny Tim, Rudolf, Frosty, Candy Cane, etc.
Put one on each persons’ back.
Players go around the room and ask other participants questions that could be answered with a ‘yes or no’ to find out who they are.
When they guessed their own “identity” they get a prize.
1. Ask “yes” or “no” questions only.
2. Answer “yes or no” to questions only.
3. No removing your own name tag to find out. If you ask, anyone will help you find out your identity.
11. UNWRAP THE GIFT
Supplies: Box filled with candy and that box wrapped many times with different paper. Music
Play:
1. Children sit in a circle on the floor. While the music is playing the “present” is passed around the circle.
2. When the music stops, one layer of wrapping paper is removed. The music begins again and the process continues until the box is completely unwrapped.
3. The box is then opened and everyone shares the candy.
12. HOLIDAY “SIMON SAYS”
Play Simon Says according to the season and theme:
Santa Says, Frosty Says, The Snowman Says, The Elf Says, The Gingerbread Boy (or girl) Says, Rudolf Says, etc.
Example: Replace the phrase “Simon Says” with “ELF SAYS.” Leader Elf says:
‘Elf says, “Put your hands on your head.”‘ All players should be their hands on their head.
When the leader Elf gives an instruction without saying “Elf Says” and the followers do the action anyway, the leader Elf says “HO! HO! HO!” and the player must sit down.
The last player left standing is the winner and can then be the next leader Elf.
13. CHRISTMAS CARD TOSS
Gather together a collection of old (RECYCLED) Christmas cards and carefully cut off the backs. (Avoid glittery cards.)
Place a large box or bin on the floor. (it would be nice if the kids decorated the container with a Holiday theme!)
Mark a place to stand some feet away from the box, depending on the age of the children.
If you are playing with mixed ages, older children should stand further away than younger children.
Each child takes turns tossing a stack of cards (like a frisbee) into the box. Count up the cards that land in the box…
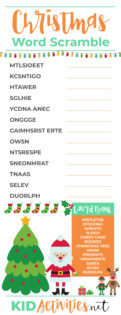
14. CHRISTMAS WORD SCRAMBLE (Played two ways)
Need: Index cards, Paper bags.
Choose a Christmas word such as: Christmas, Candy Cane, Santa Claus, or Reindeer.
Write the letters (mixed up) of the word on individual index cards. Do this two times, making two sets. Put each set in a brown paper bag.
Divide children into teams. Give each team a bag. The first team to decipher the word in the bag wins.
VARIATION: Divide children into teams with the same number of children as there are letters in the word.
Each child gets a letter and they must hold onto the card and stand in the proper order to spell the word for all to see.
15. DRAW A CHRISTMAS TREE GAME
1. For a flat surface, instruct kids to place a book or something similar on their head. Hold it in place with one hand.
2. Place a sheet of paper on the book and start to draw with the other hand.
- Instruct youth to first draw a floor.
- Draw a Christmas tree on the floor.
- At the top of the tree draw a star on the tree.
- Draw some presents under the tree
3. There is one point per correct drawing– one point if the tree is on the ground and one point if the star is on the tree and not in mid-air, one point for each present under the tree! You can also add ornaments on the tree…
16. PLAY ’20 QUESTIONS’ HOLIDAY STYLE!
One person picks something that is HOLIDAY RELATED… and then the rest of the children ask “Yes -or -No- questions’ (up to 20 questions only) until someone guesses who/or what the person has chosen. Another version of this game is to place something “Holiday-ish” IN A BOX that the children can’t see. Play the game from there! (You could put in a snow globe, ornament, tinsel, tree light, Santa hat, etc.)
17. FOR PRE-K AND K
Place cotton ball “snow” on the parachute. Put on some music and gently let the snow fall.
Christmas Activities for Kids
18. MEMORIZE SANTA’S REINDEER’S NAMES…
The common names given for Santa’s reindeer in modern culture are Dasher, Dancer, Prancer, Vixen, Comet, Cupid, Donner/Donder, Blitzen, and Rudolph.
Eight of these names are taken more or less directly from Clement C. Moore’s “A Visit From St. Nicholas,” and the ninth from the song “Rudolph the Red-Nosed Reindeer” and the TV special based upon it
19. SAY ‘MERRY CHRISTMAS’ IN ‘DIFFERENT LANGUAGES’!
Canada–Merry Christmas
USA–Merry Christmas
China–Sheng Dan Kuai Le
France–Joyeux Noel
Finland –Hauskaa Joulua
Denmark–Glaedelig Jul
Spain–Feliz Navidad
Mexico–Feliz Navidad
Sweden–God Jul
Russia–S Rozhdestvom Kristovym
Portugal– Boas Festas
Japan–Meri Kurisumasu
Italy –Buon Natale
Greece–Kala Christougenna
Belgium–Vrolijke Kerstmis
Poland–Wesolych Swiat
Netherlands–Zalig Derstfeest
Germany–Frohliche Weihnachen
20. A GAME WITH THE ABOVE LANGUAGES!
This game can introduce youth to different languages. They may not know how to pronounce the words-but they’ll learn how to recognize the greetings.
1. Cut 36 pieces of tag board. On half write the countries-on the other half write the greetings.
2. Quilt fashion–tack the countries on a bulletin board, wall or what will work for you. Put the greetings in a box.
3. The first player takes a greeting from the box and places in over the country he/she thinks it matches.
Following players have a choice. They can move whatever greetings they think belongs elsewhere-or choose a new greeting to place on a country.
4. As the game progresses, there may be two greetings on the same country. The next player will need to correct that on his/her turn. There is only one move per turn.
5. When a player at his turn– decides all is correct– the game is over and the answers are checked!
TEAM play: Set up two game boards and greeting sets. The first team done –ends the game.
If the first team to finish has all correct–five additional points are earned.
Both teams score one point for each correct move.
TIP: Write the greeting on the back of each country for easy checking) Kids can also play alone during free time.
Source: Holiday Games-Edupress 1990
(This following list can also be used to play the above game!)
21. LEARN ‘SANTA’S NAME’ FROM DIFFERENT COUNTRIES
Austria – Weihnachtsmann, Nikolaus
Belgium and the Netherlands – Black Pete, Christkind, Noel and Saint Nicholas
Brazil – Papai Noel
China – Che Dun Lao Ren
Denmark – Julemanden
England – Father Christmas
Estonian – Jouluvana
Finland – Joulupukki, Old Man Christmas
France – Pere Noel or le Petit
Germany – Weihnachtsmann, Nikolaus
Holland – Kerstman
Iceland – Jolasveinn
Italy – Babbo Natale
Japan – Santa Kurousu
Lithuania – Kaledu Senu
Mexico – San Nicolás, Santa
Norway – Julenissen
Poland – Star Man or Wise Men
Russia – Grandfather Frost (Ded Moroz), Dedushka Moroz
Serbo-Croation – Bozic Bata. Sveti Nickola
Spain – Three Kings
Sweden – Jultomten
Switzerland – Saint Nicholas, Chriskind
22. PROGRAM TREE
If possible bring a small pine tree into the classroom/program for the Holiday season. If no tree is available, make a large one out of green butcher paper/roll paper and hang it on the wall. Make and reproduce patterns for the children to color/paint/decorate — and cut out.
Punch a hole near the top of the ormaments and add yarn to hang. (When it’s time for holiday vacation–the kids can take the ornaments home to put on their own trees)
23. SEND YOUR CHILD A LETTER FROM SANTA!
Here are two FREE websites that E-mail Dear Santa letters. First one has lots and lots of other fun “Santa things”…the second is more simple–but very sweet. Nice to post at your “Parent Center…” if working in child care!
http://www.emailsanta.com/ really fun site!!!
24. HAVE SANTA TALK DIRECTLY TO YOUR CHILD THROUGH COMPUTER VIDEO!
Your child can receive their own personalized video message from Santa–click here. You enter info about your child (first name, hair color, photo if you wish, City/State, and one gift they would like (and will get) Using his big book of ‘naughty and nice’ boys and girls your child will see a page in it. Santa talks directly to your child. It’s very magical!
If you are a caregiver/teacher and would like to share this with your parents, the address is http://portablenorthpole.tv/
25. THE UPCOMING NEW YEAR!
Make a list with the kids of all the things they’d like to do in your program or home this winter!!! Try to do it before winter/holiday break–or the first week the holiday break is over!
Christmas Songs for Kids
26. MUSIC, MOVEMENT, SONG “HE’LL BE COMING DOWN THE CHIMNEY”
Sung to “She’ll be coming around the mountain”
He’ll be coming down the chimney when he comes,
He’ll be coming down the chimney when he comes,
He’ll be coming down the chimney,
He’ll be coming down the chimney,
He’ll be coming down the chimney when he comes.
He’ll be bringing lots of presents when he comes,
He’ll be bringing lots of presents when he comes,
He’ll be bringing lots of presents,
He’ll be bringing lots of presents,
He’ll be bringing lots of presents when he comes.
He’ll be driving nine reindeer when he comes,
He’ll be driving nine reindeer when he comes,
He’ll be driving nine reindeer,
He’ll be driving nine reindeer,
He’ll be driving nine reindeer when he comes.
27. “CHRISTMAS IS HERE” Song
Sung to the tune of Jingle Bells
Let’s make Christmas wreaths
And decorate the tree…
Then wait for Santa’s treats-
How happy we will be!
Let’s sing songs of peace,
Sing them loud and clear…
Oh what fun for everyone-
Christmas time is here!
Christmas time, Christmas time,
Christmas time is here!
Oh what fun for everyone-
Christmas time is here!
Lyrics to Traditional Christmas and Winter Songs are Here…
28. THE REINDEER POKEY – to tune of ‘Hokey-Pokey’
You put your reindeer hoof in,
You take your reindeer hoof out.
You put your reindeer hoof in,
And you turn yourself about.
You do the Reindeer Pokey,
And you turn yourself around.
That’s what it’s all about.
Next verses:
You put your reindeer tail in…
You put your reindeer nose in…
You put your reindeer body in..etc…
You can make up own verses…
29. MEDIEVAL WINTER CELEBRATION from Giraffe Lady in Saginaw, Mi.
Instead of having yet another generic Christmas party, my students and I have a Medieval celebration. For the two weeks prior to the last day of school before winter break, we build castles out of boxes (and anything else we can find), decorate plastic goblets with jewels, make medieval style hats and brown butcher paper tablecloths that look like wood, and talk about life in the middle ages. (Last year we spent an hour and a half talking about the plague and what silly things people believed to be medicinal.) I even got brave last year and showed them bits and pieces of “Monty Python’s Holy Grail” because it depicts the attitudes and customs of the day in a humorous way that (I was somewhat surprised to find) the student related to well.
Then, on the day before we break for Christmas, we have our “feast”. We turn off all the lights and use battery-operated candles for light. We lay down the “wooden” tablecloths over the cafeteria tables and put some natural looking garlands down the centers of the tables. The students get a hard roll torn in half as their charger, and we serve them torn up roasted chicken (Meijer’s are good, and they’re only about $5 each), hunks of cheese, and oranges for dessert. They drink sparkling grape juice from the goblets they’ve made, and wear their medieval hats. The students get a somewhat healthy meal (or enough to serve as a snack) and they love the novelty of the entire set up.
The first year we did this, it was supposed to be a week-long project for the 6th-8th grade group. They enjoyed building the castles so much that they spent two weeks on just that! I have done this every year since.
Outdoor Christmas Crafts & Decoration Ideas
TIP
If you’re going to make ‘Pine-Cone” Ornaments…
First bake the cones on a foil-lined cookie sheet for about an hour at 200 degrees. This kills any bugs or spider mites (or who knows what else!) that live in them. This also allows the seeds to fall out.
If you want the pine cone to close up again, just plunge it in cold water!
30. SHELTER, OBSERVATORY AND FOOD FOR SMALL ANIMALS AND BIRDS…
Turn a protected section of your program or school yard into a nature shelter. In the cold weather- birds, squirrels and other small wildlife are in constant search of food, fresh water and safe shelter.
Set up a bird feeder, bird bath and bird house where you and the children will be able to quietly observe. They’ll enjoy watching different animals seek the food and water– and your bird house will be there when needed.
31. OUTDOOORS CREATURE WREATH
Materials:
Cardboard wreaths (Make templates of wreath shapes to trace) or make a wreath shape from very small paper plates
Peanut butter
Birdseed
Popcorn
1. Cut wreath shapes out of cardboard.
2. Give each child a wreath and a plastic knife to spread peanut butter over the wreath shape.
3. Put birdseed over the peanut butter covered wreath.
4. Use spots of peanut butter to “glue” pieces of popcorn onto the wreath in a bow shape.
5. Hang the wreaths outside where they will be seen! Good for birds and other outdoor creatures…
32. DECORATE YOUR WINTER TREES OR SMALL SHRUBS!
CHEERIO CHAINS
Wrap tape on one end of a long length of yarn.
Tie a knot with a Cheerio on it at the other end.
If children are young, demonstrate how to string the chain by sliding a Cheerio (or any ‘O’ shaped cereal) over the tape (needle) and dropping it to the bottom.
Invite children to help you until the entire chain is strung. Drape these chains around outside tree for birds/animals to enjoy.
ORANGE SLICES…
Poke a hole with a plastic straw at the top of each orange slice. Thread with raffia or ribbon and tie each slice to a branch.
Take STALE BREAD and have children cut SHAPES WITH COOKIE CUTTERS. Invite them to spread peanut butter on the bread with a plastic knife and then sprinkle on birdseed.
Poke a hole at the top with a plastic straw.
Thread with raffia or yarn.
Together decorate the outdoor bushes and low trees branches with the decorations.
TEN EASY TIPS FOR AN EARTH FRIENDLY HOLIDAY!
You can celebrate the season of giving and do your bit to help out Mother Earth at the same time. Here’s how.
1. MAKE MEMORIES…
Give experiences instead of ‘stuff’. Try tickets to a show, a ball game, or a scenic train ride instead of dust-collecting knickknacks. Tailor the gift to the recipient: club or museum memberships, craft or hobby lessons, ‘I O U’ for a home-cooked meal, an afternoon of gardening help, free babysitting, and so on.
2. SAVE ENERGY
Shopping downtown? Take public transportation if it is available. (Look Ma! No parking fees!) And bring your own shopping bags while you’re at it.
3. RIGHT LIGHT
Using LED Christmas lights instead of power-sucking regular lights will dramatically slash your energy bill. Put all of your lights on a timer so they shine out only when it’s dark.
4. GO NATURAL String together plain popcorn and fresh cranberries into long, colorful swags to hang on the tree, along the mantelpiece, or in the windows. (This is a great activity for the kids!) After the holidays you can hang the strings outside for the birds to enjoy.
5. GO LOCAL
Seek out regionally produced, one-of-a-kind gifts. Good sources include church fairs, craft shows, local boutiques, and flea markets.
6. RE-GIFT
Here’s your official permission to pass along that present you can’t use but maybe Uncle Charlie can.
7. REUSE
Turn old holiday cards into gift tags and colorful paper chains.
8. RECYCLE
Why spend money on commercial gift wrap? Calendar pages, kid’s school paintings, the comics section of the newspaper–these make fun and fabulous wrapping paper alternatives. Choose paper or cloth ribbon, or colored twine instead of plastic ribbon.
9. REDUCE
Instead of adding bulk to the landfill, choose gifts that come with a minimum of product packaging, and try to find packaging that’s 100 percent recyclable.
10. SIMPLIFY
Stop the madness and remember what the holidays are really about– Family…Friends…The simple pleasures of a shared meal!
By: Vanessa Greaves
There you have it, 32 Christmas games for children. These games and activities are sure to deliver joy and fun to the little ones you are trying to entertain. Need more great Christmas activity ideas? Make sure you checkout some of the links below. Anything from snowman ideas to Christmas tongue twisters, we have it all.
HAVE FUN WITH ALL THE WINTER PAGES!
