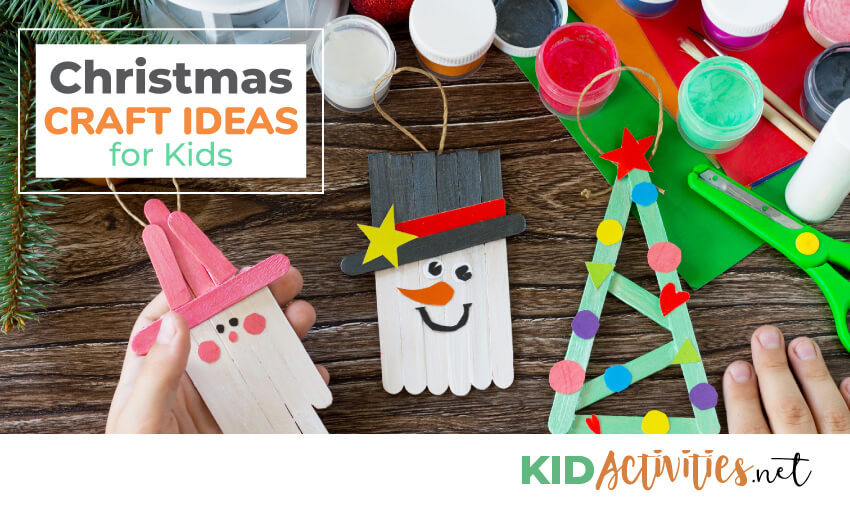
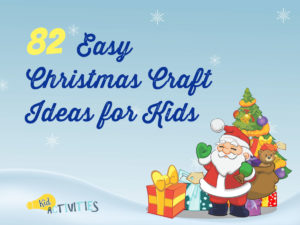
Kids Christmas Crafts
We have compiled 82 fun and easy Christmas craft ideas for kids. This is sure to keep kids busy and engaged for hours. This is a great way to let your little one’s creativity shine.
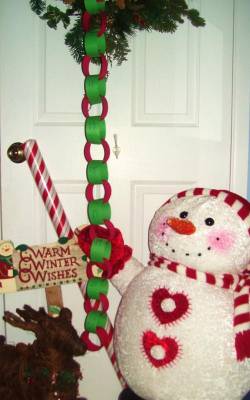
1. PAPER CHAIN COUNTDOWN TO CHRISTMAS (OR HANUKKAH OR KWANZA)
Time is a difficult concept for young children to grasp! One fun and easy way to count off the days is to make a Holiday paper chain. Start on December first…and each day remove one paper loop!
If you are a teacher/caregiver–make one with each child to take home–be sure to include directions for parents! (You could also do this in your classroom or program to count down the days to winter vacation!)
Materials:
Red and green construction paper (or color for your Holiday)
Choice of stapler, tape or glue stick, scissors or paper cutter
Directions:
1. Have adult cut paper strips from construction paper. The strips in the sample photo are approximately 2” x 8”.
2. Staple, glue or tape strips as you would any paper chain.
3. Depending on the amount of days to Christmas, number the loops 1 up to 24. (24 will be at the top of the chain and 1 at bottom)
4. Hang the chain from a doorway or hook.
5. Each day remove one loop from the chain. Before you know it– the big day has arrived!
TIPS for Parents:
- If your child is under 5, consider putting up no more than two weeks of loops. Time does seem to stretch on forever with little ones!
- Consider making one chain for each “young” child you have; each child will want to remove their own loop. Problem solved! (500 pre-pasted 7″ strips can be ordered from Orientaltrading.com for $4.99 – 5.99. however they are thin and can tear easily)
This is also a great idea for counting off any big event such as vacations, birthdays, etc. (Photo and idea by KIdActivities and featured on Nickelodeon Holiday Ideas!)
2. HOW TO MAKE REINDEER FOOD
For each small baby food jar, you’ll need:
1/4 cup dry oatmeal
1/8 cup granulated sugar, 1-2 tablespoons colored sugar
(Traditional recipes call for glitter, but unless you purchase the pricey edible glitter from specialty shops, it WON’T
BE SAFE FOR BIRDS AND SQUIRELLS. Substituting colored sugar will still give a sparkly appearance, without being harmful to the actual animals who will end up eating it.
FOR A BABY FOOD JAR
Layer half of the oatmeal, followed by half of the colored sugar, the white granulated sugar, the rest of the colored sugar, and topped with the rest of the oatmeal.
IN A BAGGIE… Alternatively, combine ingredients in a mixing bowl and scoop into zippered plastic bags….
(With the sugar instead of the glitter-It’s OK for the kids to munch on.)
Attach this poem if it is a gift!
Sprinkle on the lawn at night.
The moon will make it sparkle bright.
As Santa’s reindeer fly and roam,
This will guide them to your home.
Direct the children to sprinkle it on Christmas Eve on the lawn, driveway, or apartment patio to entice the reindeer. It gives deer something to munch on while Santa delivers his goodies.
3. DECORATED HOLIDAY BALLS
1 Styrofoam Ball (size may very)
1 Cup dried herbs or potpourri, dried rose petals or dried small flowers for a 6″ size ball
White Glue
Twine or Ribbon
1. Pour herbs mixture into a bowl. You may choose to ground leaves or petals in a coffee grinder or food processor or glue them on separately.
2. Cover an area of the ball with glue and roll ball through mixture, covering an area at a time.
3. Cloves may be glued on separately.
4. Cover ball with waxed paper and firmly press. Allow to dry completely before adding ribbon
4. ORANGE-CLOVE POMANDERS
Ingredients
6 oranges (or lemons)
whole cloves
decorative ribbon
The Spice Mix
4 tablespoons ground cinnamon
4 tablespoons ground cloves
2 tablespoons ground nutmeg
2 tablespoons ground allspice
1/4 cup orrisroot powder (as preservative)
Directions
1. Combine the spice mix ingredients.
2. Wash oranges.
3. After poking a hole with a needle, fork, or tooth pick, insert cloves into oranges in a decorative pattern.
4. Roll cloved oranges in the spice mixture within 24 hours and set in a warm place to dry, turning fruit daily.
5. Drying takes from two weeks to possibly a month.
6. Pomanders are completely dry when they are hard.
7. Remove pomanders from the spice mix, dust off a little, and tie with decorative ribbons. (Wrap your orange in holiday ribbon leaving enough extra ribbon at the top for hanging. You can poke holes into the ribbon and through to the orange to help hold it in place.)
Set out in a bowl or you can use as Christmas ornaments. Also great hung in a closet! When preserved, these can last for months to years!
5. CRAFT IDEAS FOR CLEAR ORNAMENTS
Ideas: Popcorn, Confetti, Cellophane sparkles, Pieces of foil garland, Fine potpourri, Tiny beads, Pearls, Epsom Salt, or Artificial Snow. Add a bow… (Images by KidActivities.net)
6. PLASTIC PLACE MAT ORNAMENTS (Can be used outdoors)
Materials:
Plastic place mats
Scissors
Paint pens and Contact paper
Circular paper hole-punch reinforcements
1. Cut Christmas-tree shapes out of plastic place mats.
2. Cover with green Contact paper, if desired.
Decorate by painting on designs with paint pens or markers.
Use hole reinforcements with painted centers to look like ornaments on a Christmas tree
Source: diynetwork.com
7. NATURAL TREE ORNAMENTS
Consider using only ‘natural ornaments on your classroom center or home Christmas tree!
- Decorate the tree with popcorn and cranberry garland, white painted pine cones, (some glittered) and cinnamon dough ornaments.
- Make pomanders from oranges and cloves (the pompaders can then be hung in closets)… start those in November!
- Make walnut shell ornaments (directions below) and put those on the trees too. It will smell amazing the entire month!!!
8. WALNUT SHELL ORNAMENTS
- Take walnuts and crack them so you have the 2 halves.
Take out the nut meat and be sure to use it for a cooking project with the kids. (Make sure there are no allergies) - Next take twine or ribbon and glue it into the shell
Glue the edges of the shell and put them together. Either hold the two shell pieces till the glue sets enough to keep the pieces together…or put a rubber band around the shell.
When it’s dry–remove the rubber band and it’s ready to hang on the tree.
You can also paint the shells and add glue and glitter…or just glue and glitter the natural shell. - IDEA: You can also use them OUTSIDE.
Cover them with peanut butter and bird seed and then hang.
9. CANDY GARLAND
- To make a candy garland– thread a needle with floss. Thread the candy and make a knot at the ends.
- You can hang the garland on a tree or about the room or chandeliers. OR…
Use wrapped treats and an ordinary stapler. Simply staple the ends of the wrappers together. (For loops and dips, make sure the garlands are at least double the length of the surface from which you will drape them.
10. HOW TO MAKE SNOW GLOBES
Fill a clear glass baby food jar (or other small jar) with half water and half corn syrup.
Add glitter, beads, etc. The corn syrup makes the glitter fall slowly for a sparkling effect.
11. FROSTY HOLIDAY CARDS AND PICTURES (Two projects in one!)
Mix 1 cup Epsom salts with 1 cup boiling water. Let cool.
Use paint brushes to paint mixture over recycled Christmas cards or note cards with pretty pictures.
When dry, pictures will have a frosty appearance.
Don’t throw away the mixture when you’re done painting!
IN THE SCIENCE CENTER…take a piece of black construction paper and cut it to fit the bottom of a clear, flat dish.
Pour any remaining salt and water mixture into a dish and let sit over night to dry.
The mixture forms crystals.
The children can then use magnifying glasses to view the crystals. Two projects in one!!! 😉
12. HOLIDAY WISH COLLAGE!
Write on construction paper a heading of-
“My Holiday Wish List”
Collect kid related catalogs and week-end advertising papers…filled with child related gifts/toys/books/clothes/electronic/and things for family time ideas.
Have children cut out pictures of things they find special.
Have them glue the items on sheets to form a wish-list for parents.
Instruct youth to ONLY cut and paste what they’d truly like!!!
TIP: This should be done right after Thanksgiving to early December–so that before parents shop they’ll have an idea of what their children would like!
13. PAINTED HAND AND FOOT ANGEL
Materials:
Construction paper, paint, paintbrush, paper plate, water and clean-up cloth or paper.
Pour paint on the plate.
With the paintbrush, ‘paint’ the child’s foot and then press the foot gently onto the construction paper.
Clean the foot and then ‘paint’ the hands (one at a time) and place it to the side of the foot so that it looks like wings.
When dry-add two little eyes.
With a thin circle of glue and glitter-create the halo.
If this is to be a gift… Label it
To: ___________
From: Your Christmas Angel’
Source: HistoryMom on yahoo
14. HANDS CHRISTMAS WREATH
1. Using green construction paper or card stock—trace children’s splayed-fingered hands; cut out multiple copies of it.
2. Overlap hands and arrange them in a circle to make a Christmas wreath. (It is advised to put hands over a pre-cut wreath-shape cardboard or a paper plate for more stability.
Decorate the wreath with red ribbon (either real or construction paper), a few small light ornaments shapes, red pom-poms, or berries cut from construction paper.
This sample wreath (thank you to mommentsofmommyhood) used two sheets of paper for hand shapes on their wreath. The shapes were glued to cardboard from a cereal box…and embellished with a red contruction paper bow and berries.
15. GROUP HANDPRINT CHRISTMAS TREE
- Have all children trace their hands onto green construction paper and cut them out.
- Using their hands, curl the fingertips upwards to make a branch look. Put all the curled handprints over each other into a Christmas tree shape.
16. PAINTED HANDPRINT WREATHS
1. Have children dip their hands in green paint…make green hand prints in a circular shape on tag board.
2. When the paint has dried, roll small pieces of red crepe paper into balls (berries).
3. Glue the red berries onto the hand prints.
4. Make a red bow out of the crepe paper and staple it onto the wreath. Cut a hole in the middle of the wreath. (We actually cut the shape out before we decorate the wreath.)
5. Use either green or red yarn to hang the wreaths. Submitted by Sarah in Oakbrook, Illinois
17. DIY FELT CHRISMAS TREE (For younger children)
Have children glue a piece of “cone-tree shape” felt triangle on of poster bard or cardstick paper.
Kids then snip other colors of felt scraps into little pieces and glue on as ornaments.
18. MACARONI ORNAMENTS
Need:
(1) 3″ X 4″ piece of tag board or lightweight cardboard for each ornament.
Paper clip for each
All shapes and sized of macaroni
Scissors and glue
Gold spray paint and newspapers.
1. Fold the 3″ X 4″ piece of tag board or cardboard in half.
2. Cut out ANY shape desired for the ornament.
3. Cover the cutout shape with glue.
4. Arrange the dried pasta shapes on the ornaments. They can be arranged any way the children like.
5. When one side is complete- let it dry and set.
6. Turn it over and do the other side.
7. Put a clip through the card board to hang. Spray with gold spray paint. It is advisable to lay many ornaments on newspaper and spray all at the same time. Let one side dry and then do the other side.
19. PASTA SNOWFLAKES
Materials:
Wheel shaped pasta, White paint, White glitter, Dry Tapioca pudding mix, Paint brushes, Elmer’s glue
Take round wheel shaped pasta and glue them together in a circle shape. When dry–paint the entire snow flake white. Before the paint dries, sprinkle on glitter mixed with dry Tapioca pudding mix.
To hang from the ceiling, insert a piece of string or yarn through one of the wheel holes after the snow flake is dry.
20. PHOTOGRAPH HOLIDAY ORNAMENT (Easy) Create ornaments using a photograph of the child.
Glue the photograph onto a shape the child cuts out of paper or poster board (such as a Christmas tree or Hanukkah menorah, etc.).
Decorate the ornament with glued-on sequins, beads or ribbon. Cut a small hole in the top and thread a ribbon through to hang the ornament.
21. VOTIVE CANDLES
Materials:
Baby food jars or jam jars
Scraps of tissue paper
Diluted paste or glue
Clean the jars and let dry. You can use small jars…but check the size of the votive candle to make sure it will fit. Have children brush glue onto the jar and place different colors of tissue paper over the glue, overlapping so the entire jar is covered on the outside. When brushing the tissue with glue be sure to do so gently so it doesn’t tear. If it tear, remove or leave wrinkled. The glue will appear to be white but will dry clear and when a candle is lit inside will give off a pretty color and design. Great for gift time! ♥ For Christmas: Use red and green
THE VOTIVES TO THE LEFT by KidActivities… were made using clear votive candle holders. Small squares of either red or green tissue paper were applied using decoupage finish (Modge Podge). Once dry–another coat of decoupage was applied. Just as in the directions above, this must be done gently as not to tear the paper. When dried, small tree shapes (purchased at Michaels Craft Store) were glued onto the votive candle holders.
Mixed in with clear votive candle holders-a very pretty table was set! To see the completed table setting
22. PAPER PLATE POINTSETTIA FLOWER CRAFT
This simple-to-make poinsettia is made from a paper plate and a child’s handprint cutouts.
Materials:
A paper plate
Red, green and yellow construction paper
Scissors, Glue or a stapler
1. Trace children’s hands on red and green construction paper.
2. Cut out the hand tracings.
3. Glue or staple a circle of green handprint tracings (fingers pointing outwards) around the outside of the plate.
4. Glue or staple a second circle of red handprint tracings (fingers pointing outwards) just inside the first circle.
5. Glue or staple a third circle of red handprint tracings at the center of the plate.
6. Glue a small yellow paper circle in the center of the flower.
23. PIPE CLEANER WREATH
Cut a small wreath shape from cardboard and wrap it with green pipe cleaners. (Make sure that the wreath is small enough so pipe cleaners will reach around to the backside to twist shut. Loop yarn or ribbon around to tie it on a tree–that’s it. Photo courtesy of World Preschool Mom blog site.
24. MAKE SCENTED PINE CONES
Materials Needed: Pine cones, Pine or fir pure essential oil, Lidded container, Box or plastic bag, Facial tissue
1. Fill container, box or plastic bag with dry, clean pine cones.
2. Liberally sprinkle tissue with essential oil and add to bag or container.
3. Seal the bag or container and allow oil to penetrate cones for several days before removing (the longer the cones are contained, the stronger the fragrance will be).
25. RUDOLF MASK (For younger kids)
Materials:
Paper plates, brown, black and red construction paper, scissors, glue, markers or crayons, single whole punch, rubber bands or tongue depressor stick
Preparation: For young children, pre-cut antlers and reindeer nose.
Directions:
1. Cut reindeer nose, and antlers out of construction paper.
2. Paste onto plate. Draw mouth. Cut holes out for eyes.
3. Punch hole on both sides of plate and attach rubber bands–or tape to a popsicle to hold in front of face.
4. Have children wear reindeer masks while singing “Rudolph the Red-Nosed Reindeer.” Photo from Activity Village
26. DECEMBER CELEBRATION AND HOLIDAY CARDS
Make a Holiday card with the words
“Sweet Wishes for A Merry Christmas …Happy Hanukkah or _______!”
On the inside of the card, glue or staple a ‘wrapped mini candy’.
27. A ‘CARD MAKING’ COLLAGE TABLE
Put out materials such as card stock, construction paper, old Holiday cards, pens, markers, craft glue, buttons, ribbon, holiday shaped templates for tracing, etc.
Challenge the children and see how creative they can be! This card sample uses buttons, markers, and an old jewelry piece for the tree top! Words cut out from an old Christmas card form the words, ‘Season’s Greetings’! The card stock paper is folded in half to continue the Holiday message inside…(Image by KidActivities.net)
28. TISSUE PAPER ORNAMENTS #1
Need:
2″ Styrofoam Balls
Tissue Paper in Assorted Colors
Liquid Starch
Glitter
Hairpins
Toothpicks
Wax Paper
Decoupage Solution
Foam Brush
Instructions:
- Tear tissue paper into irregular 1″ pieces. Working over waxed paper, brush a section of Styrofoam ball with Liquid Starch. Place overlapping pieces of tissue paper over the starched section of the ball.
- Brush a coat of starch over tissue paper.
- Continue until entire ball is covered.
- Use toothpicks pushed into the Styrofoam to keep the ball from rolling around.
- Let dry. Brush with a coat of decoupage solution.
- Sprinkle with glitter while still wet. Let dry.
- Remove toothpicks.
- Push hairpin into the ball for a hanger.
Source: MakingFriends.com
TISSUE PAPER ORNAMENTS #2
With a few exceptions, KidActivties made these ornaments much like the above directions.
First… a decoupage finish (Modge Podge) was brushed onto small sections of a Styrofoam ball. Red and green squares of tissue paper were applied to the wet surface. Once the ornament was covered with the tissue paper, another coat of finish was applied over the ball…red and green glitter was sprinkled onto the ornament. When dry, a small pipe cleaner hook was inserted into the top to hang on the tree. Ribbon tied in a bow completes the look
NOTE: You must be very gentle when applying the tissue paper. It can easily tear. If this happens, just pat it down with a bit more Modge Podge.
TIP: Dry round ornaments, etc. on top of a toilet paper or paper towel tubes. It works great as a holder and they don’t roll around!
29. ORNAMENT WITH PHOTO IN GOLD MASON JAR LID
1. Take out the insert of the lid and glue the child’s picture in it.
2. Cut around the picture and put the insert with the glued picture back into the lid-Now the picture shows through.
3. Finish it with gluing lace or trim around the edge on the backside of it.
4. Add a piece of gold wired cord to the trim with a dab of hot glue.
30. PICTURE ORNAMENTS
1. Buy holiday gift tags…Glue a small picture of the child in the middle and laminate.
2. Cut out and poke a small hole in the top to string.
3. You have a homemade ornament that is inexpensive and easy!
31. CHRISTMAS HAND TREE
1. Trace child’s hands.(Ten hand shapes for this project. Cut out hands…
2. To assemble tree, glue together four hands for the bottom of the tree.
3. On top of that glue three more and continue working your way up to the top of the tree.
4. Add a tree trunk and a star for the top. (Make a star shaped template for children to trace their stars)
5. Add ornaments by using a hole punch on colored paper–glue onto tree! (images courtesy of justfor fun)
32. HOW TO MAKE A CANDY CHRISTMAS TREE
Materials:
Gumdrop (Spice Drop) Candy
Styrofoam tree – Any size desired; trees in sample photo are 6″
Tin foil
Pointed Toothpicks
1. Cover the tree base with tin foil
2. Break toothpicks in half
3. Put a gumdrop on the broken side of the tooth pick…
3. Starting at the bottom of the tree, poke the pointed side of the tooth pick (with the gumdrop on it) into the tree.
4. Continue going around the tree until it’s covered with the candy.
I remember making these in the late 1960’s! Seeing a photo of one on a website brought back some nice memories–so guess what?! I made one and “Hubby” made the other…
The trees are nice to add to a tablescape, part of your dessert table, or to give as a ‘hostess gift’. Be sure to have extra gumdrops to munch as you make! (Photo by KidActivities)
33. JINGLE BELLLS TO WEAR! (Wrist or Ankle Bracelet)
Take a strip of green or red fabric or felt that will fit for a wrist or ankle band.
Tie string or yarn to the bells and then to the strip…or sew jingle bells to the fabric…
34. HOLIDAY PARTY CRACKERS (Not the kind you eat!)
1. To make Christmas party crackers, take an old paper towel roll and cut it in half or thirds.
2. Place small favors such as erasers, tiny toys, stickers, or small wrapped candy inside.
3. Roll the filled paper towel roll in Christmas wrapping paper allowing extra paper at both ends. Twist the excess wrapping paper at each end and tie with ribbon or yarn. Christmas Party crackers!!!
35. REINDEER PUPPET (Visit KidActivities Reindeer Theme) for loads of ‘Reindeer Ideas’!
Materials:
Small paper lunch bag
Scissors
Markers or crayons
Red paint or Red sticker circles
1. Have children cut 2 antler holes and one nose hole in their bags. (Antler holes are at the bag top—and the nose hole should be in the middle of the bag where a nose would go)
2 Show the children how to put their fingers in the holes to make the antlers (first two fingers for one hole–and last two fingers for next hole—thumb is used for the nose hole
3. Optional: Each child can dip their thumb in red paint or stick on a red sticker to make the nose.
Young kids can then sing “Rudolf the Red-Nose Reindeer” using this as a prop!
36. EASY PAPER REINDEER FOR YOUNGER CHILDREN
- Materials: Dark Brown construction paper
- Light Brown construction paper
- Large googly eyes
- Small red pompoms
Trace Child’s shoe on dark construction paper and cut out to make head. Trace child’s hands on light construction paper and cut out to make antlers. Glue antlers, eyes, and pompom (nose) to head
TIP: Be sure to save any Christmas left-over candy canes to make Valentine Hearts in February!
37. Make a Holiday Banner for your Room!
It can say: JOY! HAPPY HANAKKAH! HAPPY HOLIDAYS! PEACE! (whatever…)
Need:
Butcher Paper:
Narrow Banner about 18″ X 36″ and Wide Banner: 24″ X 36″
Also-Choice of a Dowel, bamboo stake, twig, etc.
Construction paper in assorted colors
Glue/paste, scissors, yarn
Letter templates
Discuss with children what you would like the banner to say and what the design, technique, etc. should be.
1. Fold both ends of paper over twice (about 2″) and paste or staple the bottom fold.
2. Cut out pieces for the banner (the words or word and pictures)from the construction paper.
3. Arrange the design on the butcher paper.
4. When you’re satisfied with the design, glue the pieces down.
5. Attach the doweling to the top of the banner with paste or staples. Add yarn and hang.
38. DOG BISCUIT REINDEER
Materials:
1 dog biscuit (Or a dog biscuit shape)
2 wiggly eyes
Set of ears (Make templates for ears and holly-shaped antlers as shown in picture)
Set of holly antlers
Pom pom for the nose (Sparkly nice)
yarn or ribbon for the hanger
Glue all parts on as shown in sample…Kids now have a reindeer ornament for your tree!
39. JINGLE BELL WIND CHIMES
Materials for each chime:
Unsharpened Pencil
10 Bells
Yarn
1. Cut 12 pieces of yarn.
2. On 10 pieces of yarn tie a bell at the end of each one.
3. Tie a plain piece of string on EACH end of the pencil for hanging.Tie them together at top.
4. In-between the end strings, tie the yarns with bells on them onto the pencil.
40. GINGERBREAD KID
Materials:
Brown construction paper
Buttons
White yarn
Black beans
Red ribbon
One red pom pom
Cotton balls
Stapler
Pencil
Scissors
Glue
1. Fold a large piece of brown paper in half.
2. Trace the shape of a gingerbread man on one side.
3. Cut out the gingerbread man so that the folded piece of paper makes 2 of the shape.
4. Use white yarn to make the decorative icing.
5. The beans can be used to form the mouth.
6. The red pom pom can become the nose.
7. Use the buttons to make a shirt and eyes.
8. Use the ribbon to make a hair bow, a scarf, or a bow tie!
9. Staple the two sides together, leaving a hole at the top.
10. Stuff the gingerbread man with cotton balls and then close up with staple or glue.
Created by Ms. Julia from the Kansas City Public Library
GINGERBREAD RHYME for above…
Stir a bowl of gingerbread,
Smooth and spicy brown.
Roll it with a rolling pin,
Up and up and down.
With a cookie cutter,
Make some little men.
Put them in the oven
Till half past ten!
41. HAND PAINTED GLASS ORNAMENTS
Materials:
Perfectly Clear glass ornaments (Size is your choice)
Acrylic paint (color choice is yours–sample is with pearl and gold
Put acrylic paint “inside” the ball — roll it around until all is covered with an effect that you like…
These directions are from Angie who gifted the ornaments to me in 1999…
1. The balls need to be dried ‘up-side down’ which can be very messy. 2. Hot glue toilet paper tubes standing on end in a cardboard box.
3.You can then tip the painted balls in the ends of the tubes and the extra paint goes into the box.
4. Make sure that the tubes are placed far enough apart for the balls to fit. It will depend on the size of the balls.
If you will be signing the bottom of the ornaments, the signature and date are done on the outside with a paint pen in either gold or silver. (You can see signature on far left ball) They write beautifully on glass. (Ornaments created by Angie Dockter, Brooklands School – Rochester, Mi. Photo by KidActivities)
42. SEQUIN STYROFOAM BALL ORNAMENT
Materials:
Styrofoam ball (any size)Sample is about 2″
8 mm sized sequins
3/4 inch sequin pins
Feathers, seed beeds, toothpick
For sample ornament…
Put sequins into the ball and have them overlap slightly.
Do this by sticking a straight pin through the tiny hole in the center of each sequin. The pin will fit flush with the top of the sequin and penetrate the Styrofoam ball and hold the decoration in place. The head of the pin will hardly be visible, so it will look as if the ball is made of sequins once you have covered the entire thing. (This ball is covered entirely with sequins; however, the silver do not show in the photograph)
You can also get a lovely effect by first putting a pin in a sequin —and then a bead. This design is nice on a ‘satin’ covered styrofoam ball; it would take longer to do–but may be something an adult or older youth would like to try.
To hang THIS ball, a toothpick was poked in the top center. A seed bead was glued to the top of the pick and then a small loop of ribbon tied under the bead. (The bead keeps the ribbon from slipping off) Small holes were poked into the top of the ball and feathers put in these to hide the toothpick.
You could also hot glue a loop of gold string or ribbon to the top of the ball. The loop should be large enough to attach an ornament hanger to it–at least the circumference of your thumb. The longer the loop, the farther down off the branch the ball will hang. Use a tiny dot of glue to hold the loop in place.
This ornament was made by Delaney Biggs of Waterford, Mi. Grade 3-2008; Photo by KidActivities
Thank you to Cere Child Care for sharing the following three Christmas Ideas. Great for younger children!
43. RECYCLE OLD CHRISTMAS CARDS!
Cut off the front cover of old Christmas cards. Have children sign their name on the back and decide whom to give it to. Punch holes around the border and give children a strip of curling ribbon to lace around boarder.
44. SANTA ORNAMENT… Use green paper. Paint fingers white for beard. Paint palm skin color (mix a little orange or brown into white until you get the desired skin color). Paint top of hand and thumb red for hat. Stamp with thumb out and fingers slightly together, pointing to the bottom of the paper. When dry add face and white dot on the end of the hat. Optional- Laminate, punch a hole at the top and hang on your Christmas tree!
45. SANDPAPER GINGERBREAD BOY
1. Cut a Gingerbread ‘cookie’ shape out of sandpaper.
2. Scrape across and all over with a cinnamon stick to make it smell nice.
3. Decorate with eyes, glitter, or whatever you have on hand.
4. Use scalloped edge scissors to make strips with white construction paper for the icing decoration.
46. TISSUE PAPER and JUICE LID MINIATURE STAINED GLASS WINDOWS
Materials:
Metal Juice lids, Colored tissues paper torn in small pieces, Glue
1. Cover the flat side of the juice lid with glue.
2. Tear or cut small pieces of the colored paper and place on top of the glue-top lid.
3. Again-cover the paper with glue. Dry overnight.
4. When dry, pop these off the lid.
6. Hang in a window.
Alternative: Powdered tempera could also be added to the glue; the colored glues could be mixed or glitter added.
47. HOLIDAY TREE…for the Classroom
If possible bring a small pine tree into the classroom/program for the Holiday season. If no tree is available, make a large one out of green butcher paper/roll paper and hang it on the wall. Make and reproduce patterns of your choice for the children to color/paint/decorate — and cut out.
Punch a hole near the top of the ormaments and add yarn to hang. (When it’s time for holiday vacation–the kids can take the ornaments home to put on their own trees)
If the tree is natural or artificial, decorate with paper chains, popcorn garland, and all the craft ideas and ornaments of nature found on this site.
48. BROWN PAPER CHRISTMAS STOCKING
Make a great Christmas stocking from a brown paper grocery bag. You can hang it and stuff it with Christmas goodies.
Supplies needed: Thick brown paper (like grocery bag paper) or brown felt, Pencil, Scissors, Glue, A hole punch, Yarn, Markers or crayons.
1. Draw a large stocking on thick brown paper (or brown felt).
2. Cut out two copies of this stocking.
3. Glue the two stockings together around the edges (make sure you don’t put any glue along the top opening).
4. Punch holes around the edges of the stocking.
5. Weave yarn in and out of the holes. Leave a loop of yarn at one end, and tie it in a knot.
6. Decorate your stocking with crayons, markers, stickers, construction paper cut-outs, or glitter.
49. COLLAGE CHRISTMAS TREE
Materials: (1) 9″x12″ newsprint, (1) 9″x12″ (any color) construction paper, old magazines, scissors, pencil, paste or glue
Fold the 9″ x 12″ construction paper in half – lengthwise.
On the half of paper draw a half of tree in a cone shape (may have a trunk in a pot base if desired–but needs to have the CONCE SHAPE tree on the trunk bottom) This will be the tree pattern.
When you cut the side out–unfold to get entire tree shape.
Next–Cut pieces of bright colored pieces of paper from magazines.
Tear these into small pieces and shapes.
Paste these onto the construction paper.
Cover the entire paper-overlapping the pieces.
These can also be applied with liquid starch and a paint brush.
Let it dry.
Lay the tree pattern on top of the collaged construction paper and draw around the tree with a pencil.
Cut the tree shape from the collage paper.
You now have a collaged tree shape.
You can mount the tree on a dark or bright colored paper. Really pretty. when complete.
50. DECOUPAGE HOLIDAY COOKIE PLATES
You need:
Clear glass plates, plain white paper (to draw and color or paint) or patterned wrapping/gift paper, pencil, scissors, crayons or markers, Modge Podge (Decoupage Finish)
1. Trace around a plate. Cut out the circle.
2. Make a colorful drawing on the paper circle. (You can also use Holiday wrapping paper like KidActivities did in the sample image!)
3. Brush Mod Podge onto the back of the plate.
4. Press the picture or paper onto the back of the plate.
5. Press/push out any wrinkles.
6. Let the plate dry. Apply another coat of Modge Podge if desired.
NOTE: Krylon spray was also used on the back of the plate for added protection. If you do this, allow time for any chemical odor to diffuse.
If you’re an adult and making on this for a gift–fill this plate with cookies you have made! Cover with cellophane and ribbon.
51. USE CANDY CANES AS HOLIDAY ORNAMENTS and EMBELLISHMENTS
- Canes are pretty just put in a glass jar-and grouped with other candy. Or use this idea at Holiday time from classytreats (I needed to disable the link. When I tried it the url had changed)… Just hang wrapped candy canes from the edge of a bowled-dish! Put a jar candle inside.
- You could also fill the inside with peppermint candies or any other Christmas candy instead of using a candle.)
- Use along with other Christmas ornaments and hang on your tree…
- Hot glue canes around a basket, container, or candles. Preserve them with a cover of clear acrylic coating.
- Another wonderful idea is from oodlekadoodle… Using a glue gun, glue candy canes, side-by-side (standing on end with their hooks at the top) to the outside of a terra cotta pot. Tie a red ribbon around the pot. Place a small poinsettia or greens inside the pot… or fill the pot with wrapped candy. (Note: I don’t see the hooks. It appears as oddlekadoodle used peppermint sticks-but either way would be lovely. Barb)
52. CANDY CANE REINDEER
Materials:
2 pipe cleaners, candy cane, two 6 mm google eyes, 1/4″ pom pom, glue, scissors
This has been around awhile–but great fun for first-timers!
1. Cut one long pipe cleaner in fourths.
2. Twist the other long pipe cleaner around the top of the cane to make 2 large antlers.
3. Wrap 2 pieces of the cut pipe cleaner pieces –around each antler to make the “branches” on the antler.
4. Glue the eyes to each side of the cane “hook.
5. Glue the pom pom at the end of the cane for the nose. You have a reindeer!
NOTE: Oops! I didn’t look at the ‘antler’ directions when this was made. This sample shows one half of a pipe-cleaner twisted and then bent a bit…Depending on your age group–do which ever is easier…
Check out the ‘CANDY CANE’ idea page for loads of ideas! Who knew you could do so much with candy canes and peppermint?!
53. MARSHMALLOW REINDEER…A snack and craft in one!
Ingredients:
Large Marshmallows and white frosting to help hold on eyes and nose
Stick Pretzels
Red Licorice strings (optional)
Chocolate chips, gummy candies, or mini M&M’s for eyes/nose (Sample made with mini chocolate chips and M&Ms’)
1. Assemble Reindeer bodies by sliding a pretzel stick through two marshmallows, one from either end.
2. Use 4 whole pretzel sticks for legs and a half of a pretzel stick for each antler.
3. Fold a 1 inch piece of licorice string in half and insert into face of reindeer for a red nose. 4. Attach head with half of a pretzel stick and then tie a piece of red licorice around neck for decoration. (Sample and Image by KidActivities.net)
NOTE: These should be eaten rather quickly. As our two 12 year old crafty cooks learned– the reindeer have a mind of their own and want to sit or lean after a bit…
54. MAKE AN EASY GINGERBREAD HOUSE #1
Materials:
Small, clean milk cartons
Brown construction paper
Glue
A variety of holiday decorating items such as-gumdrops, popcorn, M&M’s, chocolate chips, peppermint candy, sprinkles, frosted shredded Mimi-Wheats or Wheat Chex (good for a thatched roof effect), raisins, etc.
Cover a small milk carton with the brown construction paper.
Decorate as desired!
55. GINGER BREAD HOUSE #2
Sample houses made by children at Cere’s Childcare and Pre-School
This ‘mini’ craft ginger bread house has big flavor. Kids can decorate it and enjoy as a Christmas treat, or as a decoration for years to come.
Materials:
7 graham crackers
Frosting for glue (recipe below)
Assorted small candies for decorating
Ribbon
Pastry bag and tip or Ziploc bag and scissors
Purchase or Make Frosting
1/2 pound confectioner’s sugar
3 tbs. butter/margarine
1/2 tsp. Vanilla
1 1/2 – 2 tbs. Milk
Mix all the ingredients together until smooth and easy to spread, but not runny. Add more sugar if too runny.
If you have a pastry bag, place frosting in bag and use a small tip. You can use a Ziploc bag cutting a small hole in the corner.
Place one graham cracker flat on the table, squeeze a little frosting around all edges. You may need an extra pair of hands.
Place one cracker on each side standing up. It now looks like a box without a top.
Carefully squeeze more frosting on all outside corners from top to bottom and around the bottom of the box.
Let it stand for a short while to let frosting harden a little. This will make working with the roof a little easier.
Now squeeze frosting on two of the top edges of the box and place the last two graham crackers in a V shape on as the roof. It looks like a triangle on a box now from the side. It may overhang if you can get the frosting to hold for you.
Squeeze frosting along the top of the roof where crackers join. Let stand again until frosting hardens a little.
…….With leftover frosting, cover the roof to look like snow. (Two sides are left open) Then squeezing small amounts on candy, place candy on the house to decorate. You can use the frosting to add things like doors and windows. Just use your imagination.
After project is totally dry, string ribbon through to open side of the roof and hang on Christmas tree.
TIP: If you want to do this project with young children, you might want to make the base house ahead of time, gluing the corners from the inside – and let it harden. Then turn them loose with frosting and small candies to do the decorating.
Notes:
This Gingerbread House is safe to eat, but if you would like to save your treasure for years to come you can use a spray varnish in a well ventilated area. (2 – 3 coats of varnish).
Source: kaboose.com
TIP: Are you making this at home and short on time? Cute kits are at Michaels and other craft stores–just put together!
56. APPLESAUCE AND CINNAMON ORNAMENTS #1
1 1/2 cups ground cinnamon
1 cup applesauce (store bought works best)
1/3 cup white school glue (Elmer’s or other)
Directions:
1. Mix the ingredients together until a dough forms. Knead for a few minutes.
2. Roll out to 1/8 or 1/4 inch thick. (If sticky, dust your hands and rolling pin with cinnamon, work on waxed paper.)
3. Use cookie cutters or other implements to cut out the shapes you want.
4. Cut out a hole at the top of each with a drinking straw so you’ll be able to thread a ribbon or string (for hanging) when dry.
5. It takes 4 or 5 days for the ornaments to air dry. You should turn them over frequently so they will dry evenly and won’t curl.
6. You can outline each shape with puffy paint to make them more special. From Sarah/Oakbrook
57. APPLESAUCE AND CINNAMON ORNAMENTS #2
1. Take 1 cup applesauce, 1/2 cup flour and 3/4 cup cinnamon.
2. Mix the ingredients, and add more cinnamon slowly until the dough is smooth and not sticky.
3. Roll the dough out as you would to make cookies, to about 1/4″ thickness.
4. Use cookie cutters to make shapes.
5. Use a straw to make a hole for the string to go through.
6. Leave straw in as ornament dries and remove once dried.
7. These take 3-4 days to dry thoroughly.
58. COOKIE CUTTER CLAY
This recipe is meant to be rolled out, cut with cookie cutters, and left to dry. Great for ornaments!
2 cups Salt
2/3 cups Water
1 cup Cornstarch
1/2 cup Cold water
1. Mix salt with water in saucepan.
2. Stir and boil.
3. Add cornstarch and cold water.
4. Keep heating if it does not get thick.
5. Roll out dough on board floured with cornstarch. Make shapes.
6. Dry and decorate ornaments.
59. HOW TO MAKE GINGERBREAD PLAY DOUGH (non-cook)
(KA tested-it’s wonderful and smells sooooo good!)
2 cups flour
1 cup salt
1 tbsp. ground ginger
1 tbsp. ground cinnamon
2 tbsp. vegetable oil
1 cup water
Mix together well and knead until smooth.
Note: At first it seemed it may be too wet; however, after putting a bit of flour on the hands and kneading—it came together wonderfully. The longer the girls played with it…the better it got! (Images by Kidactivities.net) This would be nice any time or the year from Autumn until Valentine’s Day!
60. HOW TO MAKE HOLIDAY PLAYDOUGH (cook)
1 Cup flour,
1/2 Cup salt
2 teaspoons cream of tartar
1 cup water
1 teaspoon vegetable oil
Spices: cinnamon, Allspice, Ginger, Nutmeg
- Mix the dry ingredients.
- Add spices a small amount at a time until the dough smells and looks like you want it too.
- Mix water and oil together first and then add them to the dry ingredients and stir.
- In a pot, cook the mixture for two to three minutes, stirring frequently. The dough will start to pull away from the sides of the pot and stick together.
- When this happens, take the play dough out of the pan and knead the dough until it becomes soft and smooth.
- Allow the dough to cool and then store it in an airtight container.
61. STRING OF GINGERBREAD MEN AND WOMEN
Make a string of paper gingerbread men and women to decorate a room. These simple-to-make strings make a great Christmas or Winter decoration. You can drape the strings across rooms, over windows and around the tree.
Materials:
Brown grocery bag or brown/tan construction paper
Crayons or markers
Scissors,
Glue
Tape or staples
A long piece of green or brown yarn or string
1. Draw a gingerbread man or woman on a piece of construction paper. 2. Make sure to draw a rectangle on the top of the head (your gingerbread person will hang from this rectangle, which will be folded over).
3. Cut out the gingerbread people. Draw a face, clothes, etc.
4. Fold the rectangle at the top of the head over.
Attach the gingerbread person to a long string using tape, glue, or staples. Make more gingerbread people and attach them to the string.
Hang your string of gingerbread men and women across the room for a wonderful Christmas or winter decoration.
62. JINGLE BELL ORNAMENT
Simply thread jingle bells onto a pipe cleaner–leaving enough space on each end to connect the stems. Twist ends and close the circle. Add a ribbon where the pipe cleaners are joined. (Image by KidActivities.net)
63. BEADED WREATH TREE ORNAMENTS
Green 12″ chenille stems (pipe cleaners)
Wire cutters
Red pony beads
Red ribbon or yarn
Cut the chenille stem in half with the wire cutters.
String about 5 beads at intervals onto the chenille stem. Bend the chenille into a circle.
Twist the ends together to make a wreath.
Tie a red ribbon on to hang it from a tree.
(These are nice for small table top trees—the many I made with children 15 years ago-still look the same! B)
NOTE: YOU CAN ALSO String pipe cleaners through multi-colored beads, then mold the pipe cleaners into various shapes, such as candy canes, Christmas trees, stars, etc.
64. PIPE CLEANER CANDY CANES and WREATHS…
Materials:
White and red chenille stems/pipe cleaners (Regular or shiny)
Ribbon (optional)
Scissors
Hold one white and one red chenille stem side by side (they should be of equal length). Twist one end together and then twist together working your way down to the bottom.
Twist the bottom end together to secure. One chenille stem makes two nice sized candy canes. Finish off with thin tie of ribbon if desired.
WREATHS…As pictured, you can do tons of things with pipe cleaners! The same way the candy canes were twisted–twist two pipe cleaners and shape into a circle. Twist the ends together…finish off with ribbon. A green pom pom was added to the wreath on the right.
NOTE: The pipe cleaner stems were thinner than the kids would have liked. In the pictured sample-two of each color was used and twisted as directions state.
65. SPARKLING PIPE CLEANER SNOWFLAKES
Supplies
Scissors
Silver and/or blue tinsel pipe cleaners 2 per snowflake
Blue, white, silver plastic pony beads
Cut the two pipe cleaners in half.
Make a cross and twist the two blue pipe cleaners in the center. Do the same with the silver.
Twist the two crosses together in the center to make a ‘Snowflake’.
Add a couple beads to each stem. Bend end of stem if needed so that beads stay on.
NOTE: This sample was made using four full pipe cleaners…the same above directions were followed. I think it would be easier for the children to handle-cutting the pipe cleaners in half.
66. CANDY CANE HOLDERS for NAME CARDS OR FOOD CARDS FOR A BUFFET…
These are quite simple to make! For each holder– all you need are thre miniature candy canes, hot glue, and some thin ribbon.
1. Glue the first two canes together.
2. When those are secure, glue the third cane to the back. It looks and works much like a tri-pod.
When canes are firm ties on thin ribbon to finish the look. Use these either as place cards for your table or to label food dishes at your buffet!
67. HAPPY HOLIDAY CANDLE JARS
Materials:
Super clean Jars–the mouth of the jar just needs to be big enough so a tea light candle can fit through it.
Beads and tea light candles
Large bag of hard candy such as mints
Hot glue gun and glue sticks: Remember, young children and hot glue don’t mix, so make sure you do all the gluing!
1. Sort beads by color. (Red and green for Christmas? Yellow, red and green for Kwanzaa? Blue and white for Hanukkah?) Or any color the children wish…
2. Hot glue the beads onto the outside of the jar. When the glue is dried, pull off the leftover glue strings from the jar.
3. Unwrap candies and arrange the mints in each jar to make a “bed” for the tea lights. Fill it up as high as desired; make sure the top is relatively flat so that the candle can sit level. Experiment to get a look you like.
4. Dirctions say to take the tealight out of the metal and put it on top of the “bed” in each jar–(I would find a small candle container to catch the melted wax–as not to melt all over the candy. This way the jar can be used several times. Barb)
5. Finish off with a length of ribbon and tie it around the top of the jar… Alternately, stick some embellishments around the top of the jar to finish it off. Make sure that the end product doesn’t have anything hanging over the opening of the jar that could create a fire hazard
You can make bigger decorated jars out of industrial-sized condiment jars and pillar candles.
This idea is adapted from ParentsConnect Holiday Ideas. (Photo from same) …… Well I made my own (Dec. 2011)–but did it from memory without reading the directions! NOT the same at all! See below.
68. JARS COVERED WITH HARD CANDY
This project is written more as a ‘blog entry’ than a website idea–but I want to share my experience…
Going by memory on how to make the original craft –I made my ‘Holiday Jars’! I purchased lots of hard and round peppermint candy…got out the hot glue gun and began to glue ‘candy by candy’ on the OUTSIDE of the jar. The three jars used were much larger than the first image above…The gluing of all candy and filling in with tiny beads took 22 minutes for each jar-not bad! (TIP: be sure to have a small bowl or ice ready for hot glue on the finger tips–I only needed it twice-but was glad it was there!)
I then hot glued the ribbon around the top to finish off. I noticed that some of the candy felt a bit sticky-so sprayed the outside of jars and coated the candy with Krylon Acrylic Coating. Yes, it did take care of the stickiness.
AFTER all this was completed I read the original directions. Yikes! Only beads were glued on the outside of the jar… and the candy was put inside the jar! Ta-daa–I now have an original KidActivities.net craft idea.
As the images show, one jar will be used for a holiday vase and the other as a candle jar. A smaller candle jar/with candle was placed inside the other. Because the candy can be expensive–I would use smaller jars than the large saurkraut jars in this sample craft. The first idea at the top of the page– is however much easier.
69. POM POM HOLIDAY JAR
After reading the original directions… I didn’t have any large beads so improvised with pom-poms! Everything else was done according to directions with the candy layered INSIDE. Again, a glass votive candle holder was placed on top of the candy to catch wax dripping… Images by KidActivities.net
70. FUN ORNAMENTS… A few ideas! (Two foam, the bells and one felt)
1. FOAM: If you don’t sew—-use cookie cutters to cut shapes from Fun Foam. Press the cookie cutter into a sheet of Fun Foam. The cutters will leave an outline.
Cut along the lines, and decorate the shapes for the holidays with markers, paint, glued-on beads or glitter.
Punch a hole in the top of each ornament to accommodate a ribbon or cord hanger.
2. The sample crafts are a great Fund Raising Idea as well as ‘group craft making’ projects…These cute ornaments come from Kits at OrientalTrading.
As a ‘fund raiser’ they were made by staff and friends at Elmwood American House in Rochester, Mi. for their annual Family Thanksgiving party. They were sold at $1.00 each (the wreaths are $6.25 for 12 and bell kits are $7.25 a dozen–2011 kit prices)…
These can also be made without the kits… Example: Tiney bells are threaded onto pipe cleaners–shaped into a loop and then tied with ribbon Make templates for the others where children can trace, cut and glue the foam or felt!
71. MAKE STARS OR SNOWFLAKES…
Stars/Snowflakes are made by gluing two craft sticks together in a cross shape. Next, criss-cross two other craft sticks and glue in place. Stick stars may be left plain or decorated with glitter or pom poms. Last, loop and glue either ribbon or yarn to the back to hang.
72. HOLIDAY TREE
Tree is made by gluing 3 craft sticks together in the shape of a triangle. A couple inches of another craft stick is cut to make the tree trunk. Glue a loop or ribbon or yarn to make a hanger. Decorate the tree as desired with pom poms or glitter, etc. (Image by KidActivities.net)
Note: The sticks used for these projects were purchased pre-painted; however, sticks may be painted by children before project begins.
73. STAR OF DAVID ORNAMENT
(From KidActivities Hanukkah Theme page)
Materials:
6 Popsicle sticks for each star (Either colored sticks or painted)
Glue
Glitter (Optional)
Ribbon or yarn
1. Glue three sticks into a triangle shape. Glue the next three sticks into another triangle.
2. Glue the one triangle on top of the other triangle in opposite directions. This will give you the star shape.
3. Decorate star as desired. To hang- loop the ribbon or yarn at the top and attach with glue. (Image by KidActivities.net)
74. POPSTICLE STICK REINDEER
Materials:
3 popsicle sticks
2 google eyes
1 red pom pom
Glue
1. Glue 2 popsicle sticks together and make a ‘V’ shape.
2. About 1/3 or the way from the top, glue the third popsicle stick horizontally across the others.
3. Glue on googly eyes under the cross stick.
4. Glue the red pom pom at the bottom of the V-shape. (Photo from Reindeer Crafts–website no longer exists)
75. HAND MADE GIFT WRAP
Three Different ideas to create gift-wrap paper…
#1. Sponge-print holiday designs on brown wrapping paper.
#2. Decorate paper lunch bags with glitter-glue designs and holiday stickers. (Discount School Supply has nice big white bags)
#3. Rubber-stamp prints on butcher/roll paper, using washable ink pads in holiday colors.
Monica from The Homespun Heart states that her favorite gift wrap is brown craft paper and simple twine. This photograph is a creative way she’s embelishes plain brown paper. Some of the many items Monica incorporates into her wrapping are “… pages from old books, mini clothespins, magazine pictures, felt scraps, sticks from the yard, buttons, ribbon and sewing notion scraps.” When wrapping gifts with children, the wrapping procedure is an artistic endeavor in itself!
76. MAKE HOLIDAY NAPKIN RINGS (Cardboard and Yarn)
All that is needed is yarn, Cardboard toilet paper tubes, and a bit of strong glue.
1. Cut about 1 1/2 inches of cardboard circles off of the TP tubes. (Or the width you would like your finsished rings to be.
2. Tie a knot before beginning to wrap and glue this to the inside of the tube.
3. Wrap the tube -through the hole-around and around until it is completely covered with the yarn.
4. Make another knot and glue it in the tube to ensure that the yarn does not unravel.
Optional: Tie a piece of thin ribbon around the tube to complete the look. (Image by KidActivities.net)
Note: These napking rings can be made in any colors for any time of the year! If made over the course of time, they would be nice gifts for children to give to someone…
77. Make ‘YARN DOLL ORNAMENTS’
This doll was made in 1990, and still makes it to the tree each year! For directions visit the How to Make Yarn Dolls page…
78. HOLIDAY CINNAMON STICK BUNDLE
Put 3 cinnamon sticks in a plastic bag and add a couple drops of Cinnamon fragrance oil and shake together. Remove sticks; tie together in a bundle with raffia or ribbon to scent a room. (MAKES A NICE GIFT)
79. HOLIDAY TILES
Materials:
Approx. 6″x6″ tiles
Holiday paper napkins
Modge Podge (A water-based glue, finish and sealer)
Brush
Felt (Peel-off sticky back was used on sample)
Krylon type fixative finish (optional)
1. Brush modge podge generously on the tile. (The cocktail napkins and the tiles were the exact size as each other; no trimming was necessary)
2. Gently lay/apply the napkin over the tile. When napkin adheres to tile–carefully apply one or two more coats over the napkin covered tile.
To ensure longevity, Krylon spray was used over each tile.
3. Cut felt piece to fit. If ‘peel off’ is used–just peel and place on bottom of tile. If regular felt used–glue to bottom.
These can now be used as a decoration or coaster. (I tested the ‘completed tile’ by placing a hot cup of tea on it. There was no change in the finish)
80. MAKE HOLIDAY PUZZLES
Collect and save the front of old Christmas/Holiday cards. To make the puzzle– glue the card front onto card-stock.
With a black marker, draw several squiggle lines on the BACK SIDE of the card.
Cut the card following the lines.
Keep and mark the name of each puzzle in its own baggie.
81. MAKE A MAGNETIC HOLIDAY PUZZLE
This is KidActivities preferred method. Youth can keep the pieces in place as they put the puzzzle together. A magnetic board or a refrigerator work great for this!
Find a Christmas greeting card that is printed on stiff paper.
Take the front of the card and cut it into several puzzle pieces.
On the back of each piece, attach a small magnet or segment of magnetic strip.
The children can put them back together on anything that a magnet will stick to!!!
82. REINDEER ‘TREE BULB’ ORNAMENT…This ‘little guy’ has been around about 11 years and still makes it to the tree each year! You can use the photo as a guide to follow.
Glue on wiggle eyes and a pom-pom nose.
Cut a piece thin ribbon and tie it into a loop for hanging. Glue the loop to light bulb.
Form antlers out of a chenille/pipe cleaner stem–twist it around the top of the bulb or glue it to the light bulb. (Made by D. Biggs–image by KidActivities.net)
There you have it, 82 christmas craft ideas for kids.
Other pages you may be interested in…
