Just because it’s cold doesn’t mean you shouldn’t go outside and play some cool snow games!
After all, aren’t some of your fondest winter memories those of being outside playing in the snow?
Maybe it was having a snowball fight or building that incredible snow fort out of the plowed snowbank.
Snow gives us options! Options to play, build and create. Whether it’s a fun game of snow baseball or that artistic design made from food coloring in the snow, there’s always fun to be had.
Below you will find a collection of outdoor winter snow games and activities for kids. Not only are these ideas great for the classroom, but they will also work great on snow days!
These activities will keep kids having fun outdoors for hours. Just make sure they dress appropriately for the temperature.
Outdoor Snow Games
1. Footprint Tag
Play tag as you normally would, but stepping only in others’ footprints.
2. Snow Baseball
Directions
- Set up a baseball diamond with a mound of snow representing home plate and first, second and third bases.
- Place an empty water bottle on the top of each mound.
- The pitcher stands in the middle of the diamond and hurls snowballs first at home plate, then around the bases.
- Whoever knocks down the bottles with the fewest pitches wins.
Want to keep throwing? Check out these other throwing game options
3. Snow Golf
Take some time to smooth out a fairway and a green. Take an open can and plant it in the snow this is the hole.
For golf balls, use hockey pucks. For clubs, use hockey sticks or real golf clubs.
4. Powder-Puff Football
Directions
- All you need are two teams of three or more people to play, along with a spray bottle filled with a mix of water and food coloring to mark the playing field (a large rectangle with a centerline should suffice).
- The teams line up at opposite ends of the field (the North and South poles) for a kickoff.
- Once someone on the receiving team catches the ball, he tries to move it back across the defense’s goal line by running with it or passing it to a teammate.
- Play stops if the person with the ball is tagged by an opponent or slides out of bounds.
- The teams then face off again on the spot. After four tries or a touchdown, the ball goes to the other team.
- The game ends when either team gets cold.
Source:familyfun.go.com
5. Find the Snow Flag
This is a great game to play on the playground. Tie a white cloth to the end of a short stick.
Give each child a chance to hide it by staking it anywhere within an area with boundaries.
Note how long it takes for the rest of the group to find it. Whoever hid the flag with the group that took the longest time to find it wins the game!
6. Jump Snow Hurdles
Lightly pack a lot of basketball-sized snowballs and then use them to build a course of hurdles to jump over in a round of ‘Follow the Leader’.
7. Rope Snow Tug
Have you ever tried TUG OF WAR in the snow?! Fun!!!
Directions
- Team up for a slip-sliding variation of tug-of-war.
- Tamp down a wide, shallow trench in the snow to serve as the midline. Then, take up positions at the ends of a long, thick rope and let the tugging and towing begin.
- Whichever team pulls the entire opposing group over to its side of the trench wins.
WE have a winter Olympics and this is one of the things we do! Frodo/Colorado
As Frodo mentions above. Have an Olympics day with many of the activities on KidActivities. Snow hurdles, Tug of War, Relay races, etc.
8. Hula Hoop Challenge
Have you ever tried using ‘Hula Hoops’ all bundled up in winter clothing? Have a contest to see who can last the longest!
9. Freeze Tag
What fun in the winter-time! Play this just as you would indoors and any other time of the year.
The person who is ‘It’ tags someone; that person stays frozen until another player tags him/her again to ‘unfreeze’ them.
10. Snowball Target Practice
In the winter kids (and adults) like to throw snowballs. PLACE A SNOWBALL TARGET in a conspicuous place where it’s fine to throw snowballs.
Make sure rules are established so no one gets hurt. It’s a great source of exercise for all kids, even those that are not athletically inclined.
( This is also a good way to get the snowballs directed a ‘safe’ spots and not at other kids! )
No snow? Roll up those ‘saved” pieces of white paper and pretend they’re snowballs!
Similar to the above – HIT THE TARGET
Make a target by creating a bright circle in the snow with colored water in a squirt bottle.
11. Snowball Strike Out Game
Good for older kids! First mound up snow to create three bases and a pitcher’s mound the three mound piles should each be about 2 feet high and 20 feet apart.
Next, build a tin can pyramid on each base. The challenge is to knock down the stacks in order from first to third base by throwing snowballs from the pitcher’s mound.
The child who succeeds with the fewest pitches wins.
12. Snowman Hat Trick
Build a plump, snowman in the yard/play-field. Make a game of taking turns trying to land a hat on his head by throwing it like a frisbee from 10 or so feet away.
Love frisbee? Check out these frisbee ideas.
13. Get On a Roll
Pair up for a contest in which the object is to finish with the biggest snowball. The contest ends when the teams can no longer roll their entries or when you run out of snow.
Freeze colored water in ice cube trays. Hide them outdoors for a wintertime SCAVENGER HUNT.
14. Snow-Boot Two Step
Materials:
✓ Snow boots
✓ Winter clothes
Directions
- This tough-to-master version of follower the leader requires 2 or more players. The leader makes a path in freshly fallen snow.
- His or her teammates must try to step in exactly the same spots.
- The object of the game is to make it seem as if only one person has taken a walk through the snow.
- Can you pull it off? It takes balance and agility! Be sure to bundle up to stay warm and dry.
Source: creativekidsathome.com
15. Winter Tag
✓ 5 or more players
✓ Ages 5 and up
✓ Played outdoors in the winter
Players prepare the course for the game, consisting of a maze of parts in the snow over a field or ice. The parts should be wide enough for one person to run on, about one meter wide.
What follows is a simple game of tag played in lanes in the snow. Players must stay on the paths always, but the person who is ‘it’ may jump from path to path in pursuit of his opponents.
This imaginative modification of tag in the winter could lead players to invent their own unique games for the winter season. Source: Thunder Bay Multicultural Association
Outdoor Winter and Snow Activity Ideas
16. Snow Molds
Just like sand, snow is wet and dense and can be formed into shapes. When you go outside take out the sandbox toys, buckets, containers, and molds. Create a snow castle ( instead of sandcastle ) – Create and have fun!
18. Build a Large Snow Worm
Great for kids-no lifting heavy snow!
Materials:
✓ Food coloring
✓ Snow
✓ Sticks
✓ Fruit or vegetables ( oranges, carrot )
Directions
- Make several large snowballs. ( One bigger than the rest for the head. )
- Use the fruit or vegetables to make eyes and a nose. Like you would with a regular snowman.
- Mix the food coloring in with some water and fill up a spray bottle to spray your worm with whatever color you want. ( or not ) A fun winter “Earth Activity“!
18. Jell-0 in the Snow
Make Jell-O according to directions on the package. Pour into clean baby food jars-one for each child. Place containers in a large tub and fill the tub with snow. When Jell-O is set – enjoy!
OR, MAKE IGLOO BLOCKS ( OUTSIDE POPSICLE STICKS ) A fun activity during winter. Have children pick their favorite drink (fruit punch, apple juice, etc) and then pour this into an ice cube tray.
Have kids write their name on a popsicle stick and place it in the tray. Put this outside and let it freeze ( if it is not cold enough you can put it in the freezer ) The children then have an igloo block for a snack.
19. Create a Bird Seed Snow Angel
This angel is easiest made together. One partner lies down to make a snow angel while the other partner stands by to help the maker get up without messing up the imprint.
After the imprint is formed, pour cups of birdseed into the angel, filling the head and body with bands of variously colored seed. For a finishing touch, add pine boughs for the angel’s spreading wings.
Extension Science Idea:
Watch this spot daily and record your observations in a journal. The journal can be made with paper and a construction paper cover.
At the same time every day, write down what the weather is like, including temperature, how the sky looks if it is snowy or sunny and what animals you see, and how they look to you. Are they feeding? This can be a fun spectator activity!
20. Snowman Building Race
Directions:
- Pick 2 teams. The 2 teams make a snowman bottom.
- Someone yells GO!
- The 2 teams start to finish the rest of the snowman – The body, hat, nose, etc.
21. Ice Man
Fill three balloons with water ( one big, one medium, and one small ). Let freeze overnight.
Peel the balloon off and stack the balls ( use salt between to help them melt and stick together. ) Have kids clothe him, put a carrot nose, stick arms, etc.
22. Snow Treasure Hunt
Hide a chest full of ‘fun’ in the snow, then watch kids track it down clue by clue.
Materials:
✓ Cooler
✓ Treats
✓ Magazines (optional)
✓ Paper
✓ Markers
✓ Plastic bags
Directions
- Pack a cooler full of treats and then hide the “treasure chest.”
- Create a series of clues leading to the chest. Use pictures from magazines or create your own with markers and paper.
- Place each clue in a plastic bag and hide it in the snow.
- Begin the hunt by handing the players their first clue.
VARIATIONS:
For more sophisticated players, give them their clues in riddles or use rebuses.
TIPS:
Look around the yard for a good clue hiding places and plot them on paper. Then create the picture clues for each spot and hide them in order (keep the master list just in case a clue gets lost).
23. Freeze Bubbles

Tips:
This is a good science lesson.
- When the temperature dips below the freezing point, many changes occur in our environment: water turns to ice, and rain turns to snow. The bubble activity demonstrates this.
- It’s a good idea to first chill the containers of bubble solution in the refrigerator; outside it has to be below freezing temp.
- Have children observe the bubbles closely as they blow. They will notice ice crystals forming on the surface of the bubbles.
- What happens when the bubbles pop? They shatter.
- If the outside weather is below 32 degrees, you can make bubbles outdoors. Blow a bubble and catch it on the wand. Wait and watch as it freezes. It will turn into a crystal ball and then shatter like glass; you’ll see ice crystals form. You’ll also notice the vibrant colors!
24. Snow Squirt Art
Give children squirt bottles filled with colored water and let them color the snow. Consider also using dish detergent bottles, filled with water and food coloring; they work more easily with mittens on.
( Having done this with children, using small squirt bottles is difficult for kids to press. If using ‘squirt’ bottles – use those with larger nozzles )
TIP: Get a supply of old-used mittens as to not soil children’s’ gloves. Image of ‘Colored Snow AND Winter Bubbles’ by KidActivities
25. Self Portrait in the Snow
Create a snowy self-portrait that doubles as a tasty treat for animals who might stop by to admire and sample your work.
Materials:
✓ Birdseed (such as sunflower seeds and cracked corn)
✓ Fruits and vegetables (like apples, kale, and carrots)
✓ Food coloring
✓ Pump bottles
Directions
- Start by prepping your art materials; fill the pump bottles with different hues of food-color-tinted water and cut up various fruits and vegetables. Then take the materials outside.
- Next, start your masterpiece by lying back in the snow to make a body print. Gently rock your body to pack the print, then carefully get up (you may need a friend’s help).
- Create a portrait by filling in the shape with the seeds and vegetable pieces and adding details with the colored water.
Tips:
Younger kids may find it easier to work with fewer materials and to use cups or small pitchers (instead of their hands) to pour lines of seed.
Remember to have the artists sign their initials somewhere, too! Source: familyfun.go.com
26. Ice Block Designs
Younger children can observe how salt melts ice while creating colorful designs in large blocks of ice.
Need: Large blocks of ice, Coarse salt, Food coloring, Eye droppers This is science, art, and outside winter play!
- Freeze water in empty one-gallon milk containers. Remove the cardboard when water is frozen.
- Place ice blocks on trays covered with several layers of newspaper.
- Sprinkle coarse salt on top of the ice blocks.
- Drip various colors of food coloring on top of the ice block–tunnels of color are created as the salt melts through the ice block.
- Put the colorful ice blocks outside. If cold enough- they should stay frozen for several days.
- Children can continue to examine the melting process during outdoor play. If possible-(and if they are interested) give kids their own block of ice.
- If you have a large group do this activity over a few days. Children will enjoy watching the changes that occur as the blocks melt away!(Image by KidActivities.net)
NOTE: When salt goes over the side of the ice block-it will quickly melt grooves into the sides. The color will travel down the grooves. KA placed the ice block in a tin pie pan with lots of paper to soak up excess colored water. The ice stayed solid ( outdoors ) for about a week. ( It melted when we had a freakish 65 degree Michigan winter day in January! )
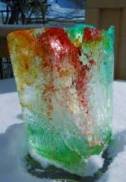
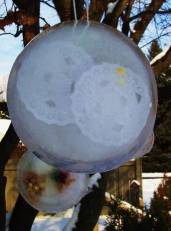
27. Winter Sun Catcher
( For Preschool and up )
Materials:
✓ Ribbon or yarn ( at least 12 inches long )
✓ Water
✓ Aluminum pie plate, or metal dish
✓ Food coloring or crayon shavings
✓ Flower petals, berries, leaves, or other materials
Directions
- Make a loop with the ribbon and place it in the pie plate. Leave at least 5 inches of the looped end hanging over the edge. Fill the plate with water.
- If you’d like your sun catcher to be colored, add a few drops of food coloring to the water and mix it around.
- Add the crayon shavings, berries, or other materials for your suncatcher to the water.
- Let the materials fall into place, or arrange them in a design. (Keep in mind that the materials may move around on their own.)
- Put the plate in the freezer, or if it’s cold enough, leave it outside to freeze.
- Let the plate sit for at least one day. If it’s outside, you may need to let it sit longer.
- When the water is completely frozen, carefully remove the ice from the tin. (Mine popped out easily)
Hang the suncatcher outside from a tree or windowsill for friends and neighbors to admire.
You can also try using cupcake tins and shorter ribbon ( 6 inches )to make several small sun catchers.
Note: I made the above samples as an example. The one with berries is made without ‘food coloring or crayon shavings’. Next time I would add the color and spread out the materials. The other image is made the same way but with ‘paper snowflakes’ placed in it. Barb
28. Viewing Snowflakes
Materials:
✓ Viewing platform: black velvet, dark cloth, or black construction paper
✓ Magnifying glass
Directions
- Snowflakes are delicate creatures and their fine crystalline shape can vanish at a touch of warmth.
- You’ll need to freeze your viewing surface (keep it in the fridge or outside in a cold dry area).
- If the snow is falling, just hold your platform aloft to catch a few flakes and view with your magnifying glass.
- You may need to wear a scarf over the mouth and nose to avoid melting the flakes with a warm breath.
29. Catching Snowflakes
Place a black sheet of paper into a freezer until cold. Take outdoors and use a magnifying glass to view snowflakes that land on the paper.
30. Make Icecycles
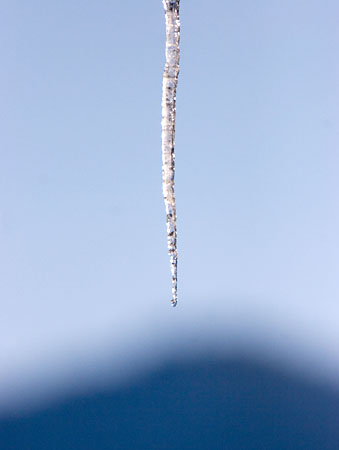
Puncture a VERY SMALL hole into a hanging container, fill it with water and then leave it slowly dripping over-night. The next day you should have your own icicle.
31. Have a Winter Picnic
Consider this for one of those all-day or half-day programs.
- You need a clear winter day.
- Children provide packed lunches – a hot one if they have an insulated bag. The program can provide warm drinks in thermoses.
- Pre-choose your picnic site. Be sure to bring a blanket to sit on!
- When you arrive, first play a warming game like leapfrog, have your warm lunches, followed by playing more active games! This would be a great time to play relay and planned games!
Weather not cooperating on the planned day? Do the same but inside!!!
DON’T FORGET ABOUT
• Looking for animal footprints.
• Making snow angels.
• Older kids puling the younger on sleds.
• Taking thermoses of hot chocolate outside.
• Wintertime nature scavenger hunt.
• Build houses, igloos, and forts.
• Don’t just make snowmen-Make snow-women, animals, animals, and superheroes!
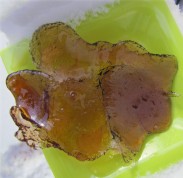
32. Maple Syrup Snow Candy
Ingredients:
✓ 2 cups of brown sugar
✓ 3 tablespoons butter
✓ 1/2 cup water.
Directions
- Bring water with other ingredients to a rolling boil. ( Boil for about 10 minutes )
- Have children make a smooth place in clean snow – pour the snow candy on it. You can pour in any desired design or pictures.
- Don’t touch until it has cooled.
IF THE SNOW ON THE GROUND BOTHERS YOU – scoop up some clean snow and place it in a bowl or dish – you can also take the snow inside and make your candy there!
Outdoor Winter Animal Activity Ideas
33. A Tree for the Animals
Decorate a tree for the animals in the woods or around your home or program property.
Use fruit, vegetables, nuts and peanut butter on pinecones so the animals will have food to eat when while it’s cold. Don’t forget, this is a great time to teach kids about hibernating.
34. Winter Necklace and Animal Feeder
Materials:
✓ Large needle
✓ String or fishing line
✓ Popped corn
✓ Dried fruit; raisins, cranberries, apple and apricot
✓ Pieces of orange peel (optional )
Directions
Measure the length of the line that you need to fit the necklace over a child’s head. Don’t forget to leave enough for tying off.
Thread the needle and string the popcorn and other items alternately.
Children can wear their necklace for a while and then hang the necklace onto a tree or shrub for the local wildlife.
Tip: The orange peel adds a very pleasant scent. Put a bit of all-natural peanut butter on the necklace before placing it outside. The oils and protein are great for the birds!
35. Outdoor Creature Popcorn Wreath
Materials:
✓ Cardboard wreaths
✓ Peanut butter
✓ Birdseed
✓ Popcorn
Directions
- Cut wreath shapes out of cardboard.
- Give each child a wreath and a plastic knife to spread peanut butter over the wreath shape.
- Put birdseed over the peanut butter covered wreath. Use spots of peanut butter to “glue” pieces of popcorn onto the wreath in a bow shape.
- Hang the wreaths outside where they will be seen – good for birds and other outdoor creatures.
36. Feeder

Materials:
✓ Lard
✓ String
✓ Pinecone
✓ Birdseed
Directions
- Tie a piece of string around the widest part of the cone.
- Mix the lard and seed together, then press the mixture into the branches of the cone.
- Use the string to tie the cone up in a tree or bush for the birds to enjoy.
37. Feed and Observe Winter Birds
Materials:
✓ An empty plastic milk, water bottle, or a milk carton
✓ Scissors
✓ String
✓ Birdseed
Directions
- Wash the bottle or carton and rinse it well.
- Cut several small (2-3″) holes in the sides, about 2″ from the bottom.
- Cut or poke two small holes near the top and thread a long piece of string through them.
- Fill the bird feeder with seeds and hang from a tree or shrub. Scattering some seeds on the ground can help the birds find the feeder.
- Watch the birds. Be patient. Try different types of seeds and different locations. Record your observations.
There are 17 DIY Bird Feeder Ideas in the Bird Theme!
38. Glow stick fun
Not really a game, but when the sun goes down, you can get some colorful glow sticks and play in the snow, the white of the snow and the colors is a very fun activity to do with kids.
Conclusion
We hope you have enjoyed these 38 outdoor snow games and activities. We tried to include a little bit of everything.
There were outdoor game ideas, snow activities, and even science projects.
Now it’s time to get outside and play in that beautiful white stuff we call snow!
More Winter Ideas
- Hot Cocoa Recipes and Fun
- Winter Inside Games
- Snowman Themed Games.
- Snowman Themed Arts and Crafts
- Miscellaneous Snowman Ideas
- Snowman Themed Snacks
- Reindeer Theme
- Snowflake Theme
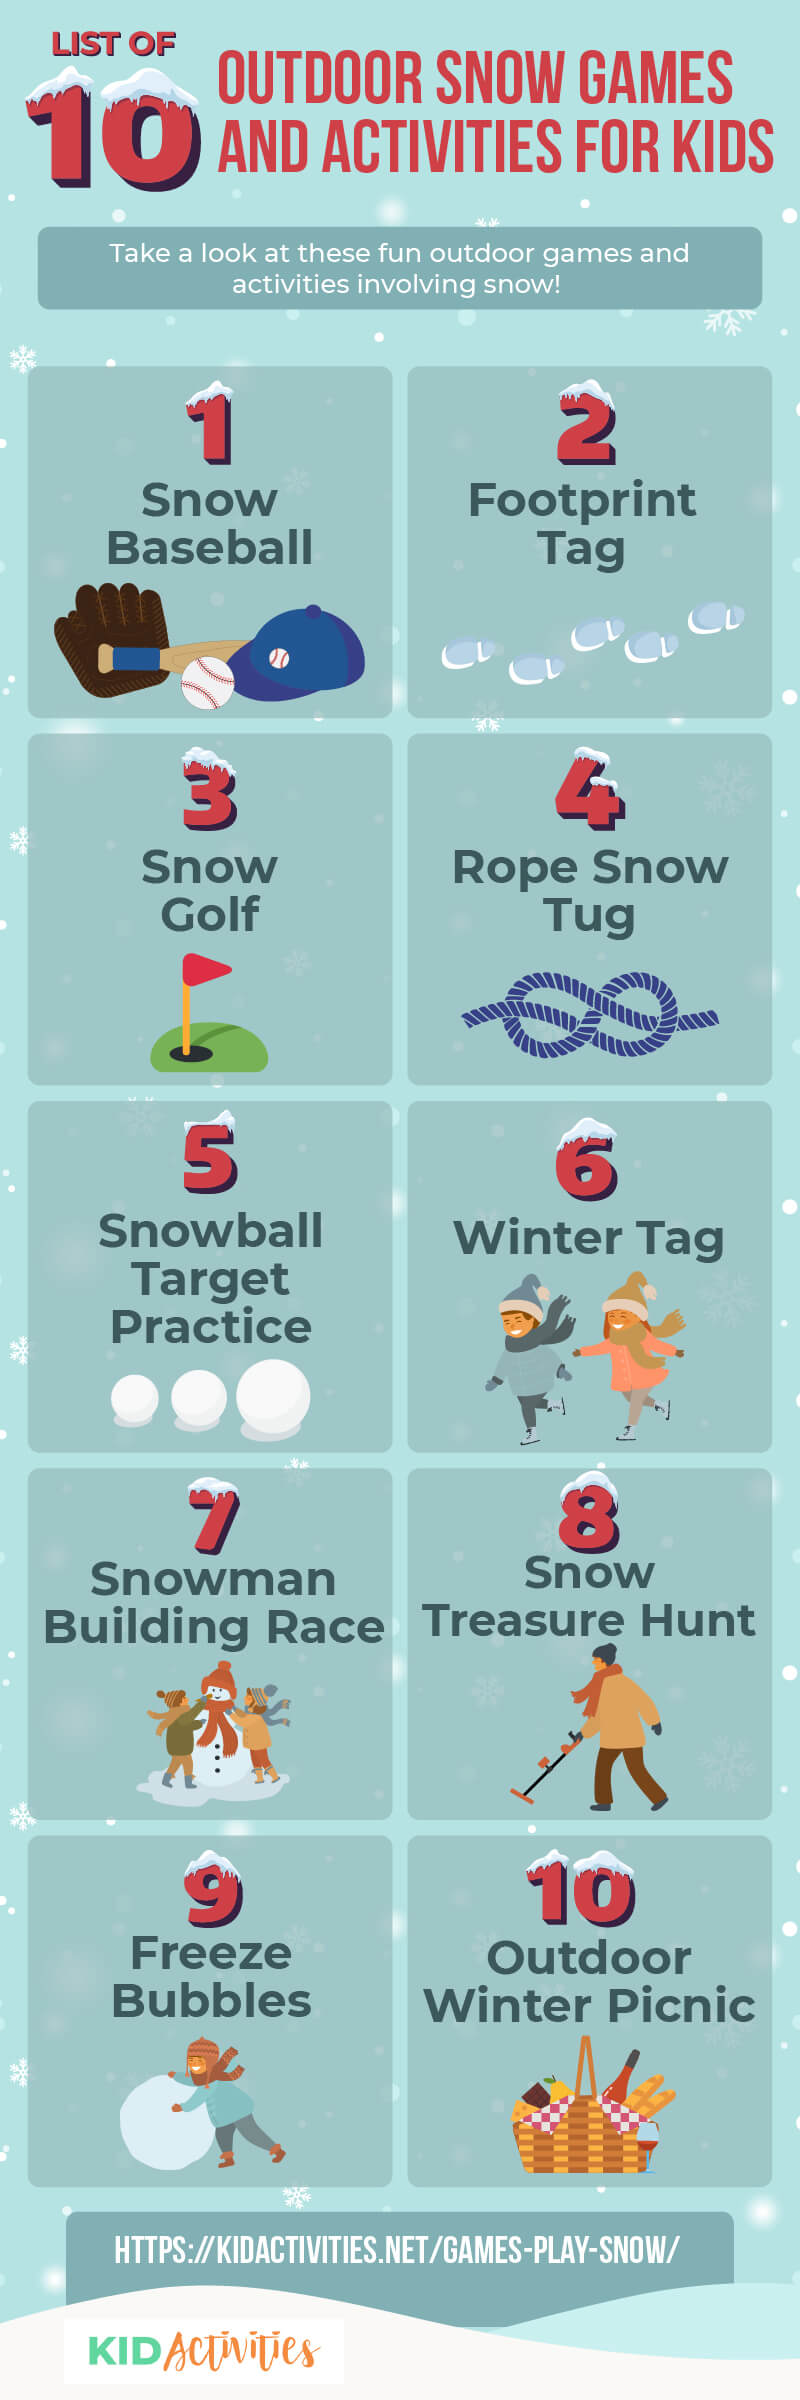
Infographic about games to play in snow