
Recycling Projects for Kids
Teach kids the importance of reusing with these 61 recycling projects for kids. Help them make the connection by turning trash to treasure.
Do you have a recycling project in the works?
If so– you’ll end up with large quantities of bottles, cans, paper, and cardboard. Before you have it collected by a recycling company, challenge your kids to build with it!
Do you have a theme going? If so can they make something to go with the theme? Could they build Egyptian pyramids? A scene from a book being read? A mosaic map of your state made from bottle caps?
One group of fourth graders centered on a social studies curriculum focused on Ancient Greece. To go with the theme, they built an 8’x4’x4′ Parthenon out of bottles and cardboard recyclables! When ideas and learning become physical through hands-on building, kids have fun and concepts are more deeply understood and connected.
MAKE GAMES
(Craft ideas are below games)
1. FIVE PIN SOCCER
Required: Gripper Soccer Ball, Volleyball or rubber ball
Players: Small to large groups
A fun, all-involved game that builds soccer skills. Place teams at opposite ends of a gym or field.
- Place FIVE 2-LITER PLASTIC SODA BOTTLES (This is the re-cycled part)in the center of the field. A little gravel in the bottle helps it to stand up and creates more noise and excitement when hit.
- At the start signal, players kick balls from behind their line trying to knock down a pin.
- The player who knocks down a pin must run out and set the pin back up.
- Score 1 point for each pin knocked down. First to get five wins.
You can adjust the game for age level—by placing more skilled players farther from the pins.
It can also be played with four teams arranged in a square around the pins.
2. MAKE RING AND TOSS GAMES!
For a COIN TOSS, you have children toss pennies at a large coffee can, a muffin tin, or even an empty egg carton, depending on their age and skill level.
Making a RING TOSS game is also simple. First, shape rings from aluminum foil. (… this is an excellent way to recycle clean foil! ) Next, turn a chair upside down so that the legs make suitable targets. (You can also throw the rings on pop bottles.)For added challenge, designate specific points for the furthest chair legs.
3. MAKE A GIANT BOARD GAME
Rug samples can be put together and used outside for a giant game board for checkers! Collect large bottle lids–paint and use them as the game pieces!
4. WRAPPING PAPER MATCH GAME
(for Pre-K and K)
Materials: Clear contact paper, used wrapping paper with many designs of small and a variety of pictures on it, scissors, cardboard or tag board
- Cut out a piece of the wrapping paper to make the game board. Glue it to the cardboard/tag board a then cover it with clear contact paper.
- Next, cut out objects from another sheet of the SAME wrapping paper. Cover these with contact paper, too.
- Children then match the cut-out pieces to the designs on the game board; they put the cut-out on the board when they find a match.
- Tip: Laminating the board and pieces will give you a game that lasts quite awhile.
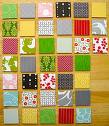
 5. MEMORY GAME
 5. MEMORY GAME
You can also make a memory game much the same way as the sample shown. Use spray adhesive to glue wall paper or fabric onto cardstock. Make two of each pattern and play the traditional Memory Game!
6. RECYCLED TOWER RELAY GAME (This one is fun!)
Form as many teams as needed.
Kids on each team take turns running to the recycled storage area and take a variety of materials such as plastic containers and boxes. Each team works together and builds the tallest towers possible!
7. Idea: OLD SOCKS
Turn mate-less socks into BEAN BAGS (cut one at the ankle, fill with beans, then sew or glue it closed).
8. LEFT OVER BALLOONS??? PLAY BALLOON BADMITTEN
Make paddles simply taping tongue depressor sticks to the back of paper plates. Use the paper plate ‘paddles’ to keep a blown up ballon up in the air–This game can be played in a gym or outdoors— played individually or in a group! It’s also a great way to repurpose paper plates and balloons! Images by KidActivites.net
OR…
An idea inspired by World Pre-School Mom is to use fly swatters (Dollar Store – 2 for $1.00) Children simply hit the balloon back and forth to each other!
_________
9. TRASH TO TREASURE CROQUET:
This is an easy and different game…
You’ll need croquet mallets and balls, but not the standard wire wickets. Instead, look for household items and recyclables that a croquet ball could pass under or through, such as:
- An oatmeal container with the top and bottom removed
- A cereal box with a hole cut on each side to make a tunnel
- A child’s plastic chair
- A laundry detergent bottle with an arch cut from the bottom.
- Set up a course that circles the yard. Use at least a dozen creative wickets, including one brave adult with his or her feet spread wide.
10. BUILD AN INDOOR MINIATURE GOLF COURSE
Need: Golf clubs (or sponge and yardstick), golf ball or rubber ball, masking tape, glue, scissors, markers, shoe box. cardboard, Coffee can.
- Use your own clubs, or use masking tape to adhere a new sponge to a yardstick
- Build your course (see ideas below) using the coffee can for the final hole.
- Take turns playing your way through your course.
- Save your obstacles for the next rainy/snowy day.
11. IDEAS FOR GOLF COURSE
- For a tunnel, cut out the bottom of an empty oatmeal box, and place the box on its side.
- To make a house, turn a shoe box upside down and cut out an entrance from one end, and the exit from the other end.
- Fold a piece of cardboard in half and set it up like a tent for the ball to go through.
- Place two or three Frisbees on the floor to form a curved fairway for the ball to go through.
- Make a ramp by scoring (run one point of the scissors in a straight line without cutting all the way through) a piece of cardboard twice. Bend slightly at each score mark to create a upside, flat, and downside to your ramp. Put some books under the center section for support.
- For a straight fairway, use two rows of building blocks.
- Make a sand trap from a hula hoop.
- For a pipe use paper and tape it.
- Put a chair or stool in the center of the room for the ball to go under.
Source: creativekidsathome.com
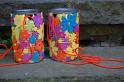
 12. JUICE CAN STILTS
 12. JUICE CAN STILTS
An adult needs to punch the holes in the cans and cut the rope.
2 large unopened juice cans (about 24 oz.)
Hand bottle/can opener (with the triangular end)
2 long pieces of rope
Heavy duty scissors to cut the rope
Various colors of electrical tape or various colors of paint and paint brush
- Use the bottle/can opener to punch 2 holes in either side of one can towards the top.
- Repeat with other juice can.
- Let the juice drain out of the cans (save it in a pitcher, container, etc.). Rinse out the cans with water and allow them to air dry.
- Cut 2 pieces of rope long enough to go through the holes in the can and up to child’s hands to hold on to.
- Thread each piece of rope through the holes in the cans.
- Tie the two ends of each piece of rope together. You should have a loop of rope going through each can that is long enough so your child can hold on the the rope as handles.
- Use the scissors to cut the different colors of electrical tape and decorate the cans. You can also use the paint to decorate them.
- These stilts were made by Suzanne brown. She painted the tops and covered the plain cans with stickers!
13. COFFEE CAN STILTS
- Using two 1-pound coffee cans, turn each can upside down so that the plastic lid is on the bottom.
- Using a screwdriver, poke two holes, one on each side of the can.
- Using rope or several strands of yarn braided or twisted together— thread through holes in cans; tie it off inside the can.
- Cans can be decorated if you like.
14. HOW TO MAKE A MANCALA BOARD GAME
(Kids really like this game! It looks long-but it is NOT complicated)
Mancala is a game that has been around for centuries. Forms of this game were played in ancient Africa and Asia. There are many different names, boards and rules of play for Mancala. . . but most are played on wooden boards with beads, stones or glass game pieces. Children in Africa would play by scooping holes in the dirt to create a game board.
- This version is one that you make with a Styrofoam egg carton, two applesauce (or pudding cups) and dried beans. Of course, you can use anything for game pieces, beads, pennies, or anything small and easy to scoop!
- You will need 48 dried beans to start the game – 4 in each cup. Two people play at a time.
Set up:
Place the board between the two players so that the long sides face the players- and the two applesauce cups (Mancala cups) are on the right and left. You will have six cups of beans facing each player. Place 4 beans in each cup. Each player has a Mancala cup – which is the applesauce cup on their LEFT. This cup is where they put the beans they collect.
Object of the game:
Each player takes a turn and tries to collect as many beans as possible in their Mancala cup before the other player clears their side of the board.
How to play:
One player starts. In his or her turn, they pick up all of the beans from one cup on their side of the board- Then – going clockwise- they place one bean at a time in each cup- including their Mancala (collection cup) until they run out of beans.
EXAMPLE:
- If you go first and pick up all the beans in the cup on the far left- you would drop one bean in your Mancala (collection) cup and one bean each in the cups on the other side of the board.
- You must put one bean in each and every cup you pass over- EXCEPT for the opponent’s Mancala cup. You just skip that cup.
- If the last bean a player has drops into their Mancala cup, they get to go again! (Strategy here would tell you to start with the fourth cup from the left. . . which would let you drop your last bean into your Mancala. . . then you get another turn.
Also- in this version of the game, if you drop the last bean into a cup that already contains beans— you pick up all the beans in that cup and keep going. Your turn ends when you place the last bean into an empty cup! Then, it’s the other players turn.
The game ends when one player has no more beans left in the cups on their side of the board. The player with the most beans in their Mancala cup wins!
 15. HOW TO MAKE JIGSAW PUZZLES
 15. HOW TO MAKE JIGSAW PUZZLES
- Give each child a piece of cardboard, scissors, and glue.
- Have them choose a picture from a magazine, calender or card; the children then glue their pictures onto cardboard. (The sample to the right is a picture drawn and painted by a child on heavy cardstock.)
- When the glue is dry, have kids draw puzzle shapes on the back of the cards. Next cut the cardboard into the shape of jigsaw puzzle pieces.
- When kids have finished, have them trade puzzles and have a race to see who finishes first.
TIP: Keep all puzzles in individual marked plastic baggies.
16. CEREAL BOX PUZZLES
Need empty cereal boxes and scissors.
Cut the fronts of large cereal boxes into pieces; base the number and shapes of the pieces to the age of the children. Store the pices in a baggie or large envelope with a picture of an identical cereal box front attached to it.
Recycled Craft Ideas for Kids
17. BERRY BASKETS…
Use them as weaving boards for yarn, grass, or strips of paper; cover them with construction paper for buildings; add a string handle for a carry-along treasure basket. You can also print with them by painting the bottoms and pressing them onto paper.
18. CRAFT SCRAPS
Scoop those leftover sequins, pieces of felt and pipe cleaners into zip-top bags and containers. When it’s full, challenge kids to use the contents of your “RAINY DAY GRAB BAG” to make something new, such as a collage or free-form sculpture. Larger pieces of unwanted artwork can be cut into strips or squares and used to make collage cards or decorate a back-to-school book holder or pencil pot. Betsy/Maine
 Easy Jar Craft Ideas for Kids
 Easy Jar Craft Ideas for Kids
19. MASON JAR VOTIVE CANDLES
Materials:
Baby food jars or jam jars
Scraps of tissue paper
Diluted paste or glue
Votive candles
Clean the jars well and let dry. You can use small jars…but check the size of the votive candle to make sure it will fit.
- Have the children brush glue onto the jar and place different colors of tissue paper over the glue, overlapping so the entire jar is covered on the outside. When brushing the tissue with glue be sure to do so gently so it doesn’t tear. If it tear, remove or leave wrinkled.
The glue will appear to be white but will dry clear and when a candle is lit inside will give off a pretty color and design.
Great for gift time!
♥ Mother’s Day: Use Mom’s favorite colors
♥ Christmas: Use red and green
♥ Valentine’s Day: Use pink & red and so forth…
20. Baby Food Jar Candles
Materials: Clean baby food jars, scraps of ribbons, seasonal stickers, votive candle
Have children wrap a strip of ribbon around the rim of a jar. Decoarte with the stickers and insert the candle! It’s that easy!
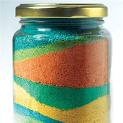
 21. How to Make Sand Art in a Jar
 21. How to Make Sand Art in a Jar
Need: Baby food jars or other jars, colored sand or sand and tempera paint
If not using purchased colored sand, compine the sand with the dry tmepera paint. Make a variety of colors. Salt also works for white.
Layer the different colors of sand into the jar. (Using small funnels to put the sand into the jars keep areas neat.) You can also use a straw or kabob stick to ‘poke’ through desired layers of sand to make designs.
 22. Decorate Baby Food Jars Into Animals
 22. Decorate Baby Food Jars Into Animals
Try this craft from Making Friends It can be adaptd to just about any animal or holday theme!
- Remove the label from a clean baby food jar. Remove label. Fill the jar with pompoms to match your animal’s face. Put the lid on and turn it upside down.
- Glue on wiggle eyes.
- Cut ears (or beak) out of foam and glue in place.
- Add pompoms if desired.
- For whiskers, cut pieces of craft lace and glue one end under pompom nose.
- Cut a strip of craft foam 1/4″ wide and glue around edge of lid. Original idea from Lisa Anniston, Alabama
23. How to Make Sewing Kit in Jar
Cover the jar lid with material, felt or paper; decorate the lid with ribbon and/or flowers. In the jar place safety pins, thread, needles, straight pins and other sewing notions. This makes a nice gift!
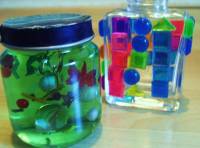
 24. How to Make a Star Jar
 24. How to Make a Star Jar
Start by placing 2 Tablespoons of Hair Gel in the jar. (Dippity Do is the brand used in this sample) Carefully place beads, sequins, etc. throughout the gel. Keep repeating with gel and objects until the jar is full. Cover tightly. (This sample was made about 15 years ago!) The thickness of the gel keeps anything that is placed in it from moving around! Complete by covering the lid of the jar with material and ribbon along the lid edge.
This idea can also be adapted to seasonal themes. Example–For Halloween one would place small items such as a plastic spider, pumpkin, orange and black sequins and beads!
Like the bottle to the right? Also a simple idea! Just hot-glue flat gems from a craft store onto a bottle or jar… (image by KidActivities.net)
SEE ‘REINDEER FOOD JAR’ IN THE CHRISTMAS CRAFT CATEGORY
25. How to Make Candles in a Jar
- Save the stubs of candles. When you have several saved, melt them together in a double boiler.
- Color the wax by adding bits of crayon to the mixture.
- Pour the wax into glass jelly or mason jars– or metal cans.
- Use cotton yarn for wicks, or you can purchase a roll of wick at a craft store.
- Decorate the outside of the candle holder with acrylic paints.
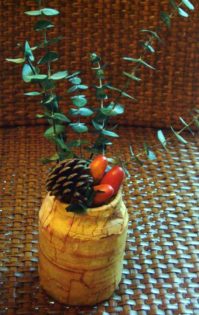
 26. FAUX ‘LEATHER-LOOK’ JAR VASE
 26. FAUX ‘LEATHER-LOOK’ JAR VASE
Cover a jar with many pieces of radomly cut masking tape. When the jar is covered, wipe shoe polish paste all over the tape. Wipe on and wipe off until you have an effect that you like.
If budget allows and this is a gift from the children to ____, place a few sprigs of eucalyptus leaves in the completed vase! These last forever. This sample was made about 20 years ago! (Image by KidActivities.net)
27. LAYERED PASTA JARS
Collect an assortment of jars. Have children fill the jars in layers with a variety of shapes and colors of pasta. The jars make pretty decorations for kitchens, etc. Nice to give as a gift…
 28. DIY Potpourri in a Jar (Homemade Air-Freshners
 28. DIY Potpourri in a Jar (Homemade Air-Freshners
Materials:
Potpourri
Clean Baby Food Jar (no top needed)
5″ Paper Doily
Rubber Band
Lace
Ribbon Rose
Low Temp Glue Gun
Instructions:
- Fill jar with potpourri.
- Cover with a paper doily or tulle.
- Secure with rubber band.
- Tie a ribbon around the jar to hide the rubber band.
- Optional: Hot glue ribbon rose to area.
29. PAINTED GLASS VASE
Recycle a jar into a pretty gift vase or pencil holder…
Materials:
Clean, empty jar
Acrylic or liquid tempera paints
Paintbrushes or cotton swabs
White glue
Clear glaze (available at craft stores)
- To make the paints stick to the glass, first mix the colors with some glue. Keep the paint thick so it won’t run.
- Use brushes or cotton swabs to paint a design on the jar.
- To erase a mistake, use a paper towel to wipe off the paint before it hardens.
- LET THE PAINT DRY, then seal the finished design with a coat of glaze.
30. Homemade Rain Stick for Kids
(Heavy-duty)
1. Hammer nails into Heavy cardboard mailing tubes 1/8″ apart, using the spiral seam of the cardboard.
2. Add several handfuls of assorted filler material (rice, beans, etc)
3. Seal each end of the tube securely with tape.
4. Decorate your stick with raffia, ribbon, adhesive-backed shelf paper, wrapping paper or a jungle print or decorations.
31. Preschool Rain Stick Craft Idea
Materials: Paper Towel Roll, Tape that can be painted, Paint, Glue, Uncooked Rice, Toothpicks…
- Pre-poke holes into the side of the paper towel rolls.
- Have children poke toothpicks through the holes and glue each end of the tooth pick.
- Next- tape one end of the roll closed.
- Add rice and tape the other end.
- Children can paint their sticks as they choose.
- Last, cut off the toothpicks that stick out from the tube.
32. WISH LIST IDEA
Put used clothing such as jeans on your program wish list! With material, children make a purse, pocket memo holder or community quilt! (Doreen Z-MI. /Florida
BLUE JEAN POUCH
Materials needed:
- Old pair of jeans (you only need the back pocket.)
- Ribbon, yarn, or roping.
Directions:
1. Cut out the back pocket of the jeans around the seams.
2. Cut from the inside of the jeans so you have the entire pocket,
both front and back.
3. Decorate with paint, beads, trim, etc.; add ribbon, yarn, or roping for a shoulder strap by sewing or tying
it to the sides of the pocket.
4. This makes a cute little pouch to carry small items.
33. COLORFUL TWIRLERS
from a window frame, tree, ceiling, party room, or front porch. (I made some and they’re really fun!) See photos in the Red, White and Blue Category!
Materials: Plastic coffee can lids (Lids come in a variety of colors)
Marker
Scissors
String
1. To make one, use a nail to poke a hole in the center of a plastic coffee can lid.
2. WITH A MARKER, draw a spiral that starts 3/8 inch FROM THE HOLE (it keeps going around itself in circular pattern) and gradually extends to the rim—then cut along the line with scissors.
3. Knot an end of a piece of string, thread the other end up through the hole in the center, and the twirler is ready to hang up and spin.
To spin, grasp each one at the bottom, twirl it around and around until the string is wound tight, let go and enjoy the show.
NINE ‘CAN OR LID’ CRAFTS
34. CONTAINER FOR ODDS AND ENDS…
Paint an empty and rinsed out tuna can with spray or acrylic paint. Decorate with glitter and glue, pom poms, buttons, lace, or stickers. These make cute holders for barrettes, pony tail holders, paper clips, rubber bands, keys, jewelry, or other small items.Using the same ideas, paint a soup or vegetable can to make a pen or pencil holder.
35. COFFEE CAN WISH BANK
- Have the kids cut pictures from old magazines or draw pictures of something they want.
- Decorate the cans with glitter, pictures, stickers or anything else you have.
- Cut a hole in the plastic top of the can for kids to deposit money.
- Each time they add money to the can, they are contributing a little bit more to the “wish” item.
___________________
36. SOUP CAN VASE OR PENCIL HOLDER
1. Clean the can being careful of the edges!–Sand the lip of the can with your sand paper, to smooth sharp edges.–Rinse any shavings off of the can
2. Fill a paper towel with a layer of noodles
3. Coat the outside of the can with glue, using a paintbrush
Tip: Leave a half an inch or so on the top and bottom of the can without glue, so it won’t pick up noodles and you can handle it more easily)
4. Roll the can in the noodles covering the can; make sure the noodles are stuck securely and let them dry.
5. Spray paint the outside of the can any color you like (Most of the kids here liked gold)
6. Let them dry and use them to fill with flowers or pens and pencils, or whatever you like!
They make great gifts!!!
37. PAINTED PIGGY BANKS
Turn empty Kool-Aid canisters into piggy banks that the kids design and create. Simply peel the outside label off the plastic canister. Wash the canister and dry completely. Once dry, arrange the various paints and brushes… Children can use their imagination to make an animal, face or ________? Cut a slit in the top of the canister.
 38. TIN CAN TELEPHONES
 38. TIN CAN TELEPHONES
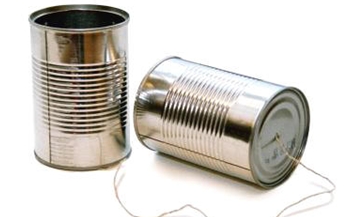
Children today are still delighted with simple tin can telephones. You can make a set n with two empty tin cans that have smooth edges.
- Punch holes in the bottom of the cans.
- Thread twelve feet of wire through the holes.
- Wind each end in and out of a button, which acts as a stopper.
- One child talks into his can while the other child holds his can over his ear to listen.
- The vibrations travel along the taut wire.
39. ALTOID TINS make wonderful containers! (Gifts too!)
Need:
Empty, clean Altoid mint tins (other brands will do), acrylic paint, Paint brushes or sponges.
Decorative options: Ribbon, buttons, craft foam shapes, pom-poms, photos, magazine cut-outs, glitter glue, feathers…the possibilities are endless!
- First paint the tins using acrylic paint.
- After the paint is dry, it’s time to decorate. You can use a glue-gun, glue dots, craft glue or even sticky backed craft foam! It’s that easy!
- Fill your new tins with barrettes, paper clips, earrings, postage stamps, lost buttons or make a mini-sewing kit for traveling.
(It wouldn’t cost much to turn it into a SEWING KIT as a gift)
_______________________
 From: Leslie S. /Minnesota
It works nicely as a SMALL FIRST AID KIT for the car!
- Paint the tin white–when dry add the large red cross in the center
- Fill it with some “FIRST AID SUPPLIES”.
- I used sticky-backed red craft foam to make the cross, so no glue was necessary. Then, I filled the tin with Tylenol type tablets, disinfectant wipe and a couple bandages.
40. TIN WORK…
known in Mexico as ‘hojalata‘, goes back to the 16th Century. It’s used widely by artisans and craftsmen to form both useful and ornamental objects ranging from purely fun to elegant and delicate. Only hindered by imagination, tin artists produce candelabras, frames, ornaments, jewelry boxes, figures, lanterns, and bowls.Introduce tin art to your kids…
 41. TIN CAN LANTERNS AND LUMINARIES
 41. TIN CAN LANTERNS AND LUMINARIES
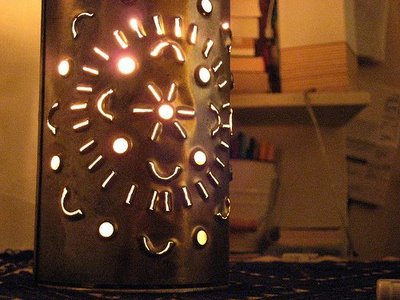
- Look for cans that have plain sides without any ridges. These make the nicest lanterns. Remove the label from the can. Scrape and clean any glue that is still on the can.
- Draw a pattern of dots on the outside of the can with a permanent marker. Be careful NOT to smudge the dots before the ink is dry. Challenge kids to come up with patterns such as stars, flowers, circles, etc.
- Fill the can with water and put in freezer for at least 24 hours-until frozen solid.
- Place the can on its side on a folded towel. Use assorted nails (also screw driver tips make a nice look) to pierce through the pattern of dots that have been drawn. Hammer the nails in just far enough to pierce the metal. If the ice is melting too quickly, return the can to the freezer for a few hours.
- When done, melt the ice in the can. Dry the lantern. Caution the children to take care and not cut or scratch themselves on in edges inside of the can.
The lantern is now ready to place a votive candle in it. Several together make a lovely night-time light! (Lantern Images: Star- Seven Impossible Things Blog; Luminary from Svanes on flickr)
42. TIN HANGING ORNAMENTS (Using juice lids)
Pierce a pattern of holes in the metal top of a frozen juice can. (The lids that are held in place with a plastic strip have the smoothest edges.) Place the lid on a work surface that can sustain the pounding of nails. Besides the design, pound a hole in near the top of the lid to string fishline or yarn from which to hang.
Several lids hung together make a nice mobile.
43. MAKE A PHOTO COASTER
Start with the lid of a margarine or yogurt container and a favorite photo.
Cut the photo to fit the top of the lid and glue it down.
After the glue dries, seal your new coaster with a water-based sealer.
Glue cork to the bottom of the lid to give thecoaster a solid base.
IDEA: If you’re making them with your own children, make a different one for every family member and present them at the next dinner.
***Idea: OLD SOCKS Make SOCK ELVES OR ZANY PUPPETS using whatever recyclables you have on hand.
44. CEREAL BOX PUPPETS
Empty cereal box
Scissors
Construction paper
Glue
Yarn (optional)
- In order to make the puppet, find the middle of the box and cut across the width and down each side (only one side of the box will remain uncut). Next, bend the box over the uncut side. You now have the puppet created – place your hands in the open ends of the cereal box.
- To decorate your puppet, use the construction paper, scissors and glue. First glue construction paper over the outside of the cereal box (you may need to cut the construction paper to make it fit). Next cut out eyes and any other features you want the puppet to have. Glue them onto the puppet. You can use yarn, macaroni, old shredded rags etc. for hair.
How to Decorate Your Puppets
45. MAGAZINE PICTURE PUPPETS
Our center is really on a tight budget–so I’m always looking for very inexpensive activities for the children.
Required: Magazines or newspaper, paper, glue, scissors, and Popsicle sticks.
Have the kids go through magazines looking for pictures they like. If the picture is really thin and doesn’t stand straight up– glue to a thicker piece of paper first.
Once the glue has dried cut out the picture and glue to Popsicle stick.
Have children brain-storm a play or story –and use their puppets. (Source: A KidActivities Visitor)
46. CEREAL BOX WHIRLYGIG (spinner)
Materials:
Old flattened cereal box
Two foot piece of kite string or gardening twine
Marker or crayon
Juice can or oatmeal canister to use as pattern tracer
Scissors
Sharp pencil
- Using the base of the juice can as a template, trace a circle onto a flat area of the cereal box. Cut out the piece of cardboard.
- Use the sharpened pencil to punch two holes in the center of the disc.
- With crayons or markers, draw a spiral design on the plain side of the disc.
- Thread the string through both holes and tie the ends together to form a loop.
To Use:
Hold both ends of the string with your fingers, keeping the disc in the center. Flip the disc around and around like a jump rope, to tighten up the string. Once the string is tight, gently pull the string outwards to make the disc spin.
47. MAKE A BOX TOWN
This is an easy way to make a toy town using old boxes, cartons, colored paper, scissors, tape, paper tubes, and crayons. This can be an on-going activity–that is constantly added to! Just add plastic figures, cars and trucks to the community!
To make buildings:
- Wrap up boxes and other empty containers with colored paper.
- Carefully cut out doors if wanted.
- Use tissue tubes for chimneys.
- Decorate with windows, flower boxes, etc.
To make trees: - Use a tissue paper tube for the trunk.
- Draw a green blob on stiff paper or cardboard for the leaf canopy and cut it out.
- Tape the green canopy to the tube.
48. BOX TRAIN
Need boxed large enough for children to fit inside.
Paint about three boxes to resemble train cars. Punch a hole in the front and back of each car; use a rope to connect the cars. The kids can have great fun using their imagination!
49. SEWING CARDS
Materials: Heavy weight holiday or occasion cards, glue, yarn, masking tape and scissors
For stability, glue together the front and back of cards. Punch holes around the outside edge of each card (or if there is a very large design such as a tree, puch holes around that.) The children can then sew around the cards with yarn that has masking tape wrapped around one end as a “needle”.
You can also cut the cards in to holiday shapes such as a candy cane, star or tree.
50. MAKE A SHOE BOX DOLLHOUSE…
This project can be as simple or elaborate as you choose to make it. First, decide how many rooms (one shoebox per room) you want the dollhouseto have.
Cut squares in the bottom of the box for windows. Add miniature furniture and decorations. Put the boxes in the order you want the rooms and glue them together.
Take two of the box tops and lean them against each other over the house. This creates a vaulted ceiling and an attic pace above the rooms.
51. EGG CARTON FLOWERS
Materials: Egg cartons (cardboard), Scissors, Glue, Green flexible straws, Colored markers
To make a TULIP: Cut an individual cup from a carton. Trim the sides of the cup to form petals (the ends can be rounded or pointed). For a finishing touch, use a colored marker to accent the edges of the petals.
For a DAFODILL: Start with 2 cups from egg carton. Prepare one as described for the tulip. Trim the second cup so that the edge is even & the sides are about an inch tall. Fit the short cup into the first & glue in place. Last, make a small slit in the bottom of each flower & insert the end.
52. EGG CARTON TALKING PUPPETS…
Materials: Styrofoam egg cartons, scissors, construction paper and decorating odds and ends (Good for young children)
Cut a styrafoam egg carton into two-cup sections. Fold each section in half so that the cups are touching. Poke a fingerhole in each cup to hold the finger-puppet and make it ‘talk’. Decorate as desired.
53. CREATE AN EGG CARTON BUG!
Materials: Cotton balls, egg cartons, paint/markers, google eyes, pipe cleaners, construction paper, glitter, any other material the children may want to use.
Cut the egg cartons in separate 1 to 3 hump-pieces and put them out with a variety of the above supplies. See where the children’s imaginations will take them!
54. CATERPILLAR
Materials:
Plastic-Foam meat tray
Hole puncher
Yarn and Pen
- Cut circles from a thoroughly sanitized plastic-foam meat tray.
- With a hole puncher, punch a hole through the center of each circle.
- Tie a knot in one end of a piece of yarn.
- Push the other end of the yarn through the hole in each circle.
- When your caterpillar is as long as you want, knot the second end of the yarn, leaving some yarn behind the knot for a tail.
- Draw a face on the front circle. You now have a Caterpillar!
- You can also make the caterpillars with long sections of egg cartons-such as the above bugs!
 55. LITTER BUG CRAFT
 55. LITTER BUG CRAFT
Materials – A variety of Craft Items such as:
Paper towel and tissue paper rolls
Stickers
Markers
Pipe Cleaners, String, Yarn, Buttons, Glue, Scissors, google eyes…
Using craft supplies and imagination create your own Litter Bug. Be sure to make it an ugly little bug. Use this bug to show young children that this is what people look like –when they don’t throw away trash!
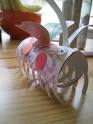
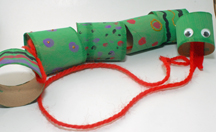
 56. MAKE A SNAKE
 56. MAKE A SNAKE
Materials:
Paper towel tubes, paint, google eyes, decorations of choice
- Cut the paper towel roll into six sections of similar width.
- Paint the sections- decorating with glitter glu, and other details as desired.•Once the paint is dry,apply googly eyes and glue a red felt forked tongue to the ‘head’ tube section.
•Loop yarn around last section and tie
•Thread the yarn through the rest of the section, leaving it loose at the head as a leash to pull the snake.Idea/Photo is from FreePreschoolCrafts by Devanie Angel
57. TREASURE SHOE BOX
…
Decorate an old shoe box and lid with construction paper, markers, paint, glue and glitter, crayons, googly eyes, stickers, lace, doilies, or whatever else you can find. Be sure to put the child’s name inside the lid. (This could be a great box for treasures found out in the yard, on the way home from school, or anywhere else children “hunt”.)
58. STARRY NIGHT SHADOW BOXES
- Paint the inside of a shoe box with black or dark blue poster or acrylic paint. OR…glue black construction paper inside the box.
- Using white crayons or stickers, make a night scene with stars and the moon on the black background.
- Get creative… use small plastic toys to create a scene inside the shadowbox or have children make their own with construction paper and glue.
- Cut out small pictures from coloring books or magazines and color and adhere to the scene.
- Hang a spaceship or shooting star from then top with a piece of string and glue. (Sample is step 1 and 2)
59. ZOO ANIMAL CAGES
Materials: Shoes boxes, playdough, paper or string, scissors, twigs and small stones
Use one shoe box per cage. Have children make playdough animals or use small plastic/rubber animals. Turn the box on it’s side –and encourage children to create a habitat with the stones, twigs and perhaps some sand. For bars on the cage, attach paper strips or use string to the open side.
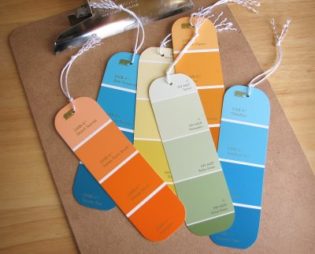
 60. FRUGAL BOOKMARK IDEA…
 60. FRUGAL BOOKMARK IDEA…
You know the OLD PAINT CHIP CARDS you used when you were trying to decide what color to paint? They can be turned into great book marks (gift tags too)…Put a hole in them with a hole puncher, string ribbon through them! You now have great book marks!
61. RECYCLED PACKAGE BOOKMARKS
This simple project comes from myplumpudding–it saves books from dog ears and recycles cardboard from the trash!
- Simply pull out your colorful cardboard packages, flatten them out and cut them into strips about 1 1/2″ x 6″. A paper cutter will give you a more consistent cut. And any size strip will do–as long as it fits in your book.
2. Trim corners with a corner rounding tool, scissors or an X-acto.
3. Punch a hole in the top and thread it with a matching ribbon
Visit ‘Bookmark’ making page for other ideas…
