Below you will find some fun art activities for kids. These project ideas are easy and fun for kids at home or in the classroom.
Art activities are a great way for kids to develop their motor skills, use their imagination, and express their creativity. When you break out the crayons or paint, you can feel the kid’s excitement and anticipation to get started.
Let’s get started with some art ideas.
Art Project Ideas for Kids
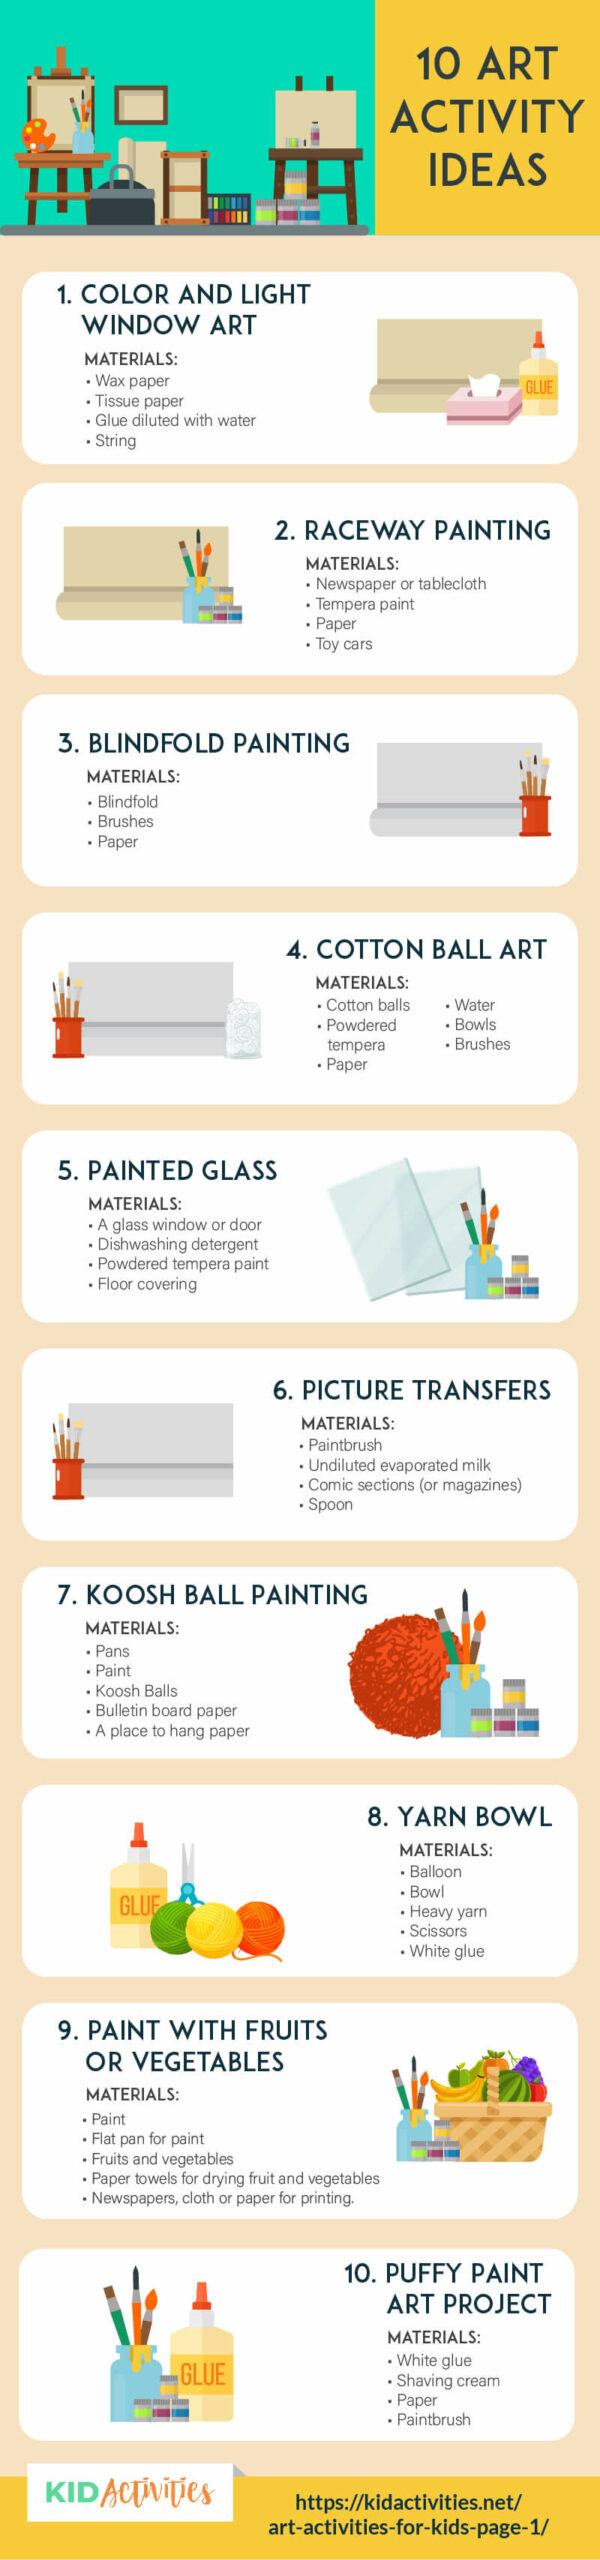
1. Color and LIght Window Art
Materials:
- Wax paper
- Tissue paper
- Glue diluted with water
- String
Instructions
- Paint the wax paper with the glue and water mixture.
- Lay pieces of tissue paper on the glue, in whatever pattern and color you wish.
- Lay the second piece of wax paper over the first and smooth.
- Attach string to hang your stained glass in a window and let the sunshine through!
2. Raceway Painting
Materials:
- Newspaper or tablecloth
- Tempera paint
- Paper
- Toy cars
Instructions
- Cover table with newspaper or plastic tablecloth.
- Have children place small amounts of tempera paint on their paper–in one or more colors.
- Using the car, have children “drive” the car all over the paper. (Small Die-cast cars and trucks – such as Hot Wheels).
- While running the tires through the paint, they’ll create “car tracks” and blend the paints together.
- Continue with the design until they feel they are finished….Dry. You’ll get some very interesting art…
- More fun! Fill buckets with soapy water– have “a car wash” when done painting!
3. Draw or Paint Half a Picture
Creating a one-half painting is a fun art idea for kids.
Materials:
- Magazine
- Glue
- Paper
- Paint
- Crayons or colored pencils
Instructions
- Cut a big picture out of a magazine…a photo of an animal or a person or any colorful object works best.
- Then cut that photo right down the middle.
- Glue the half-photo onto a sheet of paper, then draw and paint the other half.
- This also makes for a fun art project to do with a friend.
- Each of you paints half of the same photo…you do the right side while your friend does the left.
- After your paintings are dry, remove the magazine photos and glue your two half-paintings together to make one, complete, teamwork painting! It’s a wild effect, especially with faces.
- Source: kidsart.com
See some of our other fun team activity ideas.
4. Fly Swatter Painting
Fly swatters dipped in a paint-filled Styrofoam tray leaves a lovely patterned effect on the paper when the children hit it.
Children really like this activity.
Caution: Wear T-shirt cover-ups; protective goggles and use washable paint & do it outside!!!!
5. Spider Painting
Materials:

- Watercolor paints
- #7 soft-bristle brush
- A container of water
- Small sponge
- Paper towel
- Paint cloth
- Straw
Instructions
- Make one side of the paper wet with the sponge.
- Fill the brush with one color of paint and drop a small amount of paint on the paper.
- Blow through the straw—the drop of paint around the paper.
- Blow in several directions by moving the paper around.
- Repeat the steps many times–using related colors–that will blend and make “other” colors.
- When it’s dry, you can outline shapes with a black line brush or black crayon……or….cover the paper with a wash of one or more colors.
6. Blindfold Painting
This is a fun art activity for younger kids.
Materials:
- Blindfold
- Brushes
- Paper
Instructions
- Put a blindfold over children’s eyes.
- Have the child then feel the brushes, paper, and area before starting.
- Children then paint without seeing what they are doing. It’s suggested to do this with small groups at a time.
7. Melted Crayon Creations
Materials:
- 9″x12″ or 12″x19″ white paper
- Pieces of old crayons
- An iron
- Watercolor paints
- #12 soft-bristle paintbrush
- A container of water
- Paper towel
- Paint cloth
- Pad of newspapers
Instructions
- Fold a piece of white paper in half width-wise.
- Open the folded white paper and lay it flat on the working surface.
- With any old grater, grate the crayons into very small pieces.
- Sprinkle the grated crayons on one side of the white paper. Crayon pieces can be spread randomly or in specific areas of pattern.
- Fold the other half of the paper over onto the crayon side.
- Put this on the pad of newspapers. You’re ready to iron it with a warm iron.
- Open it immediately after ironing so the halves do not stick together.
- You can now use these crayon lines to make designs/accent lines or things such as butterflies or bugs. Drawing around the melted crayons.
- When complete, paint a watercolor wash over the entire surface of the picture using one or more colors.
8. Cotton Ball Art
Materials:
- Cotton balls
- Powdered tempera
- Paper
- Water
- Bowls
- Brushes
Instructions
- Give each child a piece of paper.
- Using cotton balls, draw or dab on the paper with dry tempera.
- After completing the dry tempera drawing, have each child paint the entire paper using water and a brush.
- Let the children experiment with this medium. Colors will combine and change right before their eyes.
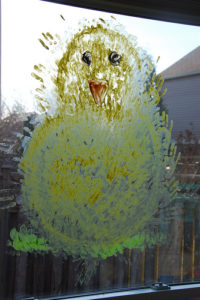
9. Painted Glass
Give children’s imagination a workout with this simple paint mixture that turns any large-paned window into a canvas for their art masterpieces.
Materials:
- A glass window or door
- Dishwashing detergent
- Powdered tempera paint
- Floor covering
Instructions
- Take 2 parts liquid dishwashing detergent to 1 part powdered tempera paint and blend until creamy.
- Mix up several colors and let them paint right on the window.
- Be sure to cover the floor if painting indoors – so it washes up with a sponge and water.
Sample window is the creation of Moremomtime
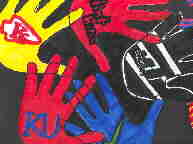
10. Personality Hands
Materials:
- 12×18″ white paper
- Sharpie
- Markers
- Scissors
- Black paper
Instructions
- First trace hands 6 – 8 times on a sheet of 12×18″ white paper.
- Using a marker, draw patterns, symbols, shapes, etc. that reflect your personality. Problem-solving is part of this project, as youth must decide how to incorporate the overlapping fingers.
- Color the negative space in between the fingers black, and anywhere it will be difficult to get to with scissors.
- Cut out around the outside of the hands and glue on black paper. Samples by Whitney and Jimmy, 5th Grade-students of Art teacher Michal Austin in Kansas
11. Picture Transfers
Materials:
- Paintbrush
- Undiluted evaporated milk
- Comic sections (or magazines)
- Spoon
Instructions
- Dip paintbrush in evaporated milk and lightly paint over the desired pictures from a magazine or comic.
- Quickly cover this painted area with a blank piece of paper and rub the paper firmly with the back part of a spoon.
- Just like magic, the picture has transferred to the clean paper in clear detail!
12. Outside Chalk Rubbings
Materials:
- Chalk or crayon
- Paper
Instructions
- Send the kids out to look for different and unique designs in their surroundings.
- Have them put several small samples on a large piece of paper by placing the paper on the object and rub across it with the chalk.
Here are some ideas to give them:
- Trees, pavement, patio brick designs, corrugated lawn furniture, wood siding, and tile flooring.
- It would be great if there was masonry with form/design on it!
13. Koosh Ball Painting
Materials:
- Pans
- Paint
- Koosh Balls
- Bulletin board paper
- A place to hang paper
Instructions
- Hang a long piece of bulletin board paper on your outside fence.
- Place pans of paint and Koosh balls on the ground. (Good idea to place all on a plastic drop cloth of some type)
- Encourage the children to throw the Koosh Balls at the paper!
- If possible have the children do this activity in the bathing suits so you can hose them off when they are done.
This can be a fun summer camp activity for young kids.
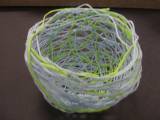
14. Yarn Bowl
Materials:
- Balloon
- Bowl
- Heavy yarn
- Scissors
- White glue
Instructions
- Blow up a balloon to the size of your choice. Place the ballon on a bowl.
- Cut strands of yarn 12 and more inches long.(The heavier the yarn the better)
- Soak the yarn in a bowl of white glue. When thoroughly drenched, lift the yarn from the bowl and squeeze the excess glue between finger and thumb.
- Place the yarn and cover only half of the balloon layering and overlapping the pieces (whichever direction you choose.)
- Continue doing this until an entire half of the balloon is covered in yarn. Leave the upper half of the balloon bare.
- The yarn will take 24 to 48 hours to dry. When completely dry–break the balloon. You now have a wonderful lacy bowl to hold ribbons, scarves or whatever!
Tips: This bowl can also be made using liquid starch instead of glue; however, I have not made one using starch. Also, instead of a balloon, a bowl or ball may also be used as the form.
However, the balloon is the easiest to remove the bowl, once it has dried… Photographs courtesy of the artist and teacher Shannon Stewart (Formerly of Stetson Hills School-Phoenix, AZ.)
15. Make a Crayon and Paint a Picture
Materials:
- Crayons
- Paper
- Watercolor paints
Instructions
- Draw a scene (such as a beach) on a piece of paper using crayons.
- Lightly color in the blue sky, the light brown sand, and the bright beach towels and umbrellas.
- Now recolor the picture using watercolor paints. Use blue paint over the blue crayon, light brown paint over the light brown crayon, and the same paint colors over the bright beach towels and umbrellas. Let the paint dry.
16. Tessellation Picture
Instructions
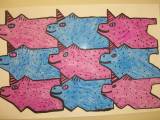
- Draw a grid of nine squares (the first picture has 16) on a piece of drawing paper. On the left side of one square, draw a curvy line. Repeat that same line on the left side of each square.
- Now draw a different curvy line at the top of the first square. Then draw the curvy line at the top of each remaining square. Take a look at the squares to see what the shape is starting to look like.
- Fill in more lines to create a shape, repeating the same line in each square. Each line creates part of the next square’s design. When you are done, you should have the same shape in each square. Color in your design using colored pencils. (Samples are courtesy of the fourth grade class of Shannon Stewart)
17. Fish Weaving
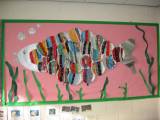
Instructions
Children weave on paper plates that are joined together to make the scales of a fish.
Photograph of Display Wall is by Lisa Tregellas at Display Photos
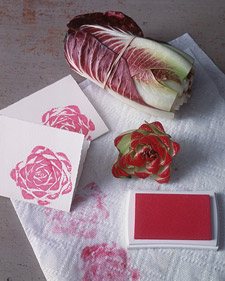
17. Paint with Fruits or Vegetables
Try corn, strawberries, pears, cucumbers, radishes, oranges, carrots, beans, lemon, cauliflower, pepper, avocado, mushroom, bunched cabbage, bunched celery, and apples!
Materials:
- Paint
- Flat pan for paint
- Fruits and vegetables
- Paper towels for drying fruit and vegetables
- Newspapers, cloth or paper for printing.
Instructions
- Cut fruits and vegetables.
- Dip them in paint and print.
- That’s it!
(Directions for cabbage image is in Valentine Arts and Crafts Category
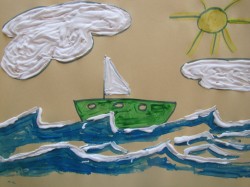
18. Puffy Paint Art Project
This fun art idea is great for snow and snowmen in the winter. In the summer it’s great for clouds, sails, and white caps on ocean waves.
Materials:
- White glue
- Shaving cream
- Paper
- Paintbrush
Instructions
- Measure equal parts of white glue and shaving cream.
- Mix the two ingredients together. It should be very thick and fluffy.
- In the winter –it’s perfect for making a Snowman, top of a Santa Christmas Stocking or a Winter Snowdrift scene! In warm weather, it’s perfect for fluffy white clouds and ‘white caps’ on big ocean waves such as in KidActivities image.
The texture is interesting. When dry-it feels much like foam and stays three dimensional. Image by KidActivities.net
What do you do with kid’s art?
Once the kids are done with their art, here are a few things you can do with it:
- Hang it up around the classroom
- Send it home with them to give to their parents or grandparents
- Take a photo of it and store it digitally
- Store it in a folder to take home all at once at the end of the school year
- Recycle it if possible
- Trash it
In Summary
We hope you have enjoyed our collection of art projects for kids. Art is a fun way to get kids hands-on and creating things using their imagination. Did you decide to try one of these art ideas? If so, which one did you go with? Time to put the art supplies away and call it a day!