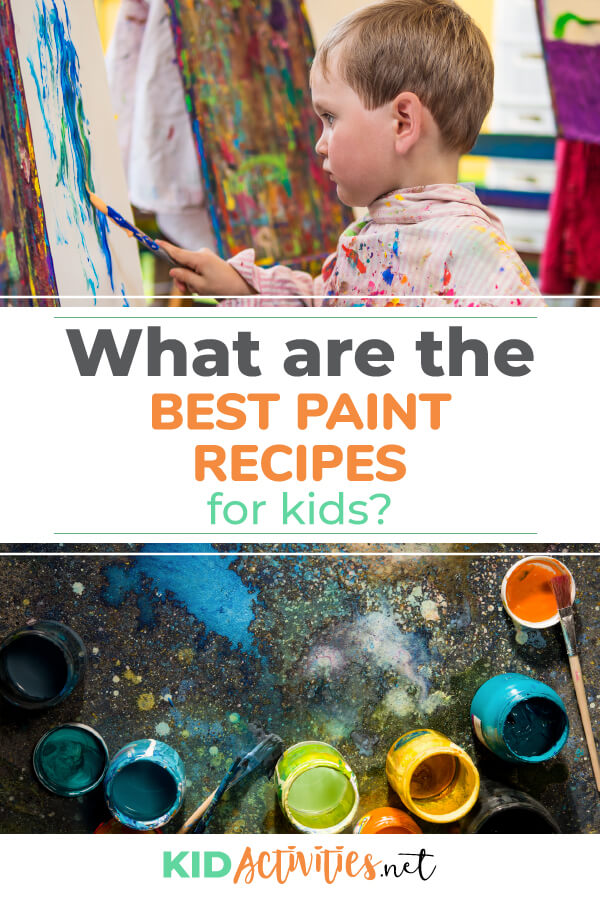
We have compiled a list of 45 recipes for different types of paint. You will find window paint recipes, face paint recipes, flour paint, and many more.
Have great fun with paint using all kinds of ingredients. Pudding, Corn Syrup, Kool-Aid, Yogurt, Soap, Powdered Milk, Shaving Cream, and more!
1. Kool-aid paint
| 2 packages unsweetened Kool-aid | 2 cups flour |
| 1/2 cup salt | 3 cups boiling water |
| 3 tablespoons oil |
Mix dry ingredients together, then add wet ingredients. Paint.
2. Scratch & sniff paint recipe
- Mix flavored gelatin or Kool aid package into half the water suggested in the package directions.
- Paint with the scented mixture and allow to dry. You will have a scratch and sniff painting.
Tip: Careful, gelatin (especially red) stains hands and clothing…
3. EAGLE BRAND MILK PAINT
Add food coloring to Eagle Brand Condensed Milk and create paint. When the “paint” dries on paper, it will be shiny.
4. CORN STARCH PAINT
- Add cold water to 3/4 cup cornstarch to make a smooth, THICK paste. Stir in boiling water until the mixture is a DESIRED consistency. It should be thick and nearly clear.
- Spoon mixture into paint cups and stir 3 or 4 teaspoons of liquid tempera into each cup. This nearly drip-less paint is ready to use for painting… or finger-painting. Store unused paint in refrigerator.
5. POPSICLE PAINT
Materials:
2 tsp. powdered tempera paint
1/3 cup water
Wax-coated paper cup
Craft stick
Plastic wrap
1. Mix paint and water together.
2. Pour the mixture into a wax coated paper cup.
3. Cover the cup with plastic wrap, then insert the craft stick through the plastic wrap in the center of the cup.
4. Place the cup in the freezer and freeze until solid.
5. Remove the paper cup and plastic wrap from the Freeze Pop Paint.
6. Dip the paint into water and paint on white paper.
Flour Paint Recipes
6. QUICK AND EASY MICROWAVE PUFF PAINT
Ingredients:
1 tablespoon self-rising flour
A few small drops of food coloring
1 tablespoon salt
Add small amount of water till it’s a smooth paste.
Use this to paint on a thick sheet of cardboard.
You can also use Q-Tips if not enough brushes…
Microwave the design on high for 10 – 30 seconds until the paint puffs and it is dry.
7. PUFF PAINT #2
1 c. water
1 c. flour
1 c. salt
Separate into different squirt bottles and add POWDERED TEMPERA PAINT to create a rainbow of colors.
8. PUFF PAINT #3
Salt, Flour. Water, Tempera Paint
Mix equal amounts of flour, salt and water. Add LIQUED TEMPERA paint for color. Pour mixture into squeeze bottles and paint. Mixture hardens in a puffy shape.
9. FLOUR FINGER PAINT #4
This finger paint has a wonderfully thick texture and makes great finger paintings.
1. Combine 2 cups flour and 4 cups of water in a microwave-safe bowl.
2. Heat in the microwave for 3 to 4 minutes, or until thickened, making sure to stir the mixture every 30 seconds. (Or cook in a saucepan over low heat until thickened.)
3. Add a pinch of salt.
4. Mix in food coloring or tempera paint until finger-paint is the desired color.
5. Cool and store in a covered container in the refrigerator.
10. EDIBLE FINGER PAINT
Ingredients:
3 Tbs. Sugar
1/2 cup cornstarch
2 cups cold water
Mix sugar and cornstarch. Add 2 cups of cold water. Cook over low heat, stirring constantly until thick. Add food coloring
11. INVISIBLE PAINT
Materials:
4T (60ml) Cup of water
4T (60ml) baking soda
Cotton swab (Q Tip)
Sheet of white paper
Purple grape juice
1. To make the paint, dissolve the baking soda in the water.
2. Dip the cotton swab in the cup and paint a picture.
Hard to see?
3. Simply brush over the picture with purple grape juice. The picture mysteriously appears in blue-green colors.
12. SOAP CRAYONS
Ingredients: Ivory soap flakes, food coloring, water, plastic ice cube trays
Pour 1/8 cup of water into a measuring cup. Fill to the one cup mark with soap flakes. Mix until you have a thick paste. Add several drops of food color. You’ll find that you don’t have to use much. Press spoonfuls of soap into the ice cube tray.
Repeat this with several different colors. Let it dry for a few days
13. CHOCOLATE PUDDING FINGER PAINT
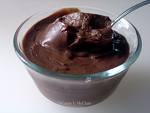
1 (4 oz.) pkg. instant chocolate pudding & pie filling
2 Cup cold milk
- Put pudding mix and milk in a medium size bowl.
- Beat with electric mixer at low speed for two minutes.
- Let set until it thickens. Finger paint on white construction paper and let dry for several hours.
14. VANILLA EDIBLE FINGER PAINT
Instant Vanilla Pudding
Food Coloring
Mix pudding according to directions. Add food coloring for desired color.
15. COFFEE SCENTED PAINT
1. Dry used coffee grounds and add them to finger-paint.
2. You’ll get the smell of coffee with a texture.
Good for younger children when studying the five senses.
16. SHAVING CREAM PAINTING USING SHAMPOO INSTEAD!
Mix 3 teaspoons Shampoo with a small amount of water in a mixing bowl. Whip with an electric mixer until it becomes like shaving cream. Add food coloring for color… Smells much better than shaving cream!
**Of course you can also use aerosol (non-menthol) to spread around and use to “paint”.
17. EDIBLE YOGURT FINGER PAINT
Non-toxic and can be kept/restored in fridge using the yogurt container. Use plain yogurt and mix with a few drops of food coloring. Dries shiny and with texture.
18. MAKE PUFFY WHITE PAINT FOR SNOW OR WARM WEATHER SCENES.
Materials:
White glue
Shaving cream
Paper
Paintbrush
Measure equal parts white glue and shaving cream.
Mix the two ingredients together. It should be very thick and fluffy.
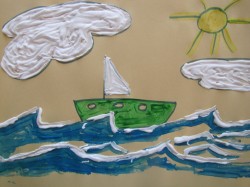
In the winter it’s perfect for making a Snowman, top of a Santa Christmas Stocking or a Winter Snowdrift scene! In warm weather it’s perfect for fluffy white clouds and ‘white caps’ on big ocean waves such as in KidActivities image.
The texture is interesting. When dry-it feels much like foam and stays three dimensional. Image by KidActivities.net
Window Paint Recipes
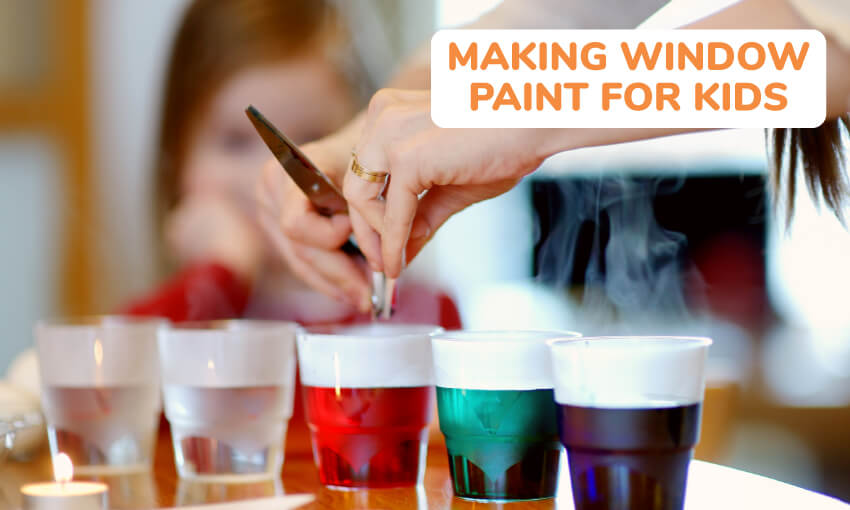
19. WINDOW PAINT~RECIPE #1
To paint a scene on your windows use the following recipe and paint is easily removed. Give each child a window to decorate.
2 Tbsp powdered tempera paint
1 Tbsp warm water
1 tsp Joy dishwashing liquid
- Measure powdered paint into a container.
- Mix in water thoroughly to achieve a smooth paste.
- Add JOY, mixing completely, but gently, to avoid making paint too sudsy.
- Use masking tape to protect the window frame and be sure to spread the newspaper around to protect the area.
- To remove paint or touch up mistakes just wipe it off with a dry paper towel.
Note: Paint with one color at a time and allow it to dry before going to the next color. This dries on windows in 5 – 10 minutes. Washes off easily with a solution of water and vinegar
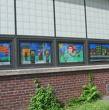
20. WINDOW PAINT RECIPE #2
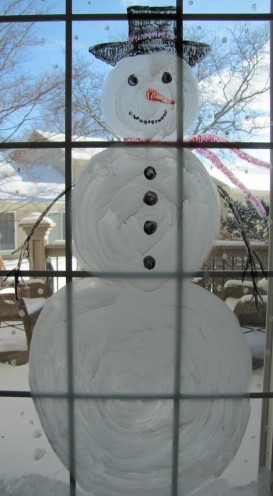
For this Snowman scene. KidActivities mixed equal parts of liquid tempera paint with liquid dishwashing soap. The mixture is a little watery..so be sure to cover floors and have paper toweling nearby. The drips of paint wipe up easily.
The ‘snowman’ was made with a circular motion of the brush. The other parts of the scene were used with a stippling effect of the brush. As above…be sure each color dries before you paint over the first.
The snowflakes on the window were used by simply placing a finger in the paint and lightly touching to the glass. To prevent dripping, be sure not to use too much paint on the brushes or the fingers. (Image by KidActivities.net)
Brushes and bowls cleaned easily. Snowman also washed off 1-2-3 jist using water!
21. GLITTER
Mix together 5-6 drops of food coloring and 1/2 c. salt stir well.
Cook in microwave for 1-2 minutes or spread out on a piece of waxed paper to air-dry.
Store in an airtight container.
22. SQUEEZE BOTTLE GLITTER
1 part flour
1 part salt
1 part water
- Mix equal parts of flour, salt and water.
- Pour into plastic squeeze bottles.
- Add liquid coloring for variety.
- Squeeze onto heavy construction paper or cardboard.
- The salt gives the designs a glistening quality when dry.
23. POWDERED MILK PAINT
Ingredients:
1 part powdered nonfat milk
1 part cup water
powdered tempera
- Mix milk and water until milk is dissolved.
- Separate mixture into different containers.
- Add in different colored powdered tempera and mix.
- This paint dries quickly to a glossy opaque finish and does not dust, chip or come off on your hands.
24. PAINT WITH WATER
- When it’s warm outside, it’s fun to “paint with water” on sidewalks and rocks.
- Also inside on chalkboards (NO paint just water)
- It’s great for younger kids to practice writing!!!
- Try painting with a tiny brush and water on the lines of a drawing done with washable markers. It bleeds the “marker- marks”. You can use a Q-tip instead of a brush, to help control “over watering” the art.
25. PAINT WITH CORN SYRUP
Just add a few drops of food coloring to a teaspoon of white corn syrup.
Idea: USE CHALK AND LIQUID STARCH!
Draw your pictures with chalk and then brush over them with liquid starch.
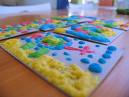
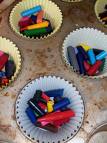
26. SIDEWALK PAINT
A fun alternative to chalk!
- You will need equal portions of water and corn starch.
- Mix well.
- Add a drop of your favorite food coloring color!
- Paint this wonderful concoction on the sidewalk. Give it a few minutes to dry and you’ll have a wonderful work of art. (Cornstarch Paint in cupcake tins photo from Craft Addict)
27. SIDEWALK CHALK
1/3 cp Plaster of Paris (Quick setting)
3 t. water
1 T. paint
Glitter (optional)
Mix all ingredients.
Scoop into empty toilet paper tube or tiny dixie cups.
Let set for 20 minutes.
Peel off cardboard. Let dry for one day. If using small cups-peel off when after a couple days.
28. HOMEMADE WATER COLORS
4 tablespoons baking soda
2 tablespoons white vinegar
1/2 teaspoon glycerin (available at your local pharmacy)
2 tablespoons cornstarch
Red, blue, yellow food coloring
- Mix the vinegar and baking soda in a small bowl or jar until mixture stops foaming.
- Add the glycerin and cornstarch and stir thoroughly.
- Pour the mixture into small containers or paint box compartments.
- Now you can experiment with color by adding a few drops of food coloring to each individual container.
- Mix each color thoroughly and leave (preferably overnight) to set.
29 .RICE FINGER PAINT (Good for Toddlers to Pre-K)
Mix baby rice cereal with water and food coloring.
30. HOMEMADE WASHABLE PAINT to stretch liquid tempera paint…
Materials
Liquid Tempera Paint
Ivory Snow or Dreft Liquid Detergent
- mix 3/4 cups of paint to 1/4 cup liquid detergent
- stir well
**This mixture is economical and as good as the commercial washable paint.
31. SPRAY KOOL-AID
Sprinkle kool-aid crystals onto a piece of paper. Have children spray water from a spray bottle onto the paper. Use different colored kool-aid mix.
32. UNCOOKED LAUNDRY STARCH PAINT
Mix 1 cup laundry/liquid starch, 1 cup cold water, and 3 cups soap
flakes to provide a quick finger paint.
33. DRY LAUNDRY STARCH PAINT
1 cup dry laundry starch
1 cup mild soap powder
2 Tb. powdered tempera
1 cup water
Combine all ingredients. Beat the mixture until it is smooth. Add more water if the mixture is too thick.
34. MAKE NEW CUPCAKE TIN CRAYONS
- Take the paper off old crayons
- Break them into pieces.
- Spray muffin/cupcake tins with nonstick spray or lightly coat with oil or Line the cups of a miniature muffin tin with aluminum foil cupcake liners of regular liners 3 each deep.
- Put crayon pieces into muffin tins and melt in an oven at 250 degrees until just melted, you can mix the crayons in the tins but you may want to have separate colors as well.
Let tins cool.
Turn over and rap back of tins hard.
**You can use a toothpick to make a swirl effect in the wax before it cools. Just be careful, the wax is very hot!
35. WANT TO ADD TEXTURE TO YOUR PAINT?
Try adding:
- Coffee grounds
- Salt
- Rice
- Soap Flakes
- Syrup
- Cornmeal
- Oatmeal
- Sugar
- Glue
- Sand
- Baby Powder
- Glitter
- Baking Powder
- Flour
- Non Menthol Shaving Cream
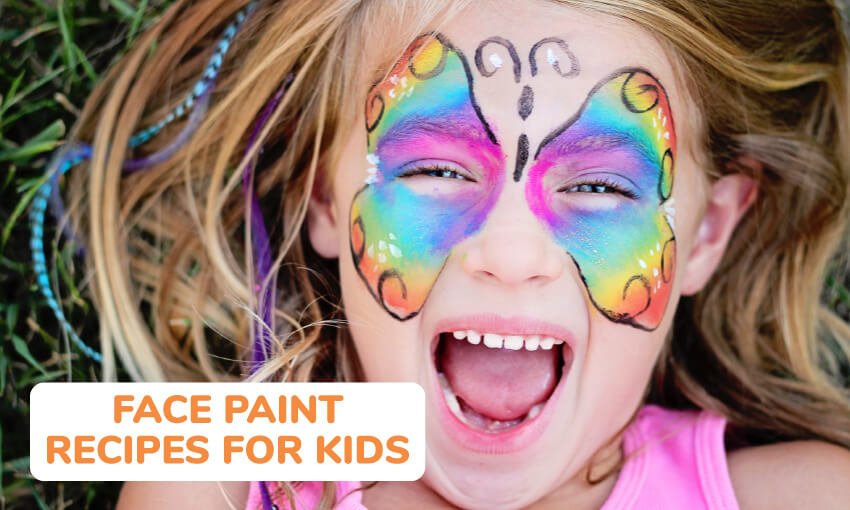
Face Paint Recipes for Kids
36. How to Make Clown Face Paint
1/8 cup Baby Lotion
1/4 tsp. powdered Tempera paint
1 squirt liquid dishwashing soap
This is easily removed by soap and water.
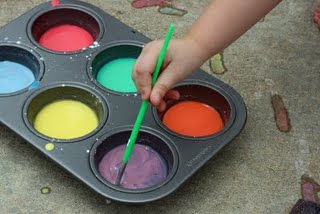
37. FACE PAINT RECIPE #2 (For six colors)
6 tablespoons of corn starch; divided
3 tablespoons of water; divided
3 tablespoons of cold cream; divided
6 cup muffin tin
Food coloring
- In each cup of the muffin tin put 1 teaspoon of cornstarch, 1/2 teaspoon of cold cream, and 1/2 teaspoon of water.
- Add a different color food coloring to each cup.
- Mix well.
38. FACE PAINT #3 (For one color)
Materials
1 tsp. cornstarch
1/2 tsp. water
1/2 tsp. cold cream
Food coloring
- Mix cornstarch and cold cream together until smooth.
- Mix in water and food coloring. Use a small brush to paint designs on the children’s faces.
- Store in an airtight container.
39. FACE PAINT #4
Materials
1 Tbs. Crisco shortening
2 Tbs. cornstarch
Food coloring
- Mix all ingredients together until smooth.
- Use sponge or fingers to apply to face.
- Wash with soap and water.
40. EDIBLE FRUIT LIP GLOSS
Materials:
- Flavored drink mix
- 1 cup vegetable shortening
- Food coloring
- Small container such as a film container
1. Mix one packet of drink mix with shortening.
2. Add in a few drops of food coloring that matches the flavor. ie: yellow for lemon.
3. Pack in small container, such as a film container, and you have wonderful tasting and smelling lip gloss. Of course the lip gloss is edible should some accidentally be licked off.
Coloring pasta is easy to do and gives kids something bright and beautiful to work with. Once the pasta is colored and dried, it can be used for crafts, art work, collages, necklaces and more!
41. COLORING PASTA RECIPE #1
Pour approximately 1/2 cup rubbing alcohol into each bowl.
Add 10 or so drops of food coloring into each bowl, one bowl for each color.
Drop the pasta into the bowl and stir gently with a spoon for a few seconds.
Remove the pasta from the bowl and allow to dry for several hours on a paper plate or paper towel.
The colors will brighten as the pasta dries.
42. COLORING PASTA #2
1/4 cup of rubbing alcohol
1 tablespoon of food coloring of your choice
2 cups of pasta of your choice
1 quart zip lock freezer bag
Large paper grocery bags, paper towel, or paper plates to dry the pasta after colored.
Pour alcohol and food coloring in a Ziplock freezer bag. Zip it and shake to mix…when mixed add the pasta.
Make sure the bag is zipped; turn the bag over and over on the table to evenly coat the pasta.
Leave pasta in the bag for about an hour.
Turn it over after 30 minutes to evenly coat it.
Pour it out onto the paper bags, towel or plates… dry over night.
Children can do this for you. Just put the alcohol into the bags ahead of time. Provide 1 cup measuring cups and measuring spoons. Let the children choose the color and the pasta to put in their bags. Make sure all bags or closed tight. An adult needs to pour the pasta out to dry.
43. COLORED RICE
Ingredients:
1 cup uncooked, white rice
1 teaspoon alcohol
Food coloring
Directions
- Combine the alcohol with four or five drops of food coloring in a plastic zipper bag.
- Add rice and shake until color is evenly distributed.
- Spread colored rice onto a cookie sheet and let dry. (If it’s sunny and not windy, rice can be dried outside.)
Suggestions: Glue onto construction paper to create unique pictures.
44. MIXING PAINT COLORS to get what you want
- Red + White = Pink
- Purple (mix red + blue) + White = Lilac
- Orange (mix red + yellow) + White = Peach
- Black + White = Gray
- Green + White = Mint Green
- Blue + White = Sky Blue
- Yellow + White = Pale Yellow
- Blue + Green = Turquoise
- Red + Green + Blue = Brown
- Orange + Red = Red-Orange
- Purple + Red = Fushcia
- Brown + Black = Dark Brown
TIP: INSTEAD OF BRUSHES PAINT WITH THESE
- Squeeze bottles
- Eyedroppers
- Fly swatters
- Roll-on deodorant bottles
- Bingo dabbers/markers
- Spray bottles
- Marbles, ping pong balls, golf balls
- Spoons and forks
- String
- Cooked spaghetti noodles
- Yarn
- Bark
- Combs
- Brushes
- Tooth brushes (Flick the bristles)
- Feathers
- Ice
- Foods (Fruit and Vegetables)
- Cotton balls
- Q-tips
- Soap-free scouring pads
- Sponges
- Shoe polish applicators
- Pipe cleaners
- Items from nature with a flat side: shells, rocks, leaves, twigs, branches, etc.
- Bottle caps
- Jar lids
- Crumpled Saran wrap
- Corn cobs
- Koosh balls
- Balloons
- Plastic animals (feet)
- Toy cars (roll the wheels through paint)
- Bubble wrap
- Candy “Peeps” in Spring
- Hands, fingers, arms, toes, feet
45. NATURAL DYES
You can get color by collecting items from nature, such as grasses, leaves, and berries!
- Cut a 7″ x 14″ piece of muslin.
- Place the items on one half of the fabric, then fold the other half over.
- Have the children pound the items through the muslin with a small hammer or mallet. This will make a wonderful hanging.
Click for two pages of 70 great ART Activity Ideas! Tons of creative ideas!